Sunday, February 3, 2019

Quinn Sherer Project 1 Castle

ghosted image
Concept

Rather than making my castle a traditional building,  I imagined a sort of fortress made out of an area surrounded by huge trees.  This castle would be found deep in a forest, and almost impossible to distinguish from the surrounding trees.

layered image
Process

To start, I made the front wall out of one large octagonal tree trunk and four smaller trunks in a close curved line.  I build the remaining four walls but copying that group of objects and rotating/reflecting them until they fit together into a pentagon shape.  For the leaves,  I placed a truncated cone on top of each of the large trees and surrounded it with small spheres.  Then I filled the area above the smaller walls with more spheres to cover the tops of the trunks and to create a taller barrier with bit of an overhang.

pedestrian view
Materials

Since the design was supposed to resemble trees,  I wanted to use materials that strengthened that idea.  I made the trunks of the trees wooden materials - "Oak Wood Satin" for the large trees, and "Walnut #2" for the small ones.  For the leaves,  I chose to use metallic paint textures called "Paint Metallic Orange peel Lime Green" for the leaves on the large trees, and "Paint Metallic Orange peel Green" for the rest of the leaves.  Because the cones are barely visible,  I went with a "Hard Textured Plastic Green #2" to keep them similar to the leaves.

establishing shot

Zane Alberts: Project 1 Castle

Zane Alberts: Project 1 Castle

Concept 
The basis for my castle design is centered upon a mix of the pyramids of Giza and European castle towers, as well as adding an element of astronomy and futurism, complementing the more medieval look quite nicely. I would have liked to have added some rocky terrain at the base of the structure, however that is beyond my current capabilities.

Techniques
I used several simple shapes, however I attempted to apply them in unconventional methods. For instance, I used the tube tool to create very wide but shallow shapes to serve as rings encircling the tiny moons and the pyramid.In addition, in order to replicate windows and a core, I cut the shapes of certain forms out of the two towers and the main pyramid. 


Materials
I felt metal would reflect the idea I had for the castle best, on the whole. The colors I chose because I felt they would suit the look, and I've always been partial to pink and purple. It may be difficult to tell, but the interior core is the same purple as the cone tops.The gold compliments the pink shades quite well I believe. The moons themselves are made from stone, as true moons are.

Saturday, February 2, 2019

Anthony Benavente: Project One Castle

Ghosted Model
Layered Model


Concept: Upon hearing advice of 'treating castle as a broad term' , it sparked a creative cog in my head. Before even starting into Rhino, I wanted to get a good feel of what I would try working on. I started simple with a fortress design with some towers at each corner; I started to notice the overall feel was looking like a medieval stone fort. Then it dawned on me, most castles are confined to the ground; So why not try making a castle that could be seen in the clouds,  and so started the work for my Skybound Fortress.

Techniques: Starting with simplicity first, the main method I used to make all my 3-D shapes was using the box tool and making them simplistic building blocks. The cubes, cylinders truncated cones and pyramids where all done by use of the box command. The towers I made using using a cylinder and truncated cone, Boolean union the parts together and copied the final result to make the towers. The larger tower is simply a scaled large of one of the copies.

The main castle and armory next door were made with cubes while hollowing them out was thanks to a Boolean difference; Boolean difference was also how I was able to create a doorway for the castle and armory.  The island, spires a d centerpiece are made from truncated pyramids and the dock is an assortment of rectangular blocks with a curved semi circle on top.  The towers and main courtyard were joined by a Boolean union to help get a feel of the now finalized design of the castle.

Establishing Shot
Detailed Shot


Materials: The choice of materials were done to 'break the norm' so to speak; I figured a castle made in the sky would also enjoy a fancier material than standard stone, sl I went with a anodized blue to imitate a dark sapphire castle.  Chrome textured to help show off the metal spires on the walls, a blackened gloss for the pathway and a ceramic white for the centerpiece to help balance. The cloudy red for the dock was done to try and get a pearl shine to the entrance all the while brick was used for the armory. The island itself has a plastic cloudy green to get a flying earthen feel,  a similar feeling in a new place; The grey overall background made it seem like it's hidden among the clouds giving an air of mystery and wonder of how this castle came to be.

Twinkle Shah: Project 1 Castle


Concept: 
When most people think of a castle, they think of a medieval, historic castle made of stone and with large pillars. Although not technically a "castle" by definition, I thought of the Taj Mahal. I wanted to make a more modern version of an old castle with some aspects that resembled the Taj Mahal. In particular, I liked the concept of the 4 pillars that surround the structure, and want to include that in my project. I do not intend to include many other concepts besides the pillars from the Taj Mahal, because I want my castle to have a minimalistic, modern, and futuristic feel.


Taj Mahal-Inspiration


Here is what I came up with:

Ghosted Castle Painted Black


Castle in KeyShot with Materials


Bird's Eye View of Castle


Pedestrian View of Castle

Process:

I started by constructing the base of the structure, which I created using the pentagon form tool. I then used the same tool to stack one more pentagonal prism above the first one. These made the two tiers of my architectonic structure. Next, I added the 4 pillars surrounding my structure that resemble the Taj Mahal. These were also pentagonal prisms, continuing the repetition of the pentagon throughout my design. Hovering above the 4 pillars, I created a ring that serves as a futuristic force field to protect the fortress. I oriented each of the pillars so that a flat edge was lined up with the ring above it. I then added detailing with some small spheres on the points of the two main pentagons and the ArrayPolar command. I wanted to be sure not to overdo the details so that I can stick to my minimalist look. I then added some cones that intersect the 5 sides of the top pentagonal prism, also using ArrayPolar.  

Materials:
For the hovering ring, I used glass (solid grey) because I liked the translucent effect it had. For the top tier and the spheres on it, I used anodized titanium brushed pink, and for the cones, I used a very reflective anodized niobium polished green. The bottom tier is marble (black advanced translucent), giving nice reflections and providing some striking color contrast. The 4 pillars are copper polished, also producing nice reflections of the inner structures. For the lighting environment, I used a lighting with 2 large light sources for ample light. I increased the contrast and included ground shadows and reflections for a nice finish. 

King Wang Wong: Project One Castle


Concept
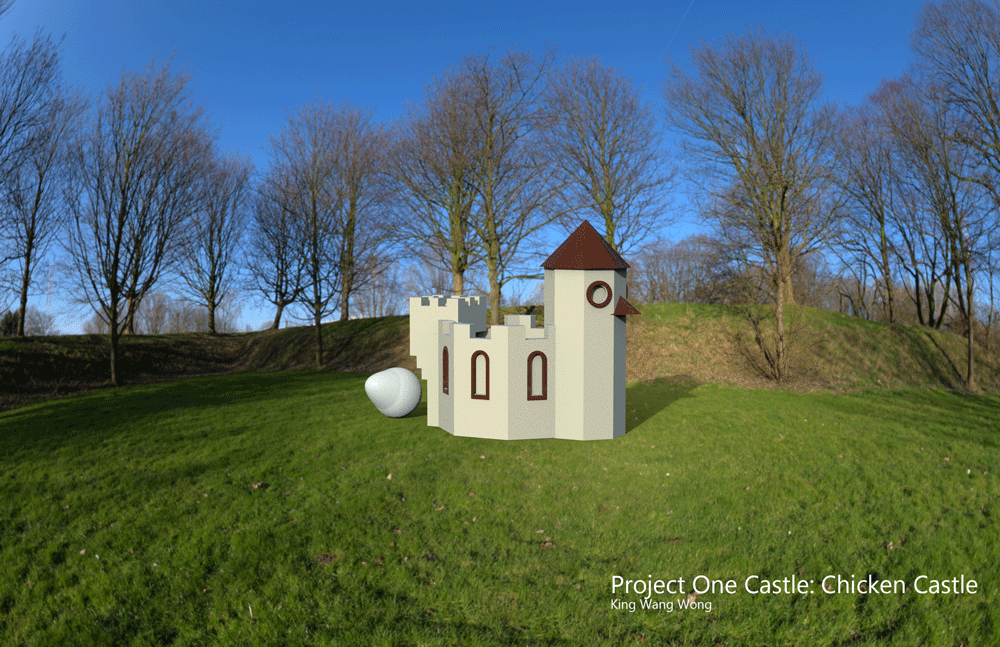
I wanted to make a simple castle that could look like it would be in a mobile game. 
After that I wanted to make a castle based off of the chicken church.
Process
Here are some in progress shots of the chicken castle:


Here are the finished shots of my castles:


Friday, February 1, 2019

Paige Ramos: Project One Castle

ghosted image 
layered image


 Concept:
               The castle that I've created was inspired from my childhood. As I use to use Play-Doh, wooden blocks and shapes to make this simplistic castle you see now. Most of the castles that I've seen back then were simple in design, from a child's point of view I had at the time. So recreating this in Rhino, was relieving that moment back in time. Creating something long ago can be now visualized on the computer.
 Process:
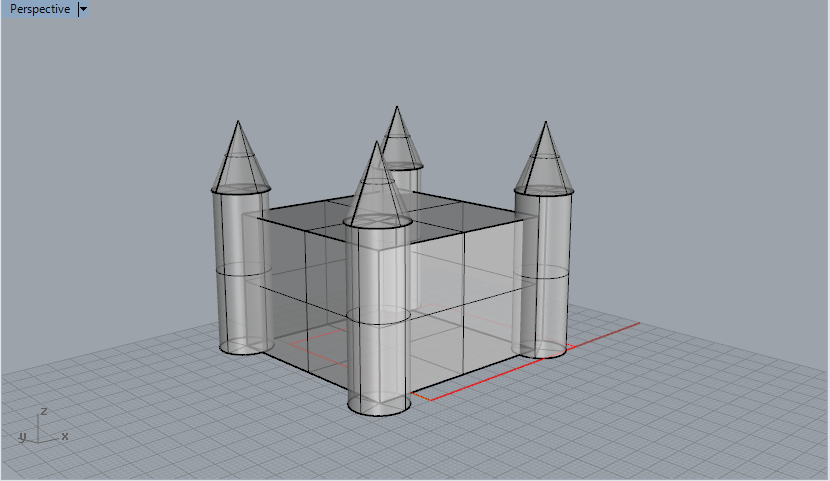
               What I've used in Rhino were the mostly the basic shapes. Such as the red square to serve as the base of my castle was made first. Next came the towers, as I used the cylinder tool and duplicate each one. So that I don't have inconsistent tower heights. The same for the tops of the towers, and making sure they touch with the cylinders. That they don't look as if they are levitating. In addition, I almost moved the towers into the corners of the castle's base. since I consider the base being made of clay from my concept that I had. This being my first time using this program, I wanted to start off simple and move on towards here. And came up with this as my end result.
Bird's eye view
 Materials:
                 Now, to bring this child's play set to life, picking out the necessary textures were needed. With the base, I've went with a soft rough red plastic. Making the surface look smooth and malleable. Next the towers were done with a light oak texture, and the tops were done with a painted yellow texture. I've kept the lighting basic for the overall castle I've created, making sure the shadows weren't too hard and having a light shine on the towers' tops to give off that plastic like quality.
pedestrian view

Monday, January 28, 2019

Jack Purcell: Project 1 Castle

ghosted image


layered image

Concept
I wanted my castle to give off a sort of futuristic oppressive Sci-Fi vibe. I wanted it to represent architecture that couldn't exist with today's technology. I also wanted it to be intimidating, because while Castles  do house people they also serve to protect and display power.
bird's eye view


Process
I used plenty of booleans of larger spheres to create cavities to house the smaller spheres. I also drew the main two towers using the draw curves tool and extruded them to create the base of the two towers. I also drew and extruded solids to subtract from the towers using booleans to give them their triangular prism shape.
ground view


Materials
I gave the main orb in between the two towers an emissive material to achieve the Sci-Fi look. I decided on a purple gold and while color palette for the rest of the materials to make it look appealing and also break up the model into different colors. Almost all of the materials are some form of brushed metal, I chose this because I thought it would also fit the futuristic theme.