Showing posts with label KeyShot. Show all posts

Saturday, February 2, 2019

Twinkle Shah: Project 1 Castle


Concept: 
When most people think of a castle, they think of a medieval, historic castle made of stone and with large pillars. Although not technically a "castle" by definition, I thought of the Taj Mahal. I wanted to make a more modern version of an old castle with some aspects that resembled the Taj Mahal. In particular, I liked the concept of the 4 pillars that surround the structure, and want to include that in my project. I do not intend to include many other concepts besides the pillars from the Taj Mahal, because I want my castle to have a minimalistic, modern, and futuristic feel.


Taj Mahal-Inspiration


Here is what I came up with:

Ghosted Castle Painted Black


Castle in KeyShot with Materials


Bird's Eye View of Castle


Pedestrian View of Castle

Process:

I started by constructing the base of the structure, which I created using the pentagon form tool. I then used the same tool to stack one more pentagonal prism above the first one. These made the two tiers of my architectonic structure. Next, I added the 4 pillars surrounding my structure that resemble the Taj Mahal. These were also pentagonal prisms, continuing the repetition of the pentagon throughout my design. Hovering above the 4 pillars, I created a ring that serves as a futuristic force field to protect the fortress. I oriented each of the pillars so that a flat edge was lined up with the ring above it. I then added detailing with some small spheres on the points of the two main pentagons and the ArrayPolar command. I wanted to be sure not to overdo the details so that I can stick to my minimalist look. I then added some cones that intersect the 5 sides of the top pentagonal prism, also using ArrayPolar.  

Materials:
For the hovering ring, I used glass (solid grey) because I liked the translucent effect it had. For the top tier and the spheres on it, I used anodized titanium brushed pink, and for the cones, I used a very reflective anodized niobium polished green. The bottom tier is marble (black advanced translucent), giving nice reflections and providing some striking color contrast. The 4 pillars are copper polished, also producing nice reflections of the inner structures. For the lighting environment, I used a lighting with 2 large light sources for ample light. I increased the contrast and included ground shadows and reflections for a nice finish. 

Sunday, September 17, 2017

Hannah Barnes: Castle Fall 2017

Concept
My original idea for the castle was an underwater ocean cave with seashell themes. This is what inspired the spires. I also tried to recreate the uneven surface of water-carved stone. My design developed to feature a throne room of a castle rather than the whole thing. As I began working with materials, I realized my design didn't create enough contrast, so I went back and added gemstones to create more of a castle of an underground mining civilization.
Modeling Techniques
I worked with a mixture of primitive-based modeling and polygonal-based modeling. For the stone platforms, I drew out the shape of the stone platform using the polyline tool then extruded it up. For the spire, I used the polyline tool to create a crooked vertical line, added a circle at the top, then used the sweep1 tool. The only other complex shapes were the gems, which were created using a box, cut-off pyramid, and a pyramid.
Materials
Though I originally planned for this to be a stone structure, I couldn't find a natural looking stone material that worked well for this. Instead, I used marble, which added a high-class feel to the throne room. For the gems, I used red gemstone materials, which added an ominous feel. I also used red glass for the spherical lights lining the bottom layer. The spires are also made of gemstone, and the throne is a white marble. The large gem behind the throne is gold to add contrast.


Monday, September 5, 2016

Michael "Griff" Crow: Week 1 Castle


Concept
    My main idea was to work with a castle design that was unusual in my searching I found a rather unique Castle. which formed the basis of my idea. Though the circular symbolism of the castle made me feel like it was more of a holy site than that of war, so I opened the entrance and added an alter \ temple in the center to make it more of a place of worship than a true castle for defense.

Modeling Techniques
    In this model I used three main technique s. The first and most important technique that I used was Boolean Difference. This allowed me to make complex shapes that were still capped on all sides, such as the wall and the fortifications. The second major technique was ArrayPolar. This allowed me to create spires, pillars, and even subtraction wheels) used with the first technique to give the whole caste a uniform feel and that perfectly circular dimensions I was looking for. Finally I used several curves and the Two Rail Sweep tool which allowed me to make the perfect arches between each set of pillars at my entrance. along side the advanced tools I mainly used my Gumball and snap tools to create the rest.

Materials
    I wanted this castle to have a real castle feel to it, but the more I played with the stones and the like the more I disliked any of the presets. I ended up making my own variations on marble due to the unique beauty of the "veins" in the marble, which gave my altar \ temple more of a mystical feel. the rest is made from stones and precious metals to reinforce the significance of the site and draw your attention inwards through the main gate and into the altar itself. The dark Green stone is used to accent the white and black and offset the blue in the marble, once again pulling the piece together for a cohesive feel without distracting from the more important materials.


Tuesday, May 5, 2015

Jenna Bastian & Renae Patoskie: Pepakura Project

My partner is Renae Patoskie. Our chess piece was based off the Knight. It has a horse head shape but with spiked mane and horns to resemble a dragon's head. So our piece is a Dragon Horse Knight. We made it look tough and bulky.

I modeled the head in Maya. I then duplicated it and deleted the bottom faces if we decided there not to be a bottom. The closed bottom head had 270 faces, and the open bottom had fewer than that. Renae worked on the pepakura part. She laid out the model pieces in the Pepakura program to be put into Rhino 3D. The model took up 4 sheets of cardboard.

We built the knight piece together, it took six hours. The final size of the dragon horse head is two and half feet. Over the summer we may work on it more.

Knight Piece in Rhino 3D

Knight Piece in Keyshot

Knight Piece Template in Rhino 3D

Knight Piece in my car

Knight Piece Model


Monday, April 20, 2015

Jenna Bastian: Week 12 Fox Box

For this project, I used the BoxMaker generator to create a box template with dimensions 23 x 6 x 9 inches. The box is sized so I can store my manga in it. I made the height a bit taller for the ones that are sized differently (Dragon Ball and Star Wars manga). I decided to do an elegant, wind theme with a fox. 

I used the BoxMaker to create the sides of the box. I then went into Adobe Photoshop and used the pen tool to create the swirls and fox shapes, and exported those paths as an Adobe Illustrator file. Then I imported those into Rhino 3D. The blue parts will be cut out, and the red will be engraved onto the 1-ply cardboard. For the cover, I made a slot so I can fit and use a "key" made for the box to open it more easily. 

Assembling the fox box was quite simple. I applied super glue to the slots and fit it quickly to the other edges. I left the top lid unglued and fit the "handle" inside the middle. This will probably hold objects of low weight so the bottom won't fall off. I'm probably going to glue the cut out fox on the back of the box. 

Fox Box Template in Rhino3D

Fox Box complete #1

Fox Box complete #2

Fox Box complete #3


Monday, April 13, 2015

Tanner Mortenson Week 12: Geometric Lamp

For week 12, I continued to build on the idea for my geometric lamp.
After last week, I had finalized my idea and began to get the design ready for Laser Cutting.
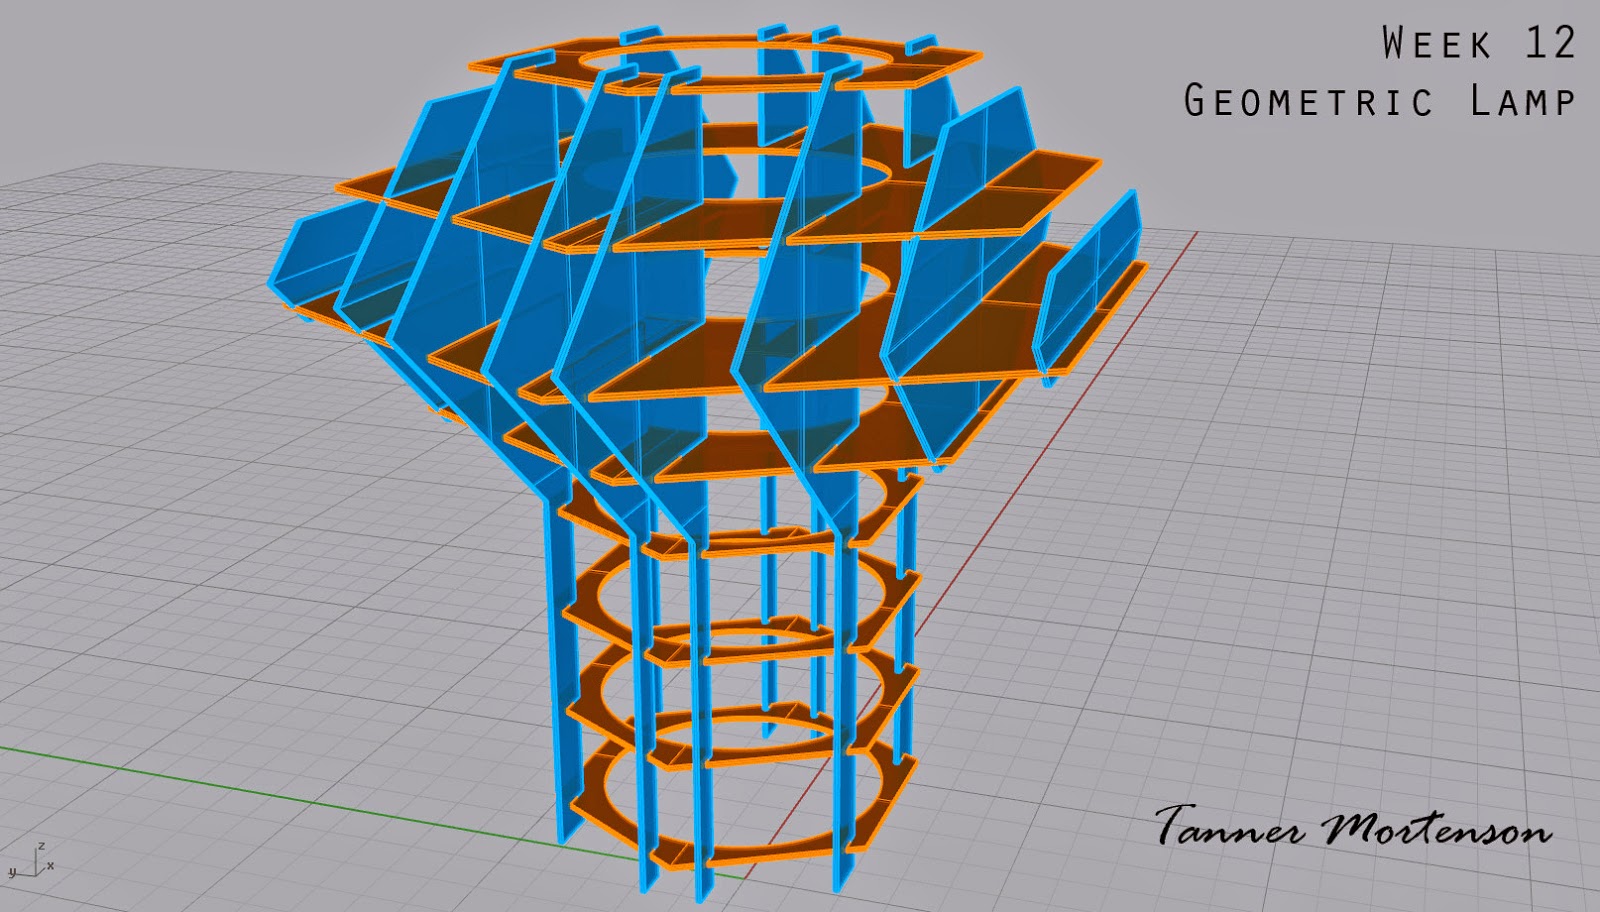
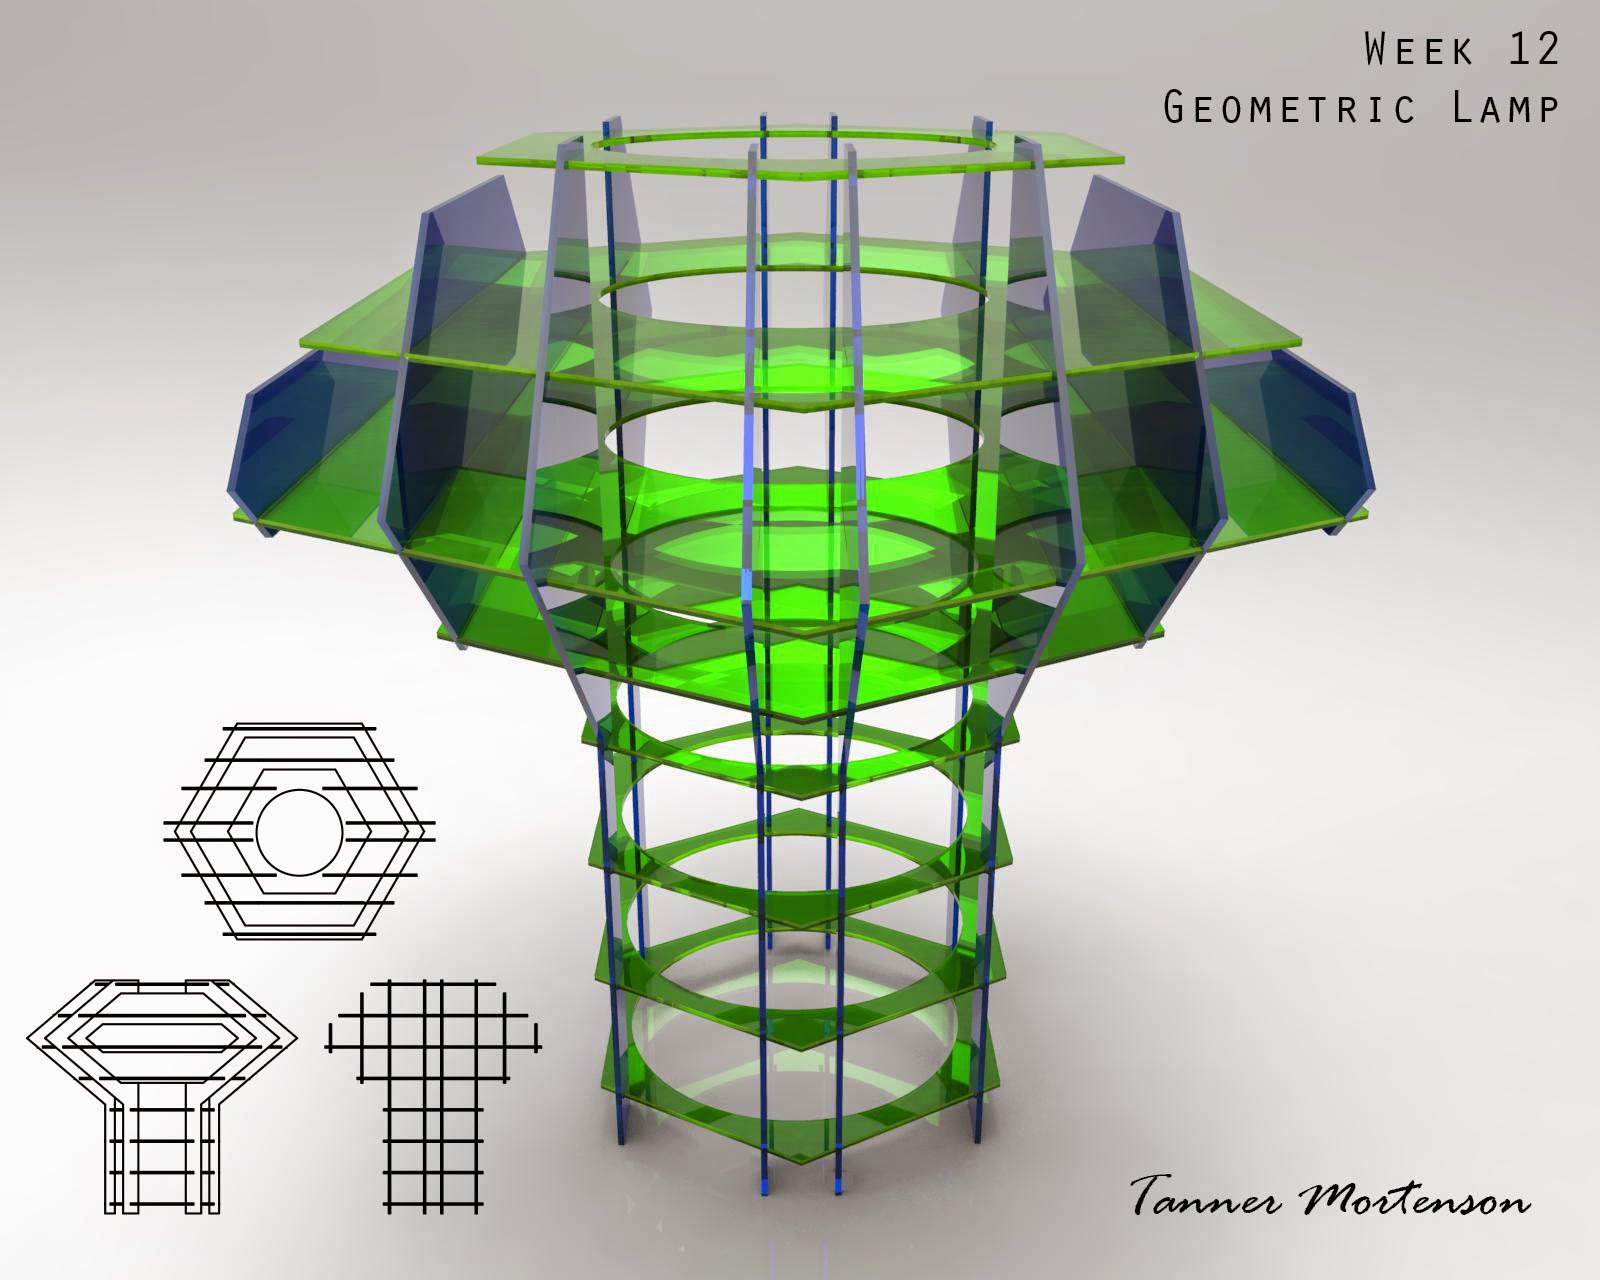
Once the design was finalized, I used two helpful scripts within Rhino- "Cut My Ribs" and "Massive Unroll". Cut My Ribs allowed me to select the different oriented pieces, and then allow the program to automatically cut slots into each piece upon their intersection.  Next, Massive Unroll allowed each of those individual cut pieces to be laid out cleanly so I could then arrange them on my cutting sheet.

I chose to use a 30x36 sheet of plexiglass to make my lamp out of, purchased from Home Depot.
In addition, I had to get another small piece of plexiglass to account for the excess pieces that were unable to fit on just one sheet.  

I decided to choose the thinner plexiglass sheets to reduce the overall weight of the lamp. Looking back, I would have loved to know silicone was not the best adhesive for this project, as it turned greasy and was not clear as I had hoped it would be.  It was also very flexible still when dry, so the structure of the lamp was very shifty.
The light was placed in the middle of the upper portion of the lamp, allowing light to not only be projected left to right and out of the top, but also downward in an ambient fashion.
This unique direction of light is one of the reasons I chose this design.

Rhino model screenshots:


Laser Cut sheet design and layout:

Keyshot Renderings:


Final Product:


Light on: 


At rest on a stool.


Monday, April 6, 2015

Jenna Bastian: Week 11 Lamp

I will be using a Japanese theme for the lamp project, and it is going to be based off the more traditional architecture. I modeled various designs in Maya and eventually combined two of them to create the final piece. A light yellow lamp shade will probably be put inside the interior of the lamp so the light bulb won't be too bright. It will have a warm color scheme (reds and yellows).

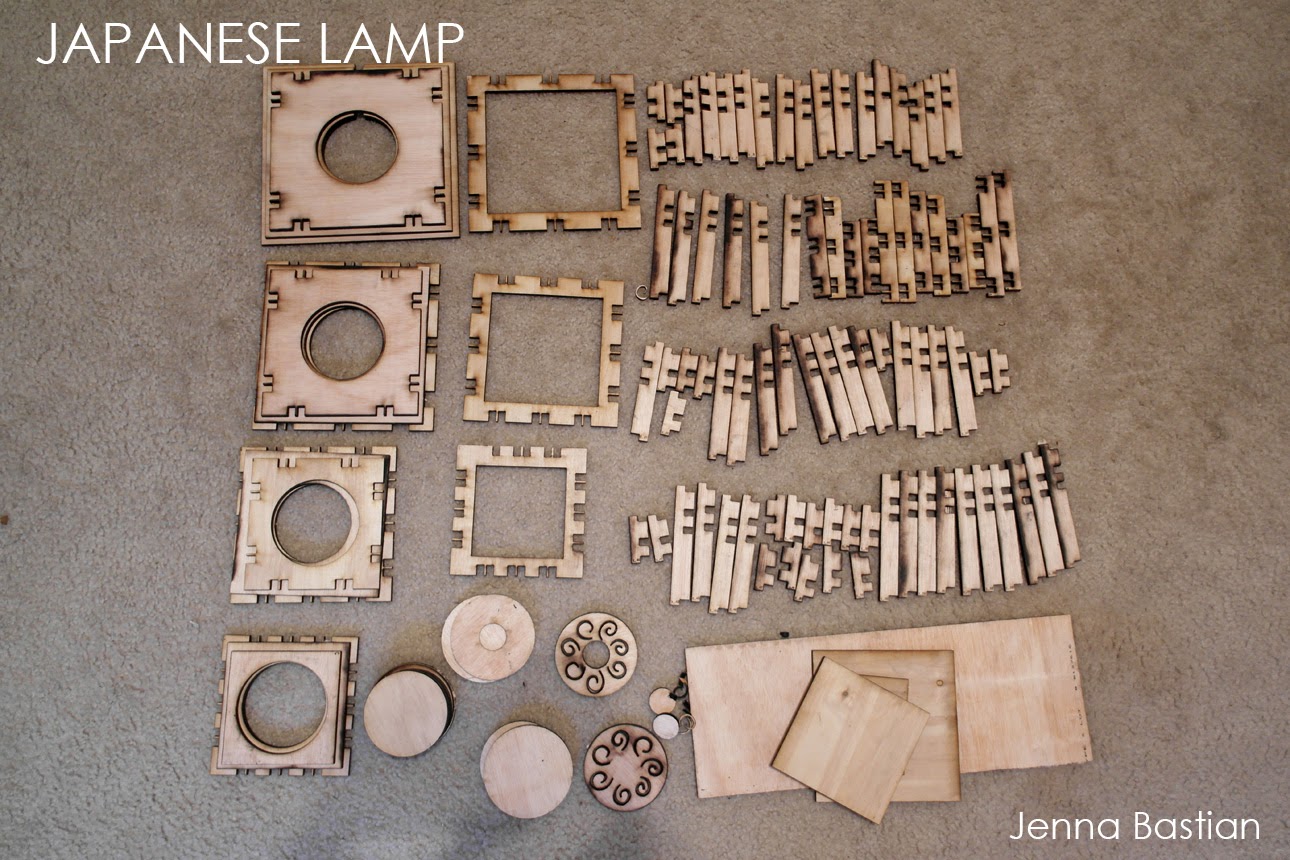
I modeled the lamp structure again in Rhino 3D with the correct dimensions. I used the Split function to cut out holes and slots from the planes and solids. I made sure the slices fit in one 24x48 sheet of plywood, before cutting out the slots. I created a circular lid for each level, which is where the light will be placed. Each lid has a different design. A slot was cut out from the bottom of the model for the wires.

I used .125 inch plywood for this model, the slots cut out were .126 inch wide. The plywood will be painted a glossy dark red and the light can be placed on any of the levels. I may buy either a white or yellow lamp shade material to be rolled up into a cylinder and placed inside to dim the light.

Lamp in Maya #1

Lamp Render in Maya #2

Lamp Slices in Rhino 3D

Lamp Template in Rhino 3D

Lamp Template on my floor

Lamp Complete!


Thursday, April 2, 2015

Jenna Bastian: Week 10 Squirrel Waffles

For the Waffles project, I decided to do a squirrel. Squirrels are the mascots for all colleges, and they are like the freshmen college students.  Some squirrels switch trees (majors) since it was not quite for them or they had too much competition. They gather as much nuts (knowledge) as they can, but some forget where they put it. They are super fidgety, excited for adventure, and wary of the unknown.

I modeled a simple shape of a squirrel in Maya and imported it into Rhino 3D. I used Contours to create curves that cut through the object, I then took those curves to create the slices with PlanarSrf. After, I thickened the slices with ExtrudeSrf by .24 (2 ply cardboard thickness). I flipped some of the vertical slices so the rough side of the hardboard will show on either side of the squirrel.

In Keyshot I placed the squirrel waffle structure in front of the UTD campus, near the Visitor Center since it also has a waffle-like structure. I chose brown metal so it would not be too distracting and be natural in the environment. The second keyshot render is what it would look like as plywood or cardboard. For the actual model I used hardwood (with .125 inch thickness), with .14 inch slots. The finished squirrel model was wobbly due to the wide slots but, with the help from Professor Scott, we were able to make it stand with the use of tiny pieces of cardboard and super glue inside some of the extra slot space.

Squirrel in Rhino 3D


Squirrel Slices in Rhino 3D

Squirrel in Keyshot #1

Squirrel in Keyshot #2

Squirrel Model finished #1

Squirrel Model finished#2


Saturday, February 21, 2015

Jenna Bastian Project 2: Dragon

For this project, I decided to create a dragon. It could be a cool pen holder or a really snazzy paper weight. Again, like the past Rhino 3D models, I am going for a tough, elegant look.

I modeled the dragon in Maya and imported it into Rhino 3D. It was difficult for me since this is first time I have modeled a creature in Maya, the wings were the most difficult. I then added the eyes in Rhino by creating spheres and editing the control points to shape it into the eye sockets.

For KeyShot rendering, the brightness and contrast of the environment were increased. I used chrome for the body but changed it to a gold color; I liked how the wings were reflecting parts of the body in a weird way. I also added a red glass texture for the eyes so it would not be completely gold. I wanted it to look like a creature living in my previous Palace

Ghosted images from Rhino and KeyShot renders:

Ghosted in Rhino

Layered in Rhino

Keyshot Render #1

Keyshot Render #2

Here are the 3D printed images of the Dragon. I spray painted it with a silver chrome color (I couldn't find any gold chrome). It came out nice, and the texture was still noticeable.