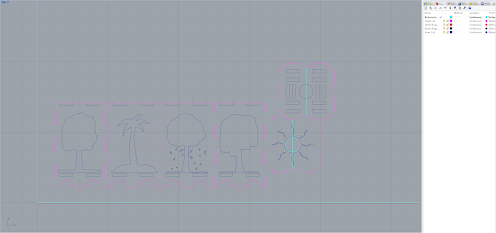
The original idea was to make a dog box. Then it went to Shiba Inu to a Japanese box. Then, to cherry blossoms and finally trees. The Cherry blossoms stayed because of the pink and beautiful colors, the Ginkgo tree (the yellow one) was actually the first time I've seen a yellow tree online and it is really pretty. Like a Sakura tree... just yellow. The palm tree is chosen because I'm an islander and Guam is my homeland. Simple as that. I finally chose the willow tree because it looks very different and unique compared to trees like oak, birch, evergreens, etc. In my opinion, those trees look very similar and I don't like them. The willow tree, however, makes a tree look like it has hair and that's pretty funny to me but it does look really good and I like it. The four seasons image is to show the difference in colors of trees and leaves- not seasons and weather. Solely color and style.
While I didn't have to make the MakerCase model myself, I still had to somehow translate my physical drawings physically. I spent a bit drawing up the flat drawings into photoshop. Pretty simple stuff. The hard part was getting the drawings into the 3D model itself. I was going to need to extrude it and have it boolean difference to cut out the box. At first, I tried importing the image itself and extruding it but it ended up just making a square with the drawing in it. I tried giving the images a transparent background and started to convert. It was one step closer but not enough. I then tried making the file into an image file specific for 3D modeling but the files I converted the images to were outdated and did not work in Rhino anymore. I tried to do a PDF but all that came up for me was a black square (this was apparently supposed to happen as you are supposed to delete the black part of the PDF image and you will get your image, but I did not notice). Finally, after spending hours trying to figure out what image file worked and didn't work, I ended up converting my PNG/JPEG files to Adobe Illustrate files using an online converter. I was able to extrude and boolean the difference in the images from the box and was very satisfied with the result. I didn't need to extrude the bottom (the moon) as I didn't actually need the image to boolean a cylinder when I could've just made one in Rhino. Modeling Process - Putting It Together
I did my best to align the box but for whatever reason, it wouldn't align perfectly. I don't know if that's how it's supposed to be and whatnot but I hated it. I tried using the Move Tool (which was the best method), I tried manually moving it and entering values with Gumball (takes a long time for "accuracy"). Eventually, I ended up giving up and just shoved everything together as best I could while still making it look nice.
Modeling Process - Filling and Coloring
I ended up doing the coloring and fill-in the hard way. I made flat squares and just adjusted their size according to how I needed them. I had at least 1 part for wood, at least 1 part for leaves, and one ground. While everything in the lamp is cut, the only exception is the rastor engraving for the falling leaves of the Sakura tree. The sun (top of the lamp) was the easiest part as I didn't need to make multiple layers for it. In the end product, I might end up not having a paper covering for it at all because of heating issues.
Rendering Process
For rendering, I couldn't just have all the leaves, branches, and grounds the same layer as it would change the material for all of those pieces, so I made individual layers (the "TEST" layers) and marked them specifically for rendering and applied the materials. Speaking of materials, I needed a material that let light pass through it. Glass was too transparent though, even if it was colored so I ended up looking through the "Translucent" materials. Human Skin was translucent and pretty good but I didn't want to use it because... it was skin for one, and two, it had a red tint to it too. I chose the other option available with the name "Translucent 100mm". It was one solid color that I could change and allowed light to pass through as well. I changed the color of the material and changed the translucency to 3 inches as opposed to the starting value of the material.


No comments:
Post a Comment