Showing posts with label #lasercutting. Show all posts

Sunday, May 3, 2020

Ivy Skross: FlatFab

Concept:


For my Flatfab organic structure, I used seaweed and coral as my inspiration. In order to make my organism look like it was flowing underwater, I took a more freeform approach to drawing the tendrils. I wanted this piece to look like it could be a backdrop in a theatre performance of some kind.

Techniques:


I made the model in Flatfab. I drew each layer and then connected them by creating more branches of the sea plant. I tried to make the branches free-flowing and in many different directions in order to give it the appearance of being underwater. The organic shapes and asymmetry also give it the appearance of being a living organism. In rhino, I created a spotlight to add lighting and then rendered it.

Materials:

In Rhino, I used multiple colors of shiny plastic to give it the appearance I wanted. I used a variety of different green and bluish shades for the color scheme. If this were to be brought into the real world, I would love to see it made out of powder-coated metal sheets.


Tuesday, May 14, 2019

Jesus Javier Vela: Week 9 Laser Cutting


Vertical View

Concept

     Thinking of the recurring wave of organically shaped buildings around the world, I decided to build an architectonic piece. Like Capital Gate tower, I wanted the side of my piece to contour diagonally towards the ground. Three pillars make the piece free-standing while other smaller pillars add support between sections of the piece.


Approximate Rendering of Blend Operation

Techniques

     Flatfab, a 2D to 3D fabrication design software was used to make the piece. I first drew the top-most section. Then I attached a support pillar to it. I used the revolve operation to create the other two support pillars. Next, I added the bottom-most section to the opposite end of the first support pillar. I had to make sure this section interconnected the all three pillars. Using a blend operation, ten more sections were generated (twelve sections, total). Once the piece was down, I downloaded the flattened slab geometry as a .obg file. I formatted the file in Rhino, extended lines to intersections, transforming text into objects, and reviewing that the dimensions were accurate. Unfortunately, I didn't save the .txt file, so the piece was lost. Hence, a .obj file could not be generated to render in Keyshot.


Formatting in Rhino


Materials

     Before I sent the piece for laser printing, I made two prototypes. First, I printed the file using copy paper. The thinness of the material made it impossible for the piece to be free-standing. Next, I made a prototype using card-stock. The material was thicker, so the piece was able to stand on its side. When I finally laser printed the file using cardboard, the piece was able to stand vertically as well as horizontally.


Horizontal View

Monday, April 29, 2019

Jonathan Holt: Week 13 Laser Scanning

Concept: For my laser scan I chose to scan the T47 Airspeeder from a board game called Star Wars Legion. I wanted to use this scan to 3D print multiple and use them as crashed terrain. It was a highly detailed piece.
Star Wars Legion T47 Airspeeder

Techniques: Luckily this object already had a matte finish so I didn't need to spray it or paint it before hand. All I needed to do was add dots with dry erase markers to help line up the alignments. I had to take multiple 360 scans from different angles in scan studios to get all the crevices of the ship. Lots of scans needed to be thrown out because the ship is so thin that it didn't want to pick up the edges.


Airspeeder Rendered by Passing

Materials: I gave it a not too shiny metallic material to match what it has in the movies. I then went in during my rendering in passes and added paint to where it belongs. I wanted to make it look like some jerk could park between the spaces on the roof of a parking garage.

Jonathan Holt: Week 12 Laser Engraved Skateboard Deck

Concept: I wanted to choose a design I would actually like to have on a skateboard. I decided to go with an altered logo of one of my favorite franchises, Jurassic Park, as well as the two T-rexs from the second move.

Illustrator file

Techniques: I did everything in Illustrator, I grabbed an image and edited it to get rid of any unnecessary spaces that wouldn't transfer well. Then I chose a T-rex picture from Jurassic Park and mirrored it on both sides to fill negative space. I then put the image in black and white and rasterized the image.
Finished board

Materials: We used a blank skateboard deck for this project with a wood finish, however my skating on a traditional skateboard sucks. I may end up putting it on a longboard since that is more my speed.

Monday, April 22, 2019

Jonathan Holt Week 11 Polyhedra


DC comics Motherbox
Concept: For my polyhedra design, I wanted something I could use. So I decided to make an objective marker for a DC game that I own so I made the motherbox from DC comics. I will end up cutting this out again at about 1/4 of the size to make it to scale. I made it larger to get a better picture.
Motherbox Illustrator file
Techniques: I used a box file online as a template to create the vector files on top of it. I then drew the designs in using the pen tool. I made sure to add different layers with the different colors to give outside and inside cuts.
Motherbox cutout
Materials: I cut out the motherbox out of e-flute cardboard. When I do it again for the board game I will probably use card stock to keep it small and easier to put together. I will then paint it to look metallic.

Ryland Smith Week 11 Polyhedra

Concept: I did a truncated cube as it seems to have an organic and inorganic look to it.

Techniques: I pulled the PDF into illustrator to act as a pass through. I then opened the exported dxf into rhino and organized the layers. I would add inner cut designs that both add curvilinear organic lines and rectilinear inorganic lines, exploded all objects and it was ready to be laser cut. 
Rhino Layered
Materials: The truncated cube was cut on e-flute cardboard, spray painted with black primer, layered with brown spray paint and light brown spray paint. The earth tones would harmonize with the organic nature of the truncated cube to accentuate the organic nature I wished to highlight. 
Pre Paint

With Paint


Saturday, April 13, 2019

Asa Rodriguez Laser Cutting

CONCEPT
With this project, I liked the idea of creating a doppelganger of my cat, Tiamat, where there would be one white "cat" and one black cat. 


TECHNIQUES
While creating this piece in Flatfab, I made sure to pay attention to keeping the form in both front and side perspectives. I wanted to keep a relatively simple and playful array of shapes, so beyond the side profile of the head I tried to keep part blobby and simple to convey softness.


MATERIAL

I rendered this model in an anodized aluminum because I wanted to play with the contrast between softness of shape and hard texture. I made the stripes a more traditional metal color to suggest striping.

Wednesday, March 27, 2019

Ryland Smith Week 11 FlatFab

Concept: The medium flat fab presents, has a lightness to it in its planar segmented forms in 3-d space. In order to harmonize with the material, I sought to create a form that had a lightness to it, thus the form I sought had a flight in mind. I would create the form of a snake that could fly. By shaping the pieces to appear to flow organically and directionally, the form appears to have movement as if it might be in flight although standing still. The thinness of the body would allow it to appear airy pronouncing the lightness of the form.

FlatFab 

Process: Using FlatFab I created the body from using the pen tool. I created 2 perpendicular cross sections at the head. Then I made the head forms, top and bottom with the pen tool, and positioned them parallel to the body and on the cross sections. I then angled the headpieces inward. Following I created the wings top down by creating one side and reflecting it. Perpendicular to the wings I created pieces that would span them and then used a blend function across them.
Flat Pattern

Rhino Layered

Rhino Ghosted Black
Materials: In Key shot, I used Hard Shiny Plastic red for the head, I used Hard Shiny Plastic Black for the body and I used Hard Rough Plastic White for the wings. I chose these colors as the red reflects energy, power, and is ultimately eye-catching, like a phoenix, and like a cardinal. The body is black and sleek to complement the vibrant red and provide the body as well as the lithe nature of a snake. The wings have a bit of roughness to give them body but are white to reflect lightness and provide contrast to the black body. The Lazer cut prototype was in e-flute cardboard a light material good for rapid prototyping at a low cost.

Key Shot

Key Shot 2


E-flute cardboard model

Wednesday, November 15, 2017

Anyssa Akridge : week 11 Laser engraving 2017

Concept :
For my skateboard I was inspired by the art of Rockin Jellybean. He's a graphic designer for movie and band posters as well as merchandise like t-shirts and even skateboards. He is one of my favorite artists of all time and his sexual punk rock imagery/ 60's exploitation film imagery has always been an inspiration to me. A lot of his art is graphic and colorful as well as busy. He's a master of typography and dynamic compositions. I took inspiration from his demon girl motifs. I also took inspiration from his comic book art line style in the second image. I thought his fringe art style would fit the feel of a skateboard very well.

Techniques

I drew my image in procreate on my ipad due to the line-art textures they had that resembled old school cartoon ink. Then I transferred it over to Photoshop to change the imagery to gray scale and edit my image. Next I transferred the Photoshop file to adobe illustrator to change it into a vector using the Live trace and expand commands. I separated the white from the black vectors, and deleted the white tones. Then I transferred my image into Rhino. I colored my vector lines red to create a crisper shallow cut edge, I used the hatch command and set the hatch to black for a deep engrave, imported an image of my skateboard deck and used the place point tool as well as the create line tool trace said deck in rhino. After that I scaled both images(The art work and deck tracing) down to 29 inches by 7.5 inches (The dimensions of my deck). I colored the lines of the deck cyan, placed it on a 48x24 cyan square as well as putting my name information in cyan.
Materials
Urethane varnish.


Tuesday, October 31, 2017

Elias Perez: Week 10 Cardboard Ball

Concept:

    The concept I had in mind for this project was to create a large jack-o-lantern helmet in the spirit of Halloween. I knew that I wanted it to fit on the persons head and that I didn't want a perfectly spherical pumpkin but rather one with many crooked edges to give off a sense of eeriness or madness almost like a Tim Burton style film. The color palette I used was based off of Vainglory's character Petal's Halloween cosmetic as I felt the purple and green complemented each other and made them pop creating an eerie feeling.
Petal Halloween Skin - Reference

Finished Product of Jack O Lantern
Technique:
    
    The Jack-O-Lantern was modeled in Maya by extruding the faces of basic polygons as well as by moving the vertices inward to create the crooked shape that I was hoping for. To help keep the polygonal shape I would set up sub divisions in Maya so that it would be easier to cut the edge loops once I got into Pepakura. After the modeling process in Maya I changed the .ma file to an OBJ file and imported it into Rhino where I changed the file into NURBS so that I could further lower the amount of polygons. I then imported the file into Pepakura where I cut the edge loops to unroll the mesh. From here I put the vector file into Rhino where I prepped the lay out for laser cutting. The helmet is made from eflute cardboard and was put together using Loctite Super Glue, the candle and the helmet were made as separate objects and glue together after both objects were painted. 
Jack-O-Lantern Pepakura File
Jack-O-Lantern Rhino File Lay Out
Materials:

    The materials used for the Jack-O-Lantern Helmet were eflute cardboard, Loctite super glue, and Apple Barrel Gloss Acrylic paint for a smoother shine and color that pops. The assembly began before the painting but the candle and head were both done at separate parts. To better fit the polygonal flame on top of its candle base I cut multiple slits and glued around both objects to help it stay upright and did then glued the candle to the head after completion. 

Cardboard Ball:

    As requested I attended the cardboard ball and saw quite a few interesting projects that other people had done and was absolutely astounded by what could be done with laser cutting and 3D printing. I took a few photos of the event with others and their costumes. 
Jack-O-Lantern and Ryuko

Jack-O-Lantern and Ryuko  

Jack-O-Lantern and Tribal Wolf Barbarian 

Jack-O-Lantern and Dark Souls 3 Suit

Gathering of others at the Ball

Monday, October 30, 2017

Anyssa Akridge Week 10 - Cardboard ball

Concept:
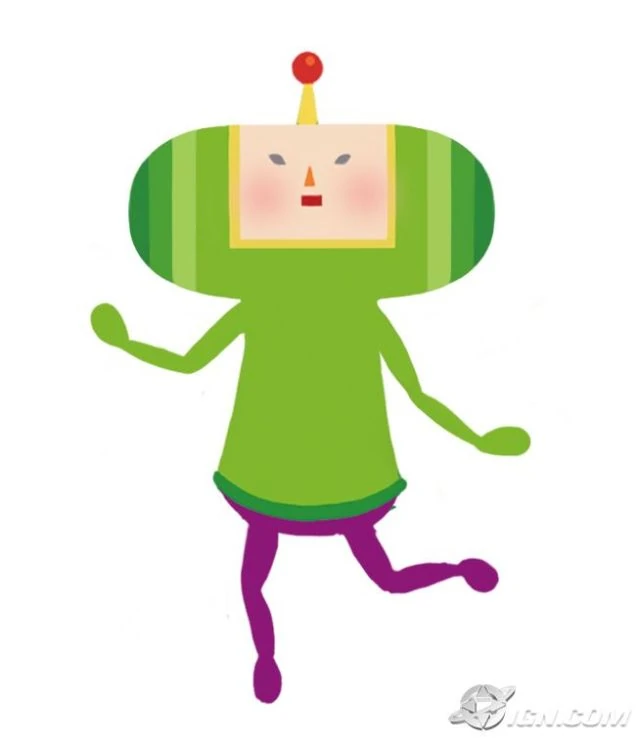
My Idea for the cardboard ball would be a cosplay head piece of the little prince from Katamari. Katamari is a game where you collect objects onto a ball, and try to make that ball as big as you can before the time runs out. Since this is my first time using the pepakura process, I thought it would be apropriate to do a simple low poly model of a game character that's made out of primitive shapes.

Techniques:
Using Rhino , I modeled the head with the Cylinder tool, the Cone tool and the sphere tool/ Half sphere tool. I used the command show bounding box to look at and adjust the measurements. Then I used the Mesh from NURBS object tool to create the low poly model while also making adjustments. After that I separated all the shapes and imported my model into Pepakura Designer. I made sure that everything in the program was set to millimeters. I also used the slice tool to better place my laser cut lines onto the cardboard sheets. I exported the pepakura instructions and imported it back into rhino to color my pepakura lines. After receiving my Cardboard cuts back from the laser cutter I used Loctite glue and masking tape to construct the head for the Katamari character. Then I used a urethane sealant and acrylic paint to paint my head. I cute out a square hole in the bottom to place my head inside the mask. Finally I cut out the eye holes and stretched black stockings on the holes to create eyes I could see through, but still looked dark and black out the outside.
Materials:
I used Flute cardboard, Loctite glue and acrylic paint to create my Katamari head. Katamari is a low poly game so using the low poly model made of primitives while adding a more detailed paint job/ texture made my head more game like. I also used black stretch stockings over the eyes so I can see through the head without the viewer seeing my own eyes, wrecking the illusion. I also used masking tape to attach parts that were hard to attach with the super glue. For keyshot rendering I used gold and gemstones for the hat/crown to represent royalty. And then for the base I used brushed on paint and metallic paint.