Showing posts with label valeria cavazos. Show all posts

Sunday, November 19, 2017

Valeria Cavazos: Week 11 - Laser Engraving

Concept:
       
          My concept design for my skateboard deck is the Gotham City Sirens because I adore the series of the trio together and separately. I wanted to represent each of the sirens through symbols or objects identifiable to them. 

Technique:
Image result for pokemon tattoo sheet

          I created the sketch before uploading it to Illustrator, redrew an outline and later fitting it to the measurements of the skateboard. I tried to make all of the items on the board to interact with one another and accomplished that through making the venus fly trap grabbing hold of everything. I used items that represent each Siren, like jewelry for Catwoman and a hammer for Harley Quinn, rather than drawing the trio. After the redraw of the sketch, I assigned it to the appropriate layering required for the machine shop. Once the file was properly formatted after some help, I sent it to the machine shop. After picking it up from the machine shop, I colored the engraving with colored pencils but tried to maintain as much of the original engraving as possible as an outline. Although a differing subject, the way I colored the skateboard deck is based on the Pokemon tattoo sheet, posted above, in order to try and create the same aesthetic style of a tattoo.

Materials
Engraving

          I used a skateboard deck my friend's dad made, Prismacolor color pencils and a clear acrylic sealer. 

Tuesday, October 31, 2017

Valeria Cavazos - Week 10: Cardboard Ball

Concept:
       I wanted to make a low polygon dinosaur skull but I was not sure for the color scheme. One weekend, I got bored and created a dragon egg, like the example below, and decided to relate the dinosaur skull with the egg through color scheme and differ through the shapes used.
Not the actual egg I created, but similar.
   
Technique:
       I got the dinosaur skull from the 3D database in the 3D Studio and lowered the polygon count in Rhino to create a low polygon shape. After getting it to a good polygon count, I uploaded it to Pepakura and sliced the figure to print out in cardstock. When the model was printed and assembled, I painted the entire outer layer blue and picked random polygons to paint in the nail polish, making sure that it wasn't concentrated on one area more than others. 
Rhino model


Pepakura

Materials:
       The materials I used were cardstock, acrylic paint, nail polish with a similar shade of blue and a few layers of Krylon Glitter Blast Clear Sealer. And the egg was made using styrofoam and thumb tacks painted with nail polish.


Wednesday, October 11, 2017

Valeria Cavazos - 3D Printing

Concept:
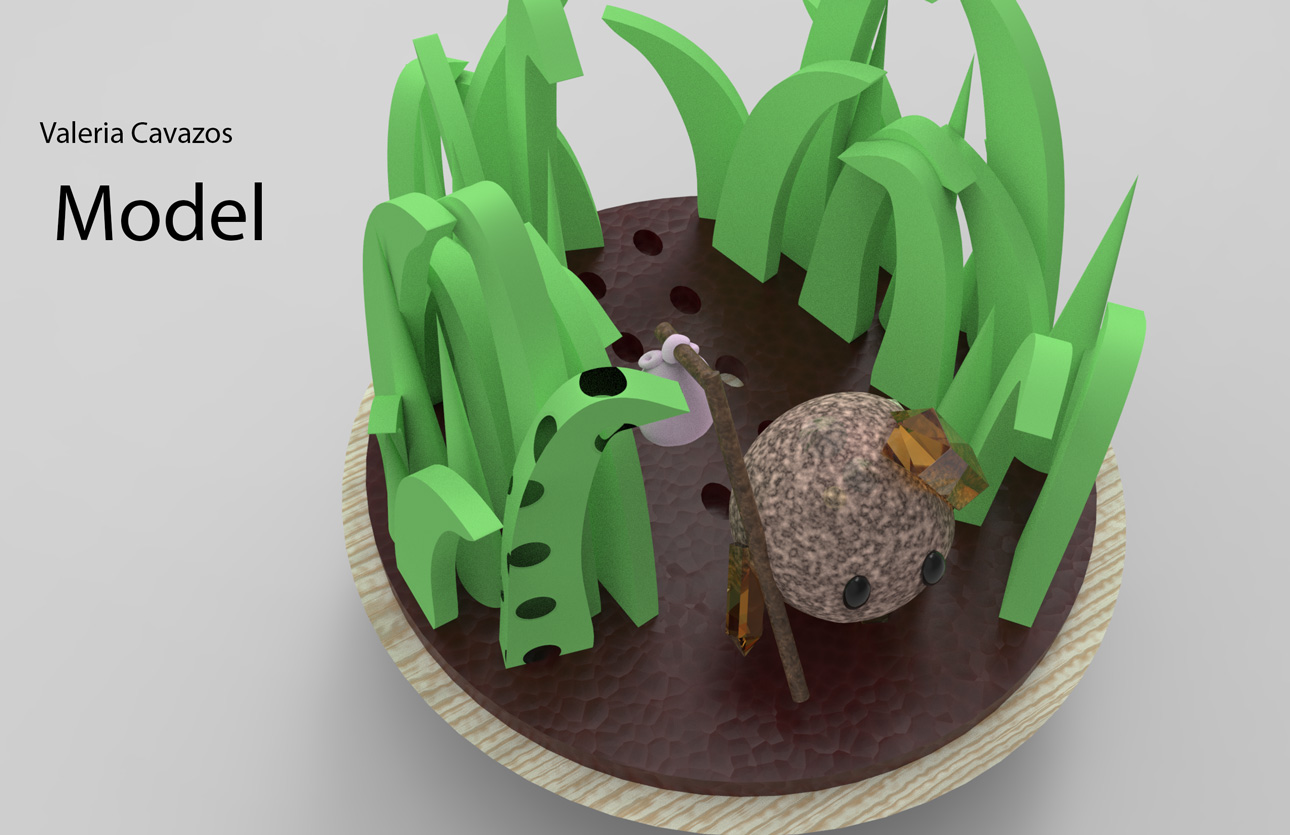
    My concept was based on a character I designed for a children's book as a Graphic Design project. This rock is one out of five and as the leader of the group, I chose to make a scene depicting him walking through the some grass with his mini hobo bag. 

Techniques:
    I first started with the base and the tried different styles before choosing the one in the picture in order to keep it simple yet show that it is a base. It was made with a truncated cone and a extruded circle to simulate dirt. The grass was drawn with the Curve tool to get two different styles, extruded both, and placed around the rock, along with a thin triangle. The actual was was created using a circle and adding small triangular pieces to make the rock look less smooth and more ragged. The gems on the rock were made with a hexagon from the Shape Tool and tracing the shape with a line tool in order to create a triangle for the points of the gems. After making one, I just copied, pasted, and scaled four more for the limbs. 
ghosted image
ghosted image with Keyshot layering assignment

measurements

Material:
    The bases material was made to look like wood and the base that simulates dirt was made with a leather material. The rock was made using a granite rock but I changed the colors in order to get a grainy appearance but not get lost in the material and the gem was a yellow gem. The grass was a result of playing with a miscellaneous material, Matte White, in order to get an organic look but not cartoonish or too fake. Metal was also too shiny to get the organic look of the grass but the front blade of grass with holes is actual metal colored green with properties such as the roughness and the Material Type. 


Final Product:


Sunday, September 17, 2017

Valeria Cavazos: Castle Fall 2017


Concept:

                  The concept for my castle was to create a sandcastle on the beach and using objects that could be found scattered in the sand. The design for the castle was also created to fit a king, in this case a small crab, the King Crab. There was a general idea of how to make the castle but details were added and created as the castle was created, such as the glass pieces and the drawbridge.

Techniques:
ghosted image
ghosted image
ghosted image with Keyshot layer assignment

                  The sandcastle was created using mostly rectangles and flattened circles, such as the base and the main structure of the castle. Sitting on the center of the castle was created using the truncated cone tool along with the small details bordering the castle, alternating from the truncated cone and a regular cone, then copied and pasted an entire row of the alternating cones and pasted on the remaining three sides of the castle. I made the windows of the castle through the MakeHole command and curve tool, made the draw bridge using the cylinder and torus tool, and the scattered glass pieces placed onto the walls of the castle was created using the line tool and scaling it to an appropriate size for the walls. I made the crab statue by using the sphere tool, copy and pasting and scaling it until the claws and eyes were appropriate sizes to the body, then added small cones to represent claws. Once the main details were placed, I added scattered truncated pyramids around the castle to create small mounds of sand and made two triangle pieces on either side of castle, using the triangle tool and twist command to create a deformed shape to represent a shard of a bottles neck.

Materials:


                  I wanted to create a sandcastle with the objects found on the beach but some materials were not available in Keyshot, so some changes had the be made. There was no sand material available so the actual sandcastle illusion had to be made with, disturbingly, human skin material. The glass pieces placed around the castle were created with basic glass colors such as red, orange, and clear to create a variety in the pieces, while the two giant glass pieces used a scratched and waved glass material. The draw bridge used a variety of wood materials, such as ash wood and old plank wood, in order to keep the theme of items that can be found throughout the beach. The flat circular objects on the pillars of the castle were originally going to be sand dollars but there was no materials that could be used as a replacement, so they became miscellaneous objects such as using the bubble material and rose gold material. The giant crab sitting in the center of the castle was going to be an actual crab but while playing with the metals to find a material, I came across the rusted metal material and decided that it would be best to have a statue in honor of the king that has been worn down over time from the sea.