For the serial slicing project i decided to use my duck model because I just really liked it and would like to see it in 3D. I did have a couple issues when it came to finishing this project. One being the measurements. I was able to scale my model down to the required dimensions but when it came down to laying out the slicing for the cut sheet, the box I created seemed to be way too small. So I created two sheets; one with the slices scaled down to fit the box and then one with the slices at the the original dimensions but that one ended up being outside the box. I think that might have to scale down my model down and get rid of a couple pieces in order to make it fit properly or made by dimensions are off and they need to be changed.I only included two registration pins because I wanted to minimize the amount of obstruction within the piece. I can live with a couple pieces having to be glued into place mare than having my duck looking like Frankenstein's Monster. For the Keyshot renderings I went with a simple brown color to resemble cardboard seeing as it will be made out of that material I figured why not.
Monday, March 20, 2017
Jose Diaz - Serial Slicing
For the serial slicing project i decided to use my duck model because I just really liked it and would like to see it in 3D. I did have a couple issues when it came to finishing this project. One being the measurements. I was able to scale my model down to the required dimensions but when it came down to laying out the slicing for the cut sheet, the box I created seemed to be way too small. So I created two sheets; one with the slices scaled down to fit the box and then one with the slices at the the original dimensions but that one ended up being outside the box. I think that might have to scale down my model down and get rid of a couple pieces in order to make it fit properly or made by dimensions are off and they need to be changed.I only included two registration pins because I wanted to minimize the amount of obstruction within the piece. I can live with a couple pieces having to be glued into place mare than having my duck looking like Frankenstein's Monster. For the Keyshot renderings I went with a simple brown color to resemble cardboard seeing as it will be made out of that material I figured why not.
Maizie Desmarais: Week 10 Serial Slice
Concept:
My serial slice model was based off a children's cartoon called "My Neighbor Totoro." I really loved the unique silhouette that can easily be recognized and the overall design of the spirit. Totoro is a forest spirit that is friendly towards the children that appear in the movie and really brings out the inner personality of a furry giant.
Techniques:
My model was completely made in Maya software and started off with 2 spheres: one for the body and one for the head. I then sculpted those to the shapes I needed and combined them together. For the arms, ears, and tail, I extruded a few faces outwards until I got the desired shape I needed. I then used contour command in Rhino to create my slices and extruded for the model.
Materials:
Because Totoro is a forest spirit, I thought wood would be a great material to use to really match the character's home. For wood I used oak purely because of the color and texture it gives off to make my slices for visible. The second material I used was a glass texture just to see the highlights off each individual slice and really liked how it looked.
Hannah Revelle- Week 10 Serial Slice
Concept
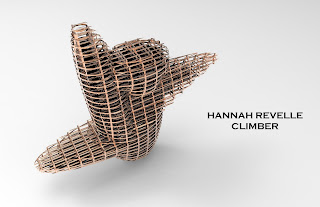
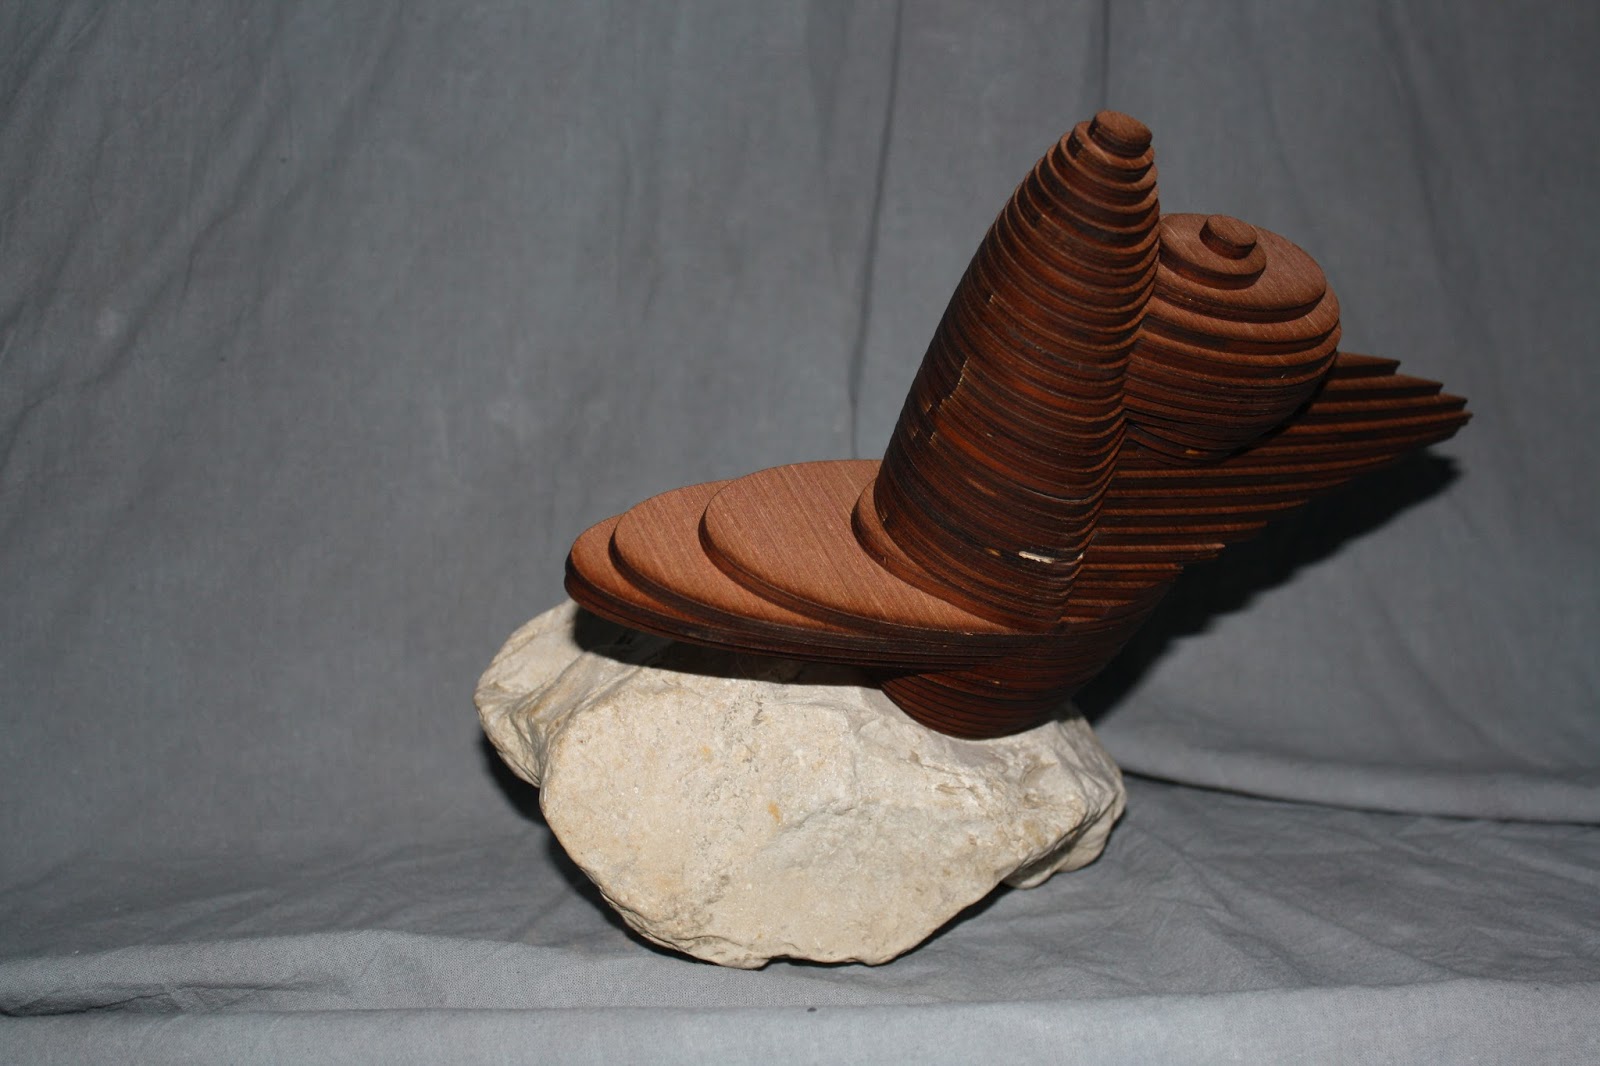
For mine I wanted to make an abstract rock climber. I was inspired by abstract human sculpture like the one below and wanted to follow the soft lake of detail style. After my piece is cut out I would like to place it on top of a large stone to give it a feeling of climbing a mountain.
Technique
My Technique was fairly simple I used two spheres and manipulated the points to keep my body soft and round and than Boolean Union the two pieces (body and head) together. When my piece is done I will get a large tall stone to attach it to. I am thinking I will have to drill a hole in it.
Material
I used two different materials in keyshot one is walnut wood to give a better feel of what the outcome will look like and than I used a fun rectangle metal with transparency for a more creative look.
Final product
I went to a creek and looked for a rock for my boyfriend Sam Lee to drill a hole in. At first we tried a lava rock but it was to brittle. here is the final product.
Final product
I went to a creek and looked for a rock for my boyfriend Sam Lee to drill a hole in. At first we tried a lava rock but it was to brittle. here is the final product.
Randall Villegas: Week 10 Serial Slice
Concept: When I was younger I went to mexico and visited Teotihuacan which housed many beautiful structures, most notably the Pyramid of the Moon and Pyramid of the Sun. Seeing the layering from the slices reminded me of the pyramids and led to the inspiration of this project. I also wanted to keep the project simple as this is a medium I am not familiar with and I wanted to really worry about the polish of the project more than intense and crazy detail, especially since a lot of the form and interest from detail gets lost in slice progress. I did change my design to something more Mayan, but the aesthetic if very similar.
Modeling: I created my base by using the curve tool and extruding to the desired height. I alt dragged to copy the size for the upper segments and scaled them to size as I went. The top is two box's booleaned together to add some distinction to it. I created the stairs by making a custom curve and extrude to get the basic shape. I scaled it down some to cut out the center to give some railing on the side and, after using boolean difference, revolved it around the other sides. I then used boolean union to bring everything together for the final model.
Materials: For materials, I wanted to first do a proxy of what a wooden material would look like, something akin to how the serial slicing would truly come out. I chose a lighter color to give a greater attention to the form of the object. For the other material, I decided on something more true to form and went with a stone look. a worn, dark grey would be the most accurate and I went with that look. For the physical piece I will use MDF.
Physical Assembly: I set up the first and largest piece of my structure and set my dowels inside. For each subsequent piece, I would shimmy them down the dowels until I had just enough room to add some glue and would quickly add Loctite to the perimeter. I would then press the piece flat and use some textbooks to keep some applied pressure while the adhesive bonded.I cut the remainder of the dowels off and looked for/cleaned off any excess glue. I definitely need to go back and add some kind of putty to the spots where the dowels are, this is something I overlooked and would really finish the piece off.
Sunday, March 19, 2017
Rebecca Genung: Week 10 Serial Slice
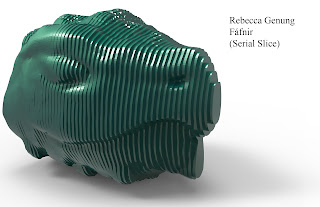
NOTE: The scars are only on the one side
I wanted to take advantage of my model's asymmetry. The first concept is a marble statue that somehow survived through the ages. The KeyShot material is called Granite Gray (I added some aluminum coloring).
The second concept was that this was a lost treasure of some sort: maybe Jade or Malachite. The KeyShot material is called Tempting Turquoise.
Lisa Brasier: Week 10 Serial Slice
For my project, I wanted to design a water fountain. I drew a simple sketch to get an idea of the basic composition and expanded upon it while modeling. I've made the creature on top of the fountain before in various other materials but never cardboard and thought it might be interesting. I wasn't entirely sure how it would read or how much detail would be lost. The final product did have some stretching.
The fountain was made with primitive shapes and the bend tool to make the details. I reused a skull from a previous project and rotated it around the fountain. All of the water was made from spheres manipulated using the moveUVN tool. The body of the creature on top of the fountain was made using the same technique as the water. To make the horns, I drew curves, piped them, and used the bend tool to get the shape that I wanted.
I added plaster bandage to the outside and plaster of Paris on top after assembling the cardboard pieces and smoothed out the surface. After it dried, I painted it with acrylics. I painted the water blue and the rest of the fountain was painted to look like marble. To add depth, I used varying shades of greys along it.
Subscribe to:
Posts (Atom)