Sunday, November 2, 2014

Kristin Loud: Project 5 Waffles

I did a search for my birthstone, an aquamarine stone that was uncut. I created a model and composition that mimics the stones in its raw state.

References:


KeyShot Renders:


The-Phong "James" Pham: Week 10 Waffles

 I kept having an error when proceeding to the massive unroll step. I assumed it might have been because I did something wrong with the model, so I tried again with a simple cube but still came across the same error. I would then try to do it manually, but I couldn't get rid of the surfaces and organize only the curves for the laser cutter. I am hoping the issue is just with my computer at home, and I will try it again on campus.


I figured out the issue, I had forgot to place the curves on another layer.


I referenced my own work for this this assignment, I looked at my flashlight assignment and wanted to emulate a similar structure. I created a cylinder and the created rectangular prisms to use the booleandifference command to cut out shapes out of the cylinder. I then used the section tool instead of the contour tool because the contour tool would sometimes line it up in such away were curves would overlap and cause problems later on with the planar curve tool. So I used the section tool to avoid that, and also give it more variation. 


For the keyshot rendering I was looking around campus and I liked the geometric shapes and cool colors presented in some of the buildings. I went for a brushed aluminium and a blue finished aluminum look. 


Blake Philley: Week 10 Grillage

For this week's grillage project I was inspired by a kind of inverted fountain shape, but I wanted to imagine it more like it was an object designed to hold fire instead of water.


I wanted to make an object with a similar feel to the inverted fountain, though it would have to be very different since it is functionally completely the oppoesite of a fountain. I opted for something with a strong and heavy feel to it, so I made the base much larger than the top and used pyramids as supports for it. I worked into more organic shapes as the object moved upwards. This is what I created:


I had a lot of trouble making this. The first few times I tried the scripts bugged out and would delete large sections of my creation so I eventually scaled it down and used fewer slices. That fixed the issues I was having and I ended up liking the way that looked more than the previous version. The objects were booleaned together to create the base shape and from there I used the same kind of techniques that professor Scott showed us in class to create the object itself. These are the renders I took:


 I like the darker wood material I used a lot more than the lighter stone, but I would have preferred a much darker, gray stone material. I think that would have looked much better than both of these.

Unfortuantely the object didn't quite get shaped the way I wanted. Since I had to edit the original design a lot to get it to work it lost one of my favorite parts. The small cup shape at the top is a lot less defined than I woud like.

Update:

I like the printed object a lot. It still has some of the shape issues I talked about before, but I think it works overall. This one also had the slots printed to be way too large, and I still don't know what I did wrong. Though I could actually glue the whole object together and get it to work.

Nathaniel Propp: Slots

Statement of Purpose : For this project I wanted to create a pieces that were not organic and used hard edges, as well as, very smooth organic shapes. Mixed with the slightly altered common connection pieces, that are both organic and rigid, I think some interesting structures could be made. For inspiration I looked at organic images and rigid objects, and  then the transition from one state to other.


Modeling Techniques : While drawing the curves, I relied heavily on the draw curve functions in Rhino i.e: polyline, and control point curve, circle, square. I also utilized the mirror functions and the Ortho, Grid snap and Near Snaps were vital to the process.


Material Choice: For my first cut I chose the plywood underlayment to save money as it is only 10 dollars for a 24x48 inch board. 

Post Cut : It was a good plan to go with a cheaper material because I trusted the measurements posted on the sign at Home Depot and it was not exact and left my slots too large. I learned the importance of measuring my materials with calipers.


Nathaniel Propp: Week10 WaffleStructure

Statement of Purpose :With this project in mind, I searched for interesting architecture for inspiration.


While my design is much more simple, by using simple shapes together I feel that I accomplished a waffle structure that conveys a possible skyscraper.


I can imagine this waffled structure as a building with an open courtyard in the middle and large outdoor balconies jetting in and out of the structure.

Modeling Techniques : I started with a tube and then added the intersecting triangular prism and ellipsoid. I then tried contouring the model to get slotted curves.


I removed some of the curves to prevent such a uniformly spaced waffle structure. If done again, I would probably have saved time by using the section tool. After that I then simply made them into contour planes, and used both of the scripts to Rib and Rollout the planes. after some clean up with the extend tool, I organized the curves into the 24"x24" box.


Material Choice: I rendered the original model in a smooth reflective material to stress the shape. While I am going to cut it out of plywood underlayment, I chose a cool blue plastic texture to compliment the initial model but highlight the waffle structure. 


Post Cut : The slots came out at the perfect thickness. While one cut was reversed it did not impede the structures form.


David Norkiewicz: Project 5: Waffle

Statement of Purpose: The inspiration for this model came from a table design I saw several years ago.I have wanted to find out how to do this type of sculpture for some time, and after seeing furnature created from this method, wanted to try to design a piece. The current table is a prototype of the design I would like to design in the future, that involves twisting and bending the table into a curling structure. I hope to be able to take this idea further with our next projects.


Modeling techniques: By creating a cube and booleaning spheres into it, the cube gains pockets from people to put their feet. The model that I ahve created is much smaller (rouchly 9-10 inched tall) and could be used as a small end table or placed piece.


The final model turned out better than expected. However tyhe bottom most piece did not fit on the model correctally and had to be scrapped.

Sean Lenox - Project 5: Waffles

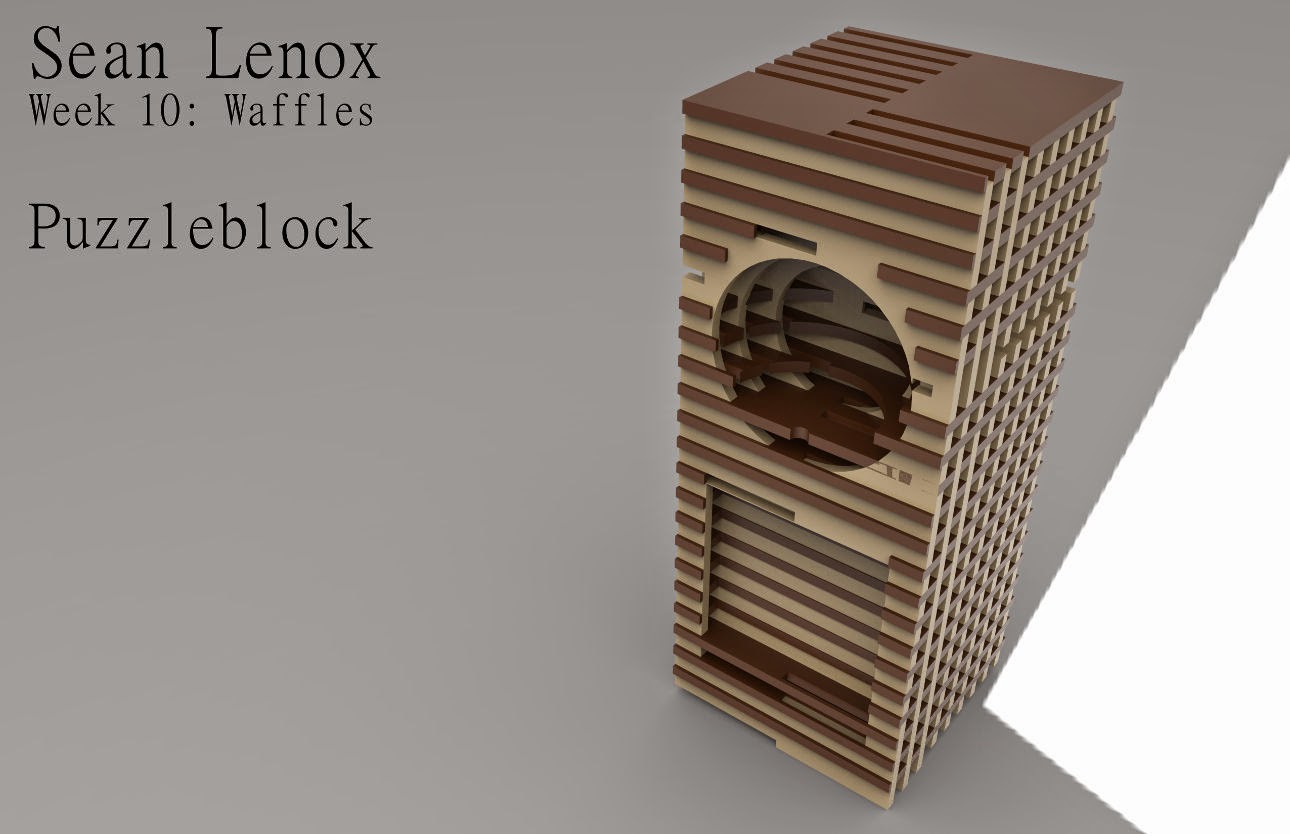
My waffle object for this week is what I call the "Puzzleblock". I was inspired by jigsaw puzzles and block puzzle games like Tetris when making it, as it is a block piece that could theoretically be part of a puzzle or in a puzzle game. I'm exploring sort of a paradoxical theme with it, as it is a puzzle piece that solves itself - the depressions on the back are filled by the pieces on the front. However, because there is only one of it, it is impossible to solve (unless, I suppose, you cut it in half or something), making it an almost frustrating piece of geometry for me.

It is a very simple model: a simple cube with rectangular and spherical holes cut out of one side with a Boolean Difference. I then did another, opposing Difference to cut the block out of the shapes, giving me half-shapes to stick on the other side of the block.

The Cut My Ribs script did some strange things to the waffle pieces, fitting the notches on them in strange, sometimes alternating orientations. After examining the waffle structure, however, It seems that despite the strange notches, everything fits together correctly. I really like the look of the notches and feared messing up the waffle structure by trying to make them more orderly, so I left them the way they are. If they end up not fitting together perfectly, I'm a big dummy.


Week 12: Redo

I decided to spruce up the design of the Puzzleblock a bit, adding more shapes and slots on the sides.


Week 13:

Here are some photos of the assembled Puzzleblock.