Showing posts with label serialslice. Show all posts

Wednesday, March 22, 2017

Anisha Chaudhary: Week 10 Serial Slice


Concept:
My serial slice is a statue of the Hindu God Ganesha. He is represented as a man with an elephant head and human body. Ganesha is represented in Indian art in a variety of ways. He is usually seen with a mouse at his side or an offering in his palm. He usually has a symbol on his forehead, this symbol varies depending from what region of India is depicting him. I like a lot of modern representations of Ganesha. They mostly try to capture his trunk and large belly. I didn't realize how many different depictions of Ganesha my family has in our house until I started this project. My favorite depiction is a small plastic version, where there is only his trunk, belly, ears, and a symbol on the forehead represented.
I decided to make this since many artists tend to make their own representation of Ganesha. I also wanted something I could use to decorate my home.

Modeling:
I did my best to use very basic geometry to represent Ganesha. I used two large spheres for his belly and chest, ellipses for the arms, legs, and feet, and curves for the ears and trunk. I like how I manipulated the trunk, by creating a pipe and then changing the size of it so it gradually gets smaller at the tip of the trunk.
I realized that this piece may be very bulky. Currently, I am working on laying it out on a 24" x 48" rectangle. I may have to use more than one sheet of wood. My piece is about 12" tall. I am also nervous about the floating pieces I have in the serial slice. I will have to follow what Professor Scott said about labeling, where I label chunks by having a layer as "01" and "01a" if they are at the same height. I chose to do a horizontal contour so that It would be easier for me to visualize.

Materials:
I am excited to actually get this laser cut, even though I know it will be difficult to piece together. There is not a hole for the Dowel presently, but before I layout my 24"x48" sheet, I will add them. I bought two panels of Cherry plywood offline from Home depot. After I have actually implemented and completed the set up of this project, I am thinking of ways I can add to the wood. I am thinking of adding moss to the wood, or maybe painting over the wood with a stain. I think it would be cool to wrap it in vines to make it look like a piece that belongs in nature. I will have to research how I can preserve this piece very well.


Before I submitted this piece for Laser cutting, I realized that I had a different thickness when I contoured compared to my plywood. I redid the layout so it looks like the layout below.


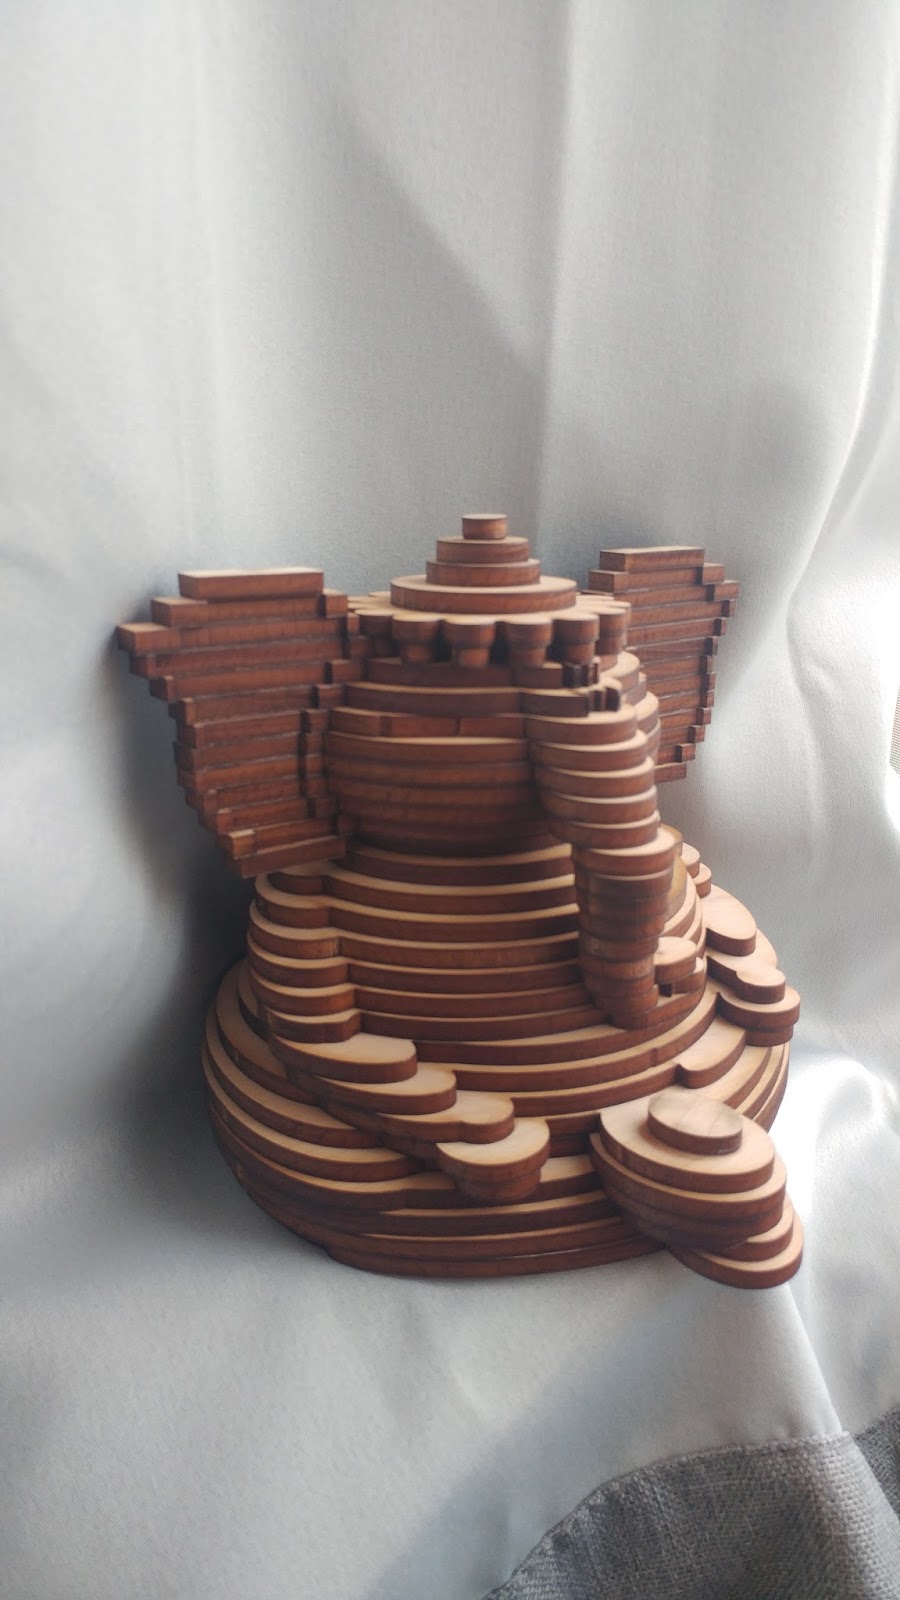
I made the piece about 7 inches tall in the end. It is a small and chubby Ganesh, and I love the way it turned out when putting it together. I did make a few manual mistakes when assembling this piece together. I did not plan out the trunk like Professor Scott had told me to, so there is a portion of the trunk that sticks out much more than the rest. I also mixed up some loose ear pieces. Luckily these pieces are symmetrical, but it does look odd in the way I placed them. Overall I'm very happy with the way my serial slicing came out and I think it looks beautiful with the type of wood that I got.


Monday, March 13, 2017

Brandon Wehenkel: Serial Slice


Close Up (Physical Object)


Ghosted Black 3D Scan (Before)


Ghosted Black Serial Slice (After)


Ghosted Black Serial Slice


Concept:
Fall 2016, created a bust of a character of mine with polymer clay then scanned him into digital information.  Because I had several models 6.3M poly, 900k poly, 12k poly, and a 3k poly I thought that maybe this project would be perfect to test the serial slice design with him.  I have a facination of anthropomorpic design so his overall style is designed from several animals:  Gorilla, Chimpanzee, and Human.


Ready To Cut


Modeling Techniques:
How I made the model please refer to my 3D Scanned Object post.
My model started off as 6.3M polys.  I reduced it down to 12,744 polys for this project.  I used Mudbox to do this.  I pressed page down to change the normals map to level 1.  Then I exported as .obj and uploaded it to Maya where I used the cut faces tool to make a nice base for the model.  I used the edge selection tool and the face selection tool to delete any of the excess polys under the line.  Then extruded the mesh to close the hole.  The fill hole command didn't work for me.  I forgot how to manually close it in Maya so I made the hole fairly large so that I could just close it in Rhino with a series of mesh tools.  I used Mesh --> Mesh Edit Tools --> Delete Mesh Faces (to remove several of the weird naked edges around faces); Mesh --> Mesh Repair Tools --> Rebuild Mesh (to eliminate the rest of the naked edges); Unify Normals; Fill All Holes.

I used contour for the serial slicing as seen in the tutorial from class.  I separated each curve by .1875 inches.  The dowels cut are at .25 inches in diameter.  The dowel placement is in a slightly different spot than from the image above.

There are four holes in the model for dowels.  Because my traditional sculpting capabilities aren't perfect the figure isn't symmetrical; remember I used a scanner to make this model so all of that information is also translated. When I put dowels into the shoulders they popped out in bad areas.  I attempted to place the dowels in the most central locations. One of the dowels does not go all the way through while the other pokes out and stops at one of the outer slices.  I did not want it to go through because it would have created an ugly exit. 

I had to use a vice, nuts, and a ratchet strap to press all of the parts together.  I ran into a minor issue with warping so the ratchet strap was useful for pressing the materials together during gluing.


Keyshot Serial Slice (Front)


Materials:
In Keyshot:
I used Soft Maple and mixed mauve with the woods texture to get the color of wood that closely resembles that of Medium-density fiberboard.

In real life:
The wood I purchased is MDF, like I mentioned above, 1/4" 2'x4' sheet which for some reason is actually 3/16" - .1875" at Home Depot.
I found a metal threaded dowel that was 3' long in the parking lot about three months ago.  It is 1/4" in diameter.   I figured I would need it someday since I have 3 various sizes at home of various material types.  I have a few nuts at home that would work for securing the wood together.
I also have plenty of wood glue as well.


 Keyshot Serial Slice (Right)

Keyshot Serial Slice (Back)


Bubbah Natural Light Interior


Comparative


 Bubbah Natural Light Exterior


Bubbah Natural Light Exterior - Backside

Monday, April 25, 2016

Tara Intyrath: Serial Slice

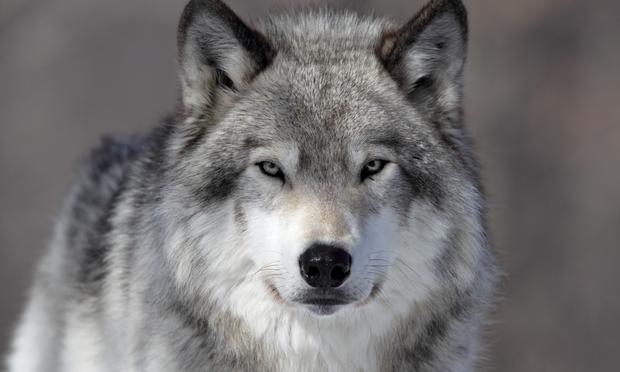
Concept: For this projects concept I wanted to focus on my favorite animal, wolves. I have been in love with wolves since I was a child after reading a book about them for a school project. They fascinate me and I have yet to design anything using a wolf so I thought to take this chance. A full wolf would have taken me far too long to model so I decided to go with the neck up of the animal.
Technique: I had a lot of difficulty working with this model as I haven't modeled something so organic before. I first took the approach of trying to edit a sphere or a box and shape it into that of a wolf head but all the vertices were very confusing. My second approach was to create curves of the wolf using google images as references and to create surfaces off those curves. I found that much easier to do and divided the head into four parts; the nose, main face area, the neck, and then the ears. I had lots trouble getting sweep or surface network to work properly or have an outcome I was satisfied with. It turned out a lot of my curves were not intersecting properly so I learned to make the curves into segments to get a better fit and then joining those segments together to make things work properly. I ended up using sweep2 for the whole process to create the surfaces. To make the swirls and detail of the eyes I made a flat curve and used project to get the curves to wrap around the model, offset them, made them into surfaces then solids, and boolean differenced them. I used various other commands such as join, to join my curves and surfaces once I created them, cap planar holes, and boolean join. Creating the contour lines, unrolling them, and making a spread sheet was the easy part of this project.
Materials: For the laser cut material I decided to stick with the .25 cardboard available at the Fab Lab as it was a cheaper solution and I also wanted to see how the ridges or the insides of the cardboard would look once cut out, hoping it would give an interesting outcome. Gratefully, it came out very well done. My model due to its shape and size has a lot of shapes and parts that aren't in one piece though in the same layer slice which is why I had to go with four rods. I decided to use threaded rods so I could tighten the slices together and ended up liking the "Frankenstein" look of it so left them in. I am very happy with the results of the real model. For my keyshots, I decided to choose a clear acrylic/plastic material and a metal material. I chose these two materials because I wanted to see what it would look like in various materials and hope to maybe make a serious out of these wolf heads.

Sunday, April 3, 2016

Alec McKay: Serial Slice


Concept: After having done so much work that was more polygonal and straight-edged, I decided to do something flowing and fluid. I also thought the serial slicing method would lend itself well to the curves present in a fluid sculpture. From there, I decided to do a swirling form that moves around the central cores.


Technique: I created two curves, with one for the front view and one for the side view, which I later cut in half and lofted to create the solid form. I did several iterations of curves that I lofted, because several of them created creases that weren't what I wanted. I found that using a loose loft rather than the default loft sometimes helped with this. Once I had the desired shape, I used the Contour command to create the serial slices.


Material: My model is cut from two-ply cardboard with two 1/4 inch dowels as the cores. I glued each layer together using superglue. I also left the holes in the bottom so that I can create a base using the two dowels and a block of wood. In keyshot, I decided to use a metallic paint with a deep blue color in keeping with the theme of fluidity.  


Thomas Perugini: Serial Slice

Concept: At first I wanted to do just a geometric shape, inspired by office buildings and abstract chess pieces. However, I found the design plain and uninteresting. To give the object a more intriguing design I twisted it, adding a more organic flow to an otherwise rigid subject.


Technique: I began with a rectangular prism. On each side, a series of holes were made, each narrower and deeper than the last. This created a closed stair case design. I then twisted the entire object to give the corkscrew design. The polysurface was then separated into curves and arranged onto the cyan work area.


Material: The keyshot rendering material chosen was black walnut wood. I needed to scale down the texture a bit, as well as darken the overlay to give it a less saturated appearance. The real piece is only cardboard so far.

Sunday, March 27, 2016

Ashley D Goodenough: Serial Slices, "Pollen"

Concept: I've been thinking about pollen and other allergens a lot lately, since it's the season for it. I thought it would be an interesting idea to take something that makes my life so difficult and abstract it. Then, I could in turn make it into something beautiful that I would appreciate rather than hate. I tried to give my design the same vibrant feeling as some of the electron microscope images you see of pollen and other unimaginably tiny living things in the microcosmos.
All laid out on the ground plane and numbered after contouring/serial slicing.

Modeling: This was interesting trip. Modeling precise geometric forms like polyhedrons can get tricky, and you need to know exact interior angles to get it right.  My design was a regular dodecahedron made up of all pentagons. I started it in Maya, since it seemed easier to get the angles and specific rotation around a point correct with Maya's universal manipulation tools. I then exported the .obj into Rhino and finished it up by added the irregular holes on each pentagonal face (using interpolate on surface curves, then curve extrusion and booleanDifference) and filleting the edges. I wanted this object to be interesting from every angle, so every side is different. To finish it up, I used "contour" command to get my serial slices (after placing my object and support structures on the inner and outer cut layers), and then snapped each group to the 24"x48" laser bed reference plane. I used ProjectToCPlane to make sure everything was on the ground plane. To make assembling it easy, I numbered each group on the text engrave layer.
Materials: For my renders, I did something mildly creepy. I wanted this object to feel very organic, so I applied a human skin texture to it, then changed up the top color and the "under the skin" color to get the mottled green appearance I was interested in emulating that I'd seen in electron microscope images of pollen. I tried a few different variations, and I think the last version works the best.

Fabrication! I really think this turned out well, so I'm going to post a lot of photos. The object definitely has interest from all angles, and I would argue that you have to see it in person and hold it to appreciate the detail and its form. I decided to spray paint it a really vibrant turquoise color, and then to add some interest and highlight the contours by gold-leafing the edges of the cardboard.
Early assemblage. Views from the top, and one angle from the side.
Spray painting in progress. Gold edges next. You really have to see this from several different angles to get an idea of its overall form. I can tell you it's a regular dodecahedron, but it's hard to picture the 3D version of a pentagon.
And some detail shots! The gold leaf treatment really makes the edges of the cardboard accent the holes. It has kind of a surreal terrain, other-worldly feel to it, like each cavern has secret details you have to look inside to discover.