Showing posts with label BrianChancellor. Show all posts

Monday, December 15, 2014

Brian Chancellor: Week 14-15: Pepakura


When designing a chess piece I thought a lot about the roles each piece plays in the game.  I decided that the King should be a large lumbering beast since he can move in any direction but only one space at a time.  Once I had decided to make a king piece, I thought about a theme.  I came to the conclusion that I should make a TRex piece.  Not only am I fascinated by dinosaurs, but TRex means King of the Tyrant Lizards.  This makes it a perfect pick for a King piece of a dino themed chess set.


It was very difficult to model this chess piece.  I ended up remodeling it three or four times due to trying to make this organic shape fit within a reasonable poly count.  

The most difficult part for me was laying the pieces out in pepakura.  I must have redone this process eight times.


Below are the next two steps where I took my pepakura files and first transferred them to Illustrator.  There I made sure the lines were properly segmented for folding.  I also made sure that the color was correct for laser cutting.  Then I moved the AI files into Rhino so I could make sure they were formatted properly for the laser cutting machine.  I probably redid these steps six or so times.  I would make a small mistake somewhere and have to redo the entire process.  This project was the most difficult for me and if I was to redo it, I would pick a much simpler shape with fewer faces.


My files did not end up getting printed due to my many errors when creating the Rhino files.  I did get my final version in on the dropbox before the cutoff time.  The last issue I did not see was that my inner cut lines were much to small and the cutting process would take an hour per sheet. My final files were on 2.5 sheets of cardboard.  This would be unreasonable to cut these because it would take too much time out of other people's projects.  In the future I would make sure I have more uniform faces on my 3D model so that I can have larger inner cut lines.  This would help with both assembly and cut time.

I choose to render my lizard King in keyshot with a black plastic look because it is supposed to be a chess piece and ideally it would be made of plastic.


Brian Chancellor: Week 13: Geometric Unfolding 101


For this project I really wanted to play with the negative space and the shapes I could cut into the cardboard faces.  I really dove into Illustrator and my main inspiration for this practice piece was the various tools in Illustrator.  I have not had much practice and I more or less played around with the various functions until I found something I liked that worked well with the cardboard.  Below you can see my cutout and since this was printed directly from the Illustrator file, I have no 3D Rhino model or keyshot model to show.  


Brian Chancellor Week 11: Architectonic Lamp


This is my architectonic lamp.  For this project I decided to try for something very unique and more difficult to make than my previous project.  I drew inspiration from the marker's shape that is in the Dead Space franchise.  You can see that image below.


I created two separate spiral shapes in rhino.  I twisted each around a central axis and inverted one.  After that I made sure to hollow out the center with an inverted cone.  this would allow for the cord and bulb to fit snugly.  I made sure that the bottom hole was one inch in diameter so that the base of the lamp would fit well.  You can see my base model below.


The next few steps took me the longest.  I had to repeat the slicing part of this project four or five times to get a shape I was pleased with.  The first time I also made the pipes to large and had to come back and edit the slots.


And here below is my lamp cut and assembled.  It turned out much better than I had expected with its unusual shape.  It was difficult to piece together much like a puzzle.


In keyshot I choose to use a glossy black plastic material.  I wanted the lamp to look ominous and the black color goes back to the inspiration I took from Dead Space.  With the sharp corners and spiral shapes black makes the lamp look ominous.


Monday, October 13, 2014

Brian Chancellor: Project 3: Serial Form


Project Description:

For this project I went back to my inspiration from the first project.  I decided I wanted to do a square shape with a lot of negative space inside.  This presented a unique challenge for the serial piece.  I ended up solving this by having four different rods, one in each corner.  I really like how the outside of the cube is smooth and flat while I wanted the inside to have the terraced look.  I also drew inspiration from geodes such as this.  

Also I drew inspiration from the Endover Cube at the University of Michigan by Tony Rosenthal.


Here are my slices.  I tried to use up as much of the cutting material as possible.  I do not like to waste material as it ends up costing more.


When I modeled this piece in Maya, I used a subtractive method.  I made large pyramids and subtracted them from the top and bottom.  This slanted inside look would give me the terrace effect in Rhino when I serialized the model.


I kept this piece all one color for Keyshot because I wanted a polished stone or gem look to the piece.


Brian Chancellor: Project 2: Flashlight Sleeve


Project Description:

For this project I created a flashlight entirely in Rhino using curves.  I drew my inspiration from a Star Wars.  

I wanted to create a case that was easy to grip.  This is why I have so many ridges on the handle. When modeling this piece, I used the curve tools in Rhino to revolve a case for the flashlight.  Below you can see the different layers I divided my flashlight into. 


For my rendered images, I attempted to get a very functional look.  I wanted to ridges to be very grip-able so I used a rubber look.  The copper highlights make it look futuristic.


Sunday, October 12, 2014

Brian Chancellor: Project 1: Sliced Symmetry


Project Description:
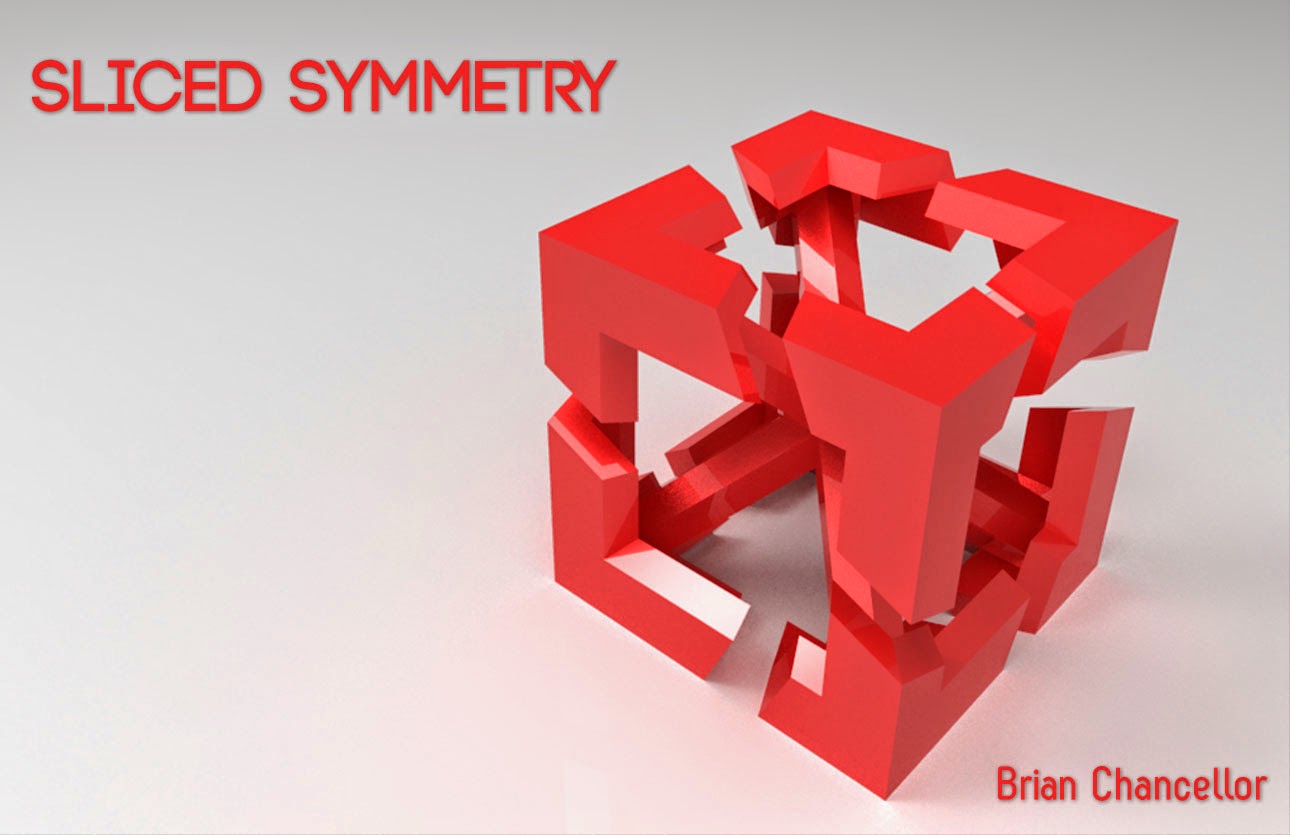
This project had a very simple idea behind it.  I wanted to create something both puzzling to look at as well as being very tactile.  I originally had this idea when messing about with this Japanese puzzle called Vortex.
This puzzle struck a very strong chord with me.  At first glance I thought the puzzle to be simple and symmetrical, but the more I handled the puzzle, the more I came to realize that each element was indeed unique.  I took this as my core idea.  From there I drew inspiration from these pieces.  

This piece is standing at the University of Michigan.  It was made by Tony Rosenthal in 1968.  It is 15x15x15 feet and made from CorTen Steel.  This piece also spins.  This gave me the second part for my 3D printed piece titled Sliced Symmetry.

 I have also been spending a lot of time at the Perot Museum this semester.  It helped me decide on keeping my model very cubic.  The building was designed by Thom Maybe.


When I was modeling this first piece, I spent a lot of time and effort to keep each side unique while maintaining the illusion that each side is the same.  I used a lot of grid snapping to keep each point in relation to the others.  I used the multiple view ports in Maya to make sure that when I ghosted the model, I could see the side directly opposite was indeed sliced a different way.  I rendered Sliced Symmetry in Keyshot.  I stuck to one material because I believe if I used a different color on each side, it would lose its unified look.