Showing posts with label college. Show all posts

Tuesday, May 5, 2015

Jenna Bastian & Renae Patoskie: Pepakura Project

My partner is Renae Patoskie. Our chess piece was based off the Knight. It has a horse head shape but with spiked mane and horns to resemble a dragon's head. So our piece is a Dragon Horse Knight. We made it look tough and bulky.

I modeled the head in Maya. I then duplicated it and deleted the bottom faces if we decided there not to be a bottom. The closed bottom head had 270 faces, and the open bottom had fewer than that. Renae worked on the pepakura part. She laid out the model pieces in the Pepakura program to be put into Rhino 3D. The model took up 4 sheets of cardboard.

We built the knight piece together, it took six hours. The final size of the dragon horse head is two and half feet. Over the summer we may work on it more.

Knight Piece in Rhino 3D

Knight Piece in Keyshot

Knight Piece Template in Rhino 3D

Knight Piece in my car

Knight Piece Model


Monday, April 20, 2015

Jenna Bastian: Week 12 Fox Box

For this project, I used the BoxMaker generator to create a box template with dimensions 23 x 6 x 9 inches. The box is sized so I can store my manga in it. I made the height a bit taller for the ones that are sized differently (Dragon Ball and Star Wars manga). I decided to do an elegant, wind theme with a fox. 

I used the BoxMaker to create the sides of the box. I then went into Adobe Photoshop and used the pen tool to create the swirls and fox shapes, and exported those paths as an Adobe Illustrator file. Then I imported those into Rhino 3D. The blue parts will be cut out, and the red will be engraved onto the 1-ply cardboard. For the cover, I made a slot so I can fit and use a "key" made for the box to open it more easily. 

Assembling the fox box was quite simple. I applied super glue to the slots and fit it quickly to the other edges. I left the top lid unglued and fit the "handle" inside the middle. This will probably hold objects of low weight so the bottom won't fall off. I'm probably going to glue the cut out fox on the back of the box. 

Fox Box Template in Rhino3D

Fox Box complete #1

Fox Box complete #2

Fox Box complete #3


Monday, April 6, 2015

Jenna Bastian: Week 11 Lamp

I will be using a Japanese theme for the lamp project, and it is going to be based off the more traditional architecture. I modeled various designs in Maya and eventually combined two of them to create the final piece. A light yellow lamp shade will probably be put inside the interior of the lamp so the light bulb won't be too bright. It will have a warm color scheme (reds and yellows).

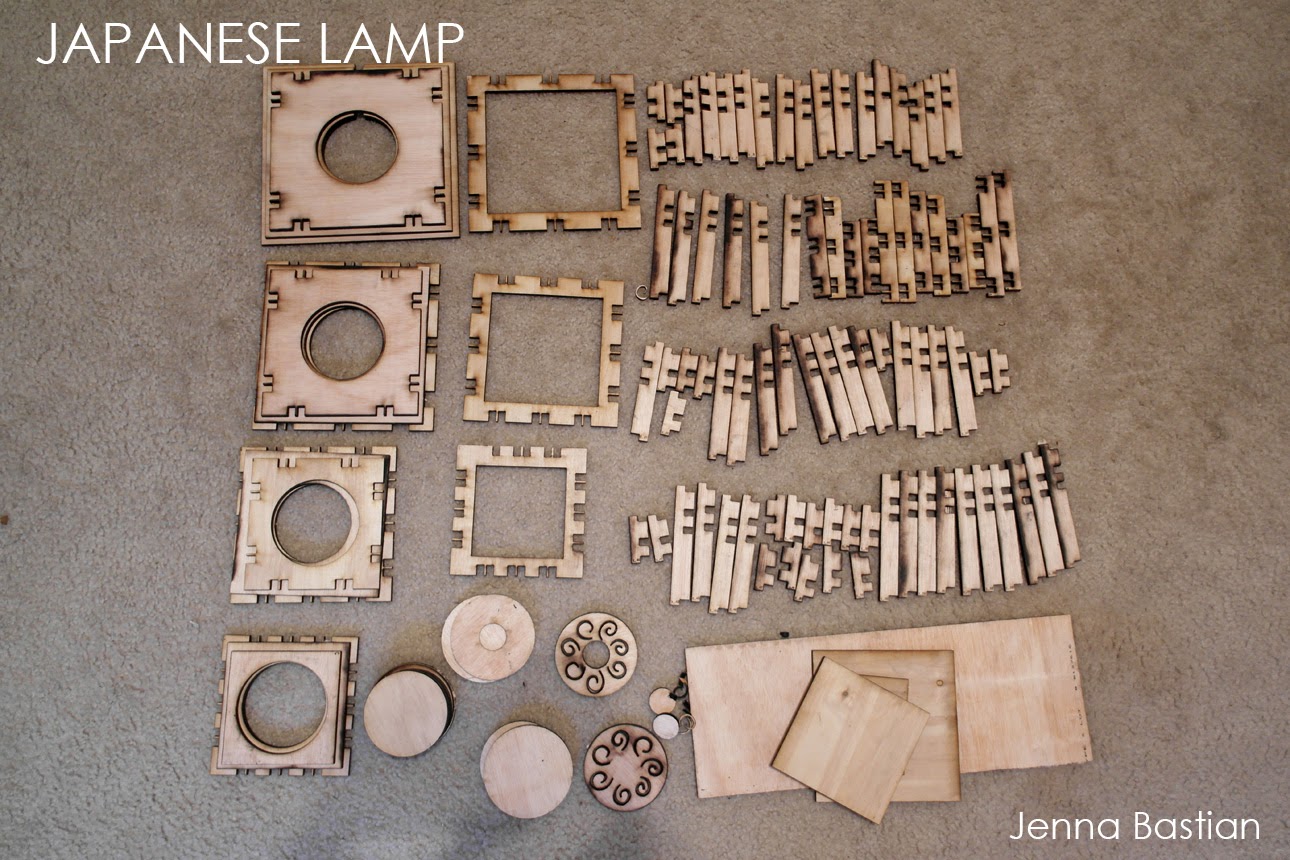
I modeled the lamp structure again in Rhino 3D with the correct dimensions. I used the Split function to cut out holes and slots from the planes and solids. I made sure the slices fit in one 24x48 sheet of plywood, before cutting out the slots. I created a circular lid for each level, which is where the light will be placed. Each lid has a different design. A slot was cut out from the bottom of the model for the wires.

I used .125 inch plywood for this model, the slots cut out were .126 inch wide. The plywood will be painted a glossy dark red and the light can be placed on any of the levels. I may buy either a white or yellow lamp shade material to be rolled up into a cylinder and placed inside to dim the light.

Lamp in Maya #1

Lamp Render in Maya #2

Lamp Slices in Rhino 3D

Lamp Template in Rhino 3D

Lamp Template on my floor

Lamp Complete!


Thursday, April 2, 2015

Jenna Bastian: Week 10 Squirrel Waffles

For the Waffles project, I decided to do a squirrel. Squirrels are the mascots for all colleges, and they are like the freshmen college students.  Some squirrels switch trees (majors) since it was not quite for them or they had too much competition. They gather as much nuts (knowledge) as they can, but some forget where they put it. They are super fidgety, excited for adventure, and wary of the unknown.

I modeled a simple shape of a squirrel in Maya and imported it into Rhino 3D. I used Contours to create curves that cut through the object, I then took those curves to create the slices with PlanarSrf. After, I thickened the slices with ExtrudeSrf by .24 (2 ply cardboard thickness). I flipped some of the vertical slices so the rough side of the hardboard will show on either side of the squirrel.

In Keyshot I placed the squirrel waffle structure in front of the UTD campus, near the Visitor Center since it also has a waffle-like structure. I chose brown metal so it would not be too distracting and be natural in the environment. The second keyshot render is what it would look like as plywood or cardboard. For the actual model I used hardwood (with .125 inch thickness), with .14 inch slots. The finished squirrel model was wobbly due to the wide slots but, with the help from Professor Scott, we were able to make it stand with the use of tiny pieces of cardboard and super glue inside some of the extra slot space.

Squirrel in Rhino 3D


Squirrel Slices in Rhino 3D

Squirrel in Keyshot #1

Squirrel in Keyshot #2

Squirrel Model finished #1

Squirrel Model finished#2