Showing posts with label Lamp. Show all posts

Tuesday, November 29, 2022

Lindsey Nguyen: Week 13 Architectonic Lamp


Design Intent


For my architectonic lamp, I wanted it to be a lamp that I would use and a style that I would like as well. I decided to go for a jello on a platter look because I like eating jello and I think it would be a great way of creating a lamp for it. 


Modeling Techniques


The modeling techniques I used is that I started off with a star, then free formed the curves and used control points to make it more smooth on the curves. Then created a circle in the middle and started to create more curves on the edge to the top of the jello. Then used the sweep 2 rail to create the jello look. Then created a pipe way for the dish, then finally created my model. 


Rendering Materials 


For the rendering materials, I decided to keep it the same as the material that will be created in the end. So I used a wood texture on the model, and it really stood out very well and nice. 


Sunday, October 16, 2022

Helena Silva: Project 3 Phoenix Lamp

Concept: 

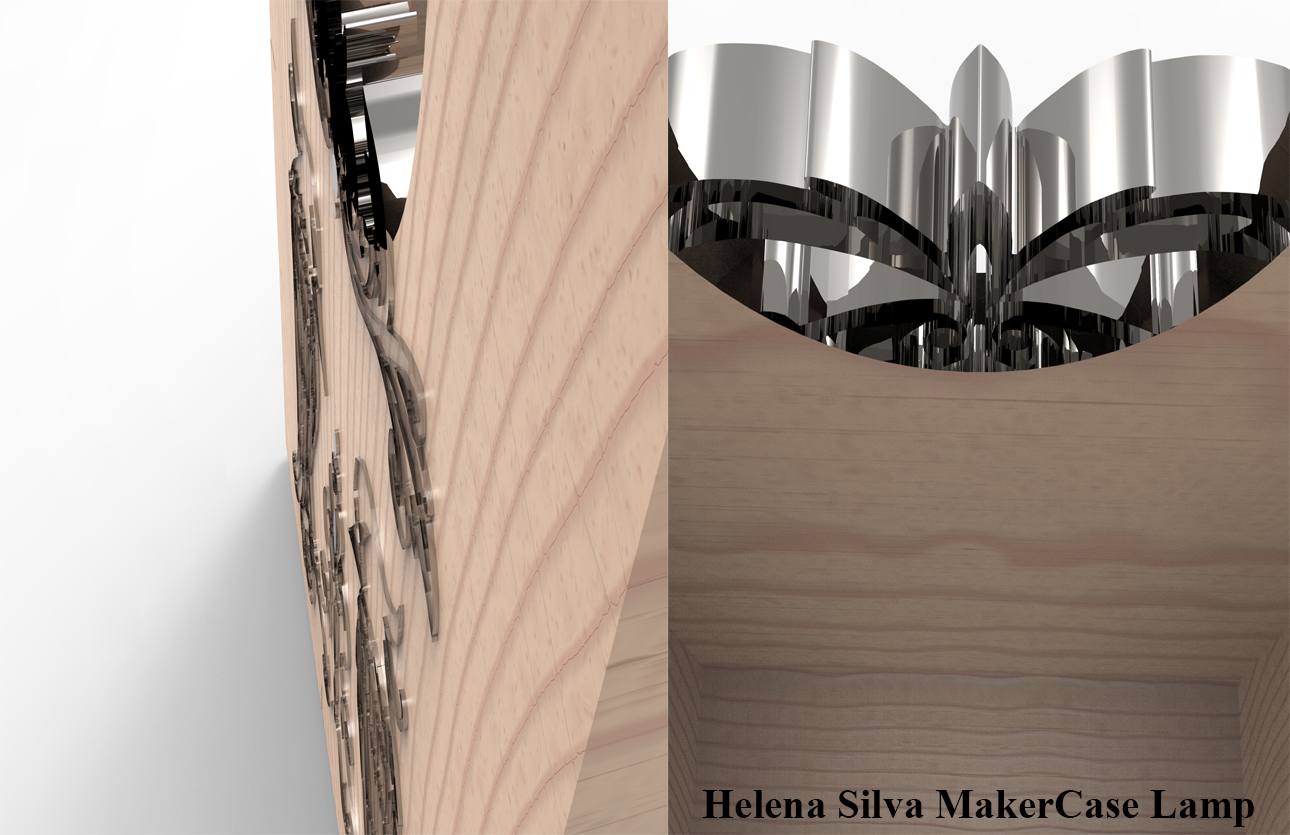
    The inspiration for this project was the create a Baroque themed phoenix. I wanted to use a form of symmetry to emphasize elegance and power. The reason I choice to use a Baroque theme was because it is a fun and challenging form of art. It is usually seen in frames and typography but I love drawing new styles with the idea of 'how could I incorporate this style into something else?' The idea didn't come easy but I wanted to illustrate the specific idea of reflection yet flow throughout the entire design.  

References


Orthographic Drawing W/ Annotations

Orthographic Drawing

Techniques:

    To begin the modeling process. I started with Clip Studio Paint to draw a digital design. Once I finished the design, I converted it into vectors. Next, I exported the vectors to Adobe Illustrator. There, I would make any fixes and organize the layers before importing the .svg file into Rhino. Once I was in Rhino, I could begin building the 3D model and organize once again to make sure that everything could be used in the final laser cutting process. I never built the model, I basically would use three different softwares to either convert, fix or draw my design. Rhino was the only software that made the design come together in a 3D format like putting together puzzle pieces.


Ghosted

Ghosted- Edge Analysis

Ghosted- Assigned Layers


Materials:

    The type of materials that I used is birch plywood. I don't really have the intention of painting my box. I plan on just using the lights to extenuate the design on the box. However, I wanted to play with the materials I could have used in Keyshot. 


Keyshot- Orthographic View

Keyshot- 3D Model Staged

Keyshot- Close-ups

Physical Model- Orthographic View

Physical Model- Close-ups


Sunday, April 30, 2017

Griffin Korns: Week 12 Waffle Lamp

Concept:
I wanted to make a simple, easy to put together lamp that sort of mimicked a globe, and could stand on its own.


Technique:
I created a series of circular curves, then lofted them to create the outer shape, then used the Cap command to seal it off. I duplicated the model and manipulated it to get the interior cavity shape that I wanted, then used BooleanDifference to hollow it out. I followed the tutorial video with the pipes to create the sliced model.


Materials:
The model is made out of 2 ply cardboard, along with a regular light bulb and a Bottle Lamp kit from Lowe's.I also created a mounting piece for the light bulb with some scrap cardboard, and cut it so it notches into the top of the lamp.


Monday, April 10, 2017

Rebecca Genung: Week 12 Waffle Lamp


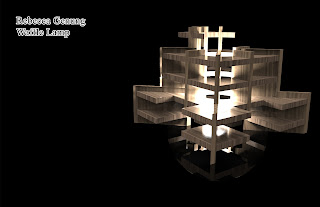
I wanted to use only basic shapes this project. Inspired by cube-shaped statues and a oddly shaped building near where I live, I created a simple but modern design.

For technique, I just kept it simple. I placed cubes in the shape of the building I mentioned above and Boolean-difference a cylinder from the center to leave room for the light. The Rhino scripts provided glitched out on me so I did everything by hand.


For materials, I used oak in the KeyShot. In KeyShot, I made the vertical pieces beige to keep the textures from muddying the form. The actual lamp itself is made of .25 cardboard.

Tuesday, December 1, 2015

Vincent Lo: Lamp


I sculpted a rough base mesh in Zbrush


 Once I brought the mesh inside Rhino and generated my curves, I discovered many of them were unusable. I spent some time figuring out what curves were usable, and then I modified them to be more appealing.


Concept

I knew from the start that I wanted the physical illumination of the light to connect with the conceptual aspect of the sculpture. After quite some time, I finally settled on the concept of fire. In addition, I thought this concept of "natural" fire contrasted nicely with "artificial" light.

Techniques

I sculpted my mesh in Zbrush, but then found out quickly that many of the auto-generated curves were unusable. I salvaged what I could, and I did a lot of cleaning and manipulation to the curves. Often I would just re-draw new curves over the old and then scrap the old.

After finding the shapes that I wanted, I blocked out the hole in which the light bulb would rest and scaled things appropriately. To create the slits, I created pipes and placed them on the plane intersections. After all that, I used booleans and splits to make the holes.

Materials

For the Keyshot render, I played around with many materials. I eventually landed on a liquid material and played with the refraction and transparency settings to achieve the current look. For the sculpture, I used cardboard for financial reasons.

Sunday, May 10, 2015

Renae Patoskie Week 11: Lamp

In most of the examples for the Architectonic Lamp project, a shape was used to create the lattice structure. I wanted to use multiple forms to create something more active and engaging. 

To create the model I drew separate outline curves for the two different layers. I then revolved them, and took a single section slice which I then used the polar array to equidistance my slates around the form. I repeated this concept with the other shape. I then found the innermost points of each object and inserted circular planes to hold the outer shapes together, careful to leave ample room for a spherical lightbulb.

After using the CutMyRibs script to create my slots, there were a lot of overhangs, to simplify the clean-up process, I simply corrected a single outline of each form and then duplicated each 7 times to get my outer shapes.

Rhino rendering of final model.


I tried to save material and time by printing both my box and lamp on the same sheet.


Lamp rendered in red and yellow plexiglass


Lamp from above with simulated emissive light, for the interior places I used clear plexiglass.


Constructed Lamp.

Wednesday, April 15, 2015

Hadi Zadeh - Assignment 9 Lamp

I had several attempts to create a good model for the lamp in 3DsMax, until I figured out what I was looking for. I wanted a non-symmetrical model that look good in one hand and could be fitted in just one sheet on the other hand. I also wanted the model have different shapes and thickness when looking from different angles. 

I made the basic mesh in 3DsMax and then imported it to rhino. And then used contour, section and pipe commands just as were demonstrated n video tutorials. I think using pipes to make notches is a more accurate way in compare with cut my ribs script.  

I used two different materials and HDR images for reflection and refraction. 

3DsMax Basic Model

Rhino 1

Rhino 2

Keyshot 1

Keyshot 2

 Keyshot 3

Final 1

Final 2

Final 3

Final 4