Showing posts with label wafflestructure. Show all posts

Sunday, May 1, 2016

Thomas Perugini: Waffle Structure

For a long time I was uninspired in what to do for this project. Then I came across some images of retro-futuristic ray guns. I believe this type of style is called "Gothic raygun." It is a bit of a 1940s-1950s prediction of what the technology of the future would look like.


 To create the model I drew a curve for the main body silhouette, and then extruded it around an axis. I then made a curve for the handle and trigger guard, and extruded it. The fin was also a curve that was extruded. The tip was a flat cone object with a sphere at the end. I then used the cut my ribs code to make the outlines for the laser cut.


 I used .25' cardboard for my final product, and I removed more extraneous pieces from the trigger guard and the handle to make it easier to hold. The main body was a little tight, but I got it all together in the end.


Monday, April 25, 2016

Tara Intyrath: Waffle

Concept: For this project I wanted to go back to the oriental theme as it is my favorite art genre. I also always wanted to make a bust out of something so I decided to go for a geisha design. Geishas are really elegant and beautiful to me with profound features so I thought it was perfect.
Technique: For this model, I used the same techniques for the wolf bust from the previous project. I started by using references from google images to create the curves for half of the bust, created a surface using those curves, copy and mirror that surface, joined the surfaces together, and patched the bottom and created a solid with the surfaces. This was only for the head and the shoulder part of the model though. I wanted the hair to be a whole separate entity that could be removed so didn't have that joined with the head. For the hair it was a much simpler process. I created curves that moved a long the shape of the head how I think the hair would fit and flow and used pipe to make a solid. I even used the torus tool to make the bun on top and then boolean joined all the hair parts together. To make the hair a separate entity and removable I made a boolean difference from the hair using the head without deleting the solid used (the head) and thats how its able to fit so nicely on top. I made the waffle slices using the contour command and used the rib command that was provided for us on blackboard. I originally was going to make the hair the same angle as the head and shoulders but I decided it would look better if the waffles slices were angled instead of flat to show contrast between the two elements.

Materials: For the actual real life model, I used plywood for the head and shoulders and the hair is MDF. In the keyshot renderings I decided to use simple translucent plastics for the hair and head/shoulders but differing colors to again show contrast and differentiate the two.

Sunday, April 17, 2016

Alec McKay: Waffle Structure


Concept: My design was inspired by other furniture I found online that had been made with waffle structure, such as the above chair. From there I decided to do a sofa, so I did some research into interesting designs for sofas, which was where I got the idea to put a shelf into the back of the couch. I thought the rounded form of both the sofa and the shelf would look good with the layers of waffle structure, and the shelf would add more interest to the back side of the sofa.


Technique: I started with an ellipsoid, and I used another ellipsoid and BooleanDifference to create the seat of the sofa. To create a base, I drew an ellipse curve and used Sweep2 to create a surface connecting it to the ellipsoid above it. Once I had that shape, I created another ellipsoid for the shelving unit. For a flat-bottomed shelf, I used a flat surface to cut the bottom off, and then I used another BooleanDifference to cut that out of the sofa. I also used a large fillet on the edges of the sofa and the shelf so that the arm rests and seat wouldn't be too sharp.


Materials: For my laser cut model, I decided to go with the thin E-Flute cardboard because I thought it would look better for the small scale to have a thinner material, so it would look more similar to what I imagined it would look like at full scale. For my renders, I went with a plastic painted in metallic red for the solid version, and a nice light wood for the waffle structure. A light colored wood was what I thought I could use if I made a full scale version of the waffle structure sofa. I chose a different material for the solid version because the wood didn't look as good in this context, so I went with a bright, shiny metallic plastic.


Sunday, April 10, 2016

Ashley D Goodenough: Week 10 Waffle Structure

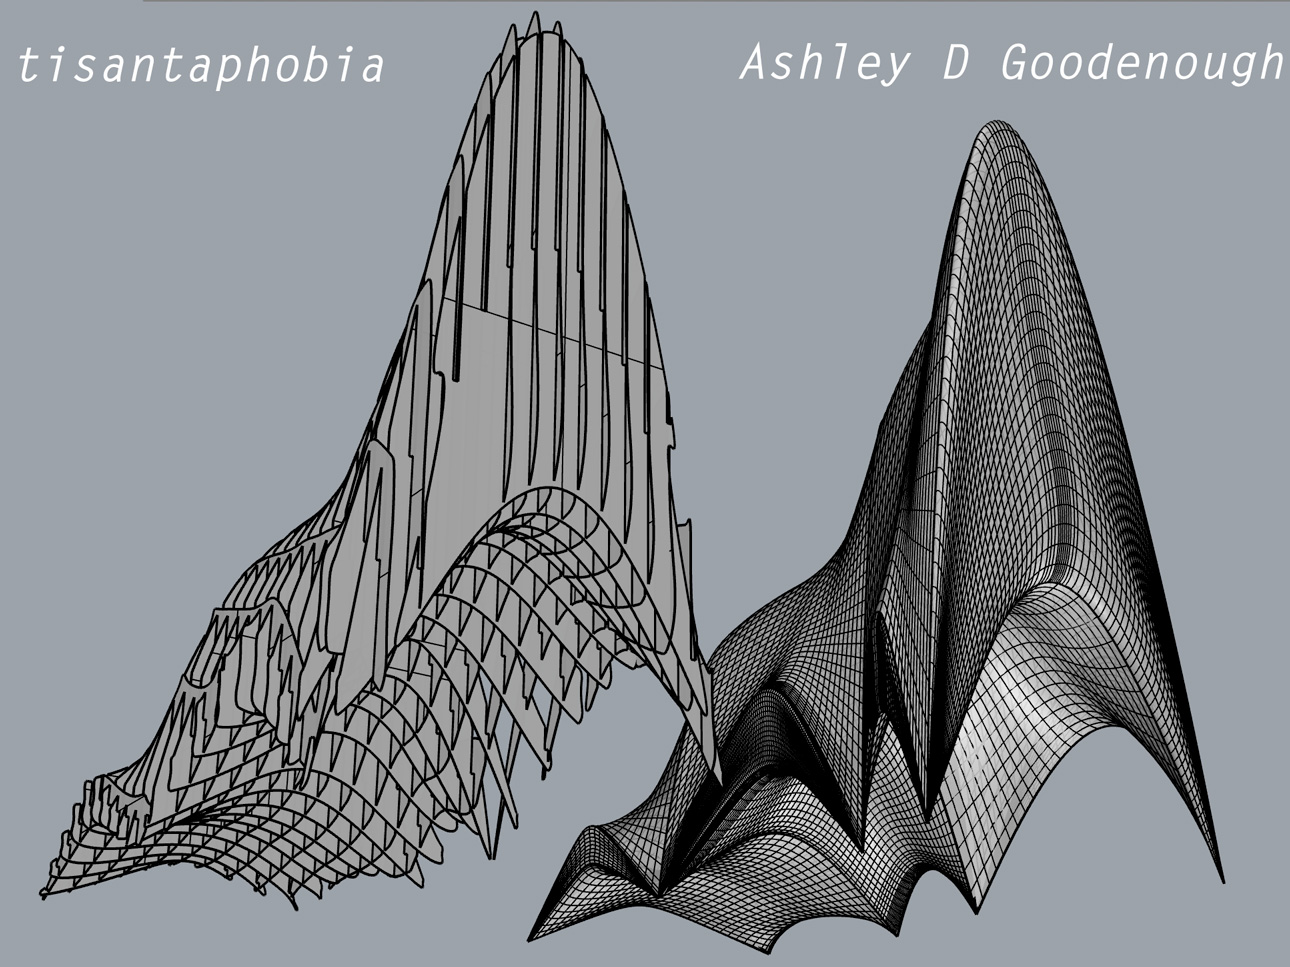
Concept: My waffle structure is called “Tisantaphobia,” which is a fear of tents. Inspired by the discomfort and anxiety some people (like myself) experience when attending formal events, this architectural structure was designed to feel imposing, monstrous, and kind of like a giant trapeze tent beast. 
Modeling: For creating the mass structure, I used Interpolate Point Curves to draw my initial outlined forms that I would build my surface from. I used CurveBoolean and Conic to get the curves all connected and angled correctly. Then, I used NetworkSrf combined with a very few sweeps to build the surface. Contour in both x and y directions got me the basic waffle structure I wanted, then PlanarSrf and ExtrudeSrf made them solids. I used the very buggy CutMyRibs script to create notches that had to be cleaned up extensively (Extend and Split), then the MassiveUnroll script to easily lay them out on the ground plane before placing them strategically on 24x48" reference planes for laser cutting. I wanted to build this as large as I could using the 24x48" 2ply cardboard I had access to, which seems crazy. I very much like the idea of keeping this piece, and it doesn't feel imposing and threatening as a small maquette. 
Materials: I used 2ply cardboard for this project, because it's structurally sound for a large build, and since I didn’t want the print to get more expensive than it had to be (disregarding the fact that it was going to be expensive anyway due to laser machine processing time). I may decide to do a very small model next in two different types of wood, but the end result would have a completely different feel to it. In Keyshot, I used walnut for the X direction and ginger bronze paint for the Y direction, because I like the way the two materials contrasted in specularity but paired nicely in color. Despite its imposing feeling, I still wanted the piece to be beautiful and majestic as a waffle structure, especially when envisioned as a very large sculpture. I also did extra renders using Keyshot’s occlusion material, then overlayed the images in Photoshop using the multiply blend mode. I then placed my renders within images I took of the ATEC building, to put the architectural piece in its potential place of display. I’d like to see this built large enough to walk under. For my fabricated piece, I ended up using plaster fabric to provide more structure to its feet before I eventually paper-mached the whole thing. The paper mache process took much longer than I thought it would, considering its size and the rainy weather we've had the last few days, which made it take longer to dry and set. I then painted the entire structure with a white satin exterior paint to make it feel more tent-like again.