Wednesday, April 27, 2016

Stefan Babick: Serial Slice - ProtoXeno

ProtoXeno


Inspired by H.R. Giger's Xenomorph and the costume of Daftpunk's Guy-Manuel de Homem-Christo, I set out to design a headphone stand that could stand on it's own when not sporting headphones. A theme of rounded shapes was a set to contrast the rigid angles of my previous project and to reduce fatigue on the ear-cups of the headphones placed upon the stand.


Since this was to be a functional piece of work, I needed to obtain measurements of my headphones. I wanted the headphones to be completely retracted into the headband, with the ear-cups separated to provide just enough spring to stay in place on the stand. I decided the ear-cups should be about half the distance from each other compared to normal use to reduce wear.
With the measurements, perpendicular curves were created in front and side profile. A Split and Mirror were used to make sure that the left and right curves matched symmetrically.


Once I had the two curve profiles to my liking, I Lofted the Curves and rebuilt the surface. I then selected the bottom control points and brought them up along the Z-axis to create a cavity that the stand would flow into.


The needed surface detailing and I wanted a wanted a wrapping effect like a hand grasping a fist. To obtain this, I use the Helix tool to generate a curve that would be swerve left and right along the Z-axis when viewed orthographically.


I projected this helix curve through the surface of the head. The head was then Split along this projected curve. The Split wasn't clean with several surfaces being created. After joining adjacent surfaces within each half, I was ready to make the last adjustment to the head.


With the larger of the two halves selected, I adjusted with ScaleNU to make the surface larger. It took some time to get the settings right, but I was able to use BlendSrf to join the two halves together. 


It was time to create the stand. I started with two rectangular curves which were then blended together to obtain a gentle sweep to the profile.


I then used the Twist tool to add more flow to the stand. To avoid clipping between the jaw of the head and the volume of the twisted stand the head was lifted long the Z-axis. The top stand surface was then extruded to intersect with the elevated head. With the volumes aligned to my satisfaction, it was time to place the cylindrical volumes that represent the alignment dowel rods and slice the model at 1/8th inch thick intervals.

While laying out the grouped serial slices of the model, a number of slices comprising the jaw and back of the head would need engravings to align the slices below. The slices with engraving were to mirrored to place the engraving on the bottom of the slices.

Once laser cut, I started placing the slices onto the wooden dowel rods. There were several spots where the laser did not cut through due to inconsistent wood density. The spots were in stark contrast with the burnt edges. Matching colors, I used a brown marker to conceal the spots.


I went baltic birch wood for its subtle wood grain and light color knowing it would contrast nicely with the burning of the laser. A 1/8th inch thickness would provide a higher resolution to the silhouette, particularly in extrusion along the face of the head.


Rafael Garcia: Pepakura

Created in Maya, exported to Rhino for further editing.
Concept: The low poly design of my mountain sound wave came to mind for this project. Originally the mountain was 300 polygons, but for this project I lowered the count to 120. I'd like to make this pepakura into a midi touch controller.
In the pepakura program I cut ring-like loops going downward from the peak to the base of the mountain. This helped with construction greatly.


In Keyshot I used a metallic material to give lighting to multiple faces of the model. I placed a bump map of granite on the blue mountain to give it a bit of texture.

With the finished piece, I'd like to attach touch sensitive midi controllers on the faces so that the mountain could essentially become an instrument. Adding triggered lights to the panels would also be great.

Tuesday, April 26, 2016

Julio Romero: Pepakura


Last semester I made a land turtle for my final, so this semester I wanted to make a sea turtle. Instead of only using quads like last time, I wanted to distinguish the shell from the body using triangles. I also wanted to try to add some details to the shell.
I imported the original turtle file I used for my waffle structure project from Rhino into Maya so I could manipulate the vertices. The transfer between programs created a couple of problems, especially the areas where the shell and fins connected, as well as making a couple of triangles. I deleted the triangles as well as the problem areas, and then reconnected the fins using the bridge tool and merge vertex tool. After that I used the multi-cut tool to create new triangles that moved down the edge loops in a logical manner. I made small indentations in the shell by selecting edge loops and chamfering them, and then selecting the middle edge loop that was created and either scaling them inward or pulling them down from their normals. I also made two small stands by duplicating faces on both ends of the shell and extruding them downwards to the same height. I imported an .obj file into Pepakura Designer and made cut lines to separate the different pieces into edge loops and scaled it up to make the model about 4 feet long. When I exported that file and brought it into Rhino I removed a majority of the edge numbers because I prefer the look of it without them. The only ones I kept were the ones on flaps where it connected to itself and where it connected to another piece.
In KeyShot I used two different materials: one for the shell and another for the body parts. I used a rusted metal for the shell to give it a hard brown look and a soft green plastic for the body to give it a more tender feeling. I changed the background color to blue to make it look like it's swimming, and used a top and down view for shots of what it would look like depending on whether you're on the water surface or deeper.

Monday, April 25, 2016

Alyssa Phillips: Prosthetic

To view presentation, click the link below:

Prosthetic Powerpoint

Inspiration: I got my inspiration for my prosthetic design from what I remembered about studying smooth muscle tissue in anatomy class. It has this wavy look to it with random nuclei all about it. I named my prosthetic "undulex", based on the undulation of waves and the ending "lex" made me think of "flex". I slightly modified the foot, but I mainly focused on my texture for the main part of the prosthetic covering the pipe piece.


Technique: I went about building the main body of the prosthetic in a number of different ways, trying to figure out what the best was to go about doing it. I played with all kinds of curves, and manipulated them in various ways, from extrusion, to offsetting, trimming, lofting, and sweeping. I was finally able to get a curved polysurface that gave a subtle hint of a calf muscle along the backside, and I trimmed the top and bottom edges with curves in order to make the structure less stiff-looking. I used an extruded curve to remove the middle chunk of the foot piece, to give the model a more aerodynamic and modern look. I spent a lot of time getting my wavy texture right in order to flow it along the surface of the main leg shaft. I got the main components down, extruded them, and then copied the strip a number of times. I was then able to get it onto the surface, and ended up taking out the original surface underneath, so that all that was left was my wave-like structure.

Rendering/Materials: I stuck with plastics and metals, and a little but of axalta for my materials in keyshot. I would imagine the prosthetic to be very light, yet strong enough for everyday activities. Plastic is also slightly malleable, in order to get the prosthesis on and off. If it became a reality, the wave-like casing would attach to the pipe by a series of strong magnets that would connect from random sections of the inside of the casing to parts around the pipe. That way, if the user wanted to switch out the casing for another one, they could easily just pull it off and attach another.


Alyssa Phillips: Pepakura

Inspiration: I took my inspiration for my pepakura model from my grandmother and aunt who both passed recently. I had been wanting to do a project for them the whole semester, and I finally decided on a pair of wings. I wanted them to be slightly abstract, and resemble the shape of a heart. I designed them with the idea in mind that they would be a few feet long and hang on a wall. Therefore, I had to make sure that the backs of them would lay flat and be unaffected by the polygon mesh that extrudes forward at certain points. 

Technique: I used a few techniques to get the desired effect of wings. I created a free form curve that I placed a planar mesh over, and then reduced the amount of polygons. From there, I moved around the vertex points and pulled a few of them up on the z axis to give the wings some 3D texture. After I got one wing done, I simply mirrored it on the other side. Slicing the model in Pepakura Designer proved to be a little difficult as far as trying to get the flaps to come out right with no overlapping edges. I finally ended up with the pieces below:


Turnout/Model: I did not extrude the model enough for the depth to be processed, and so my wing parts came out as 2D objects that I had to manipulate and attach to a separate back panel in order to get the desired effect. I rendered the model with some rose colored stone, as well as some glossy, black glass to show the texture a little more. After I finished putting the model together and taping up the edges, I went ahead and painted it with a walnut colored stain with the idea in mind of having a polished piece on the wall with a wooden effect to it. The piece came out with a little more texture and curvature than how it looks in the renderings, but I like the abstract feel that it has. This is what turned out:


Tara Intyrath: Waffle

Concept: For this project I wanted to go back to the oriental theme as it is my favorite art genre. I also always wanted to make a bust out of something so I decided to go for a geisha design. Geishas are really elegant and beautiful to me with profound features so I thought it was perfect.
Technique: For this model, I used the same techniques for the wolf bust from the previous project. I started by using references from google images to create the curves for half of the bust, created a surface using those curves, copy and mirror that surface, joined the surfaces together, and patched the bottom and created a solid with the surfaces. This was only for the head and the shoulder part of the model though. I wanted the hair to be a whole separate entity that could be removed so didn't have that joined with the head. For the hair it was a much simpler process. I created curves that moved a long the shape of the head how I think the hair would fit and flow and used pipe to make a solid. I even used the torus tool to make the bun on top and then boolean joined all the hair parts together. To make the hair a separate entity and removable I made a boolean difference from the hair using the head without deleting the solid used (the head) and thats how its able to fit so nicely on top. I made the waffle slices using the contour command and used the rib command that was provided for us on blackboard. I originally was going to make the hair the same angle as the head and shoulders but I decided it would look better if the waffles slices were angled instead of flat to show contrast between the two elements.

Materials: For the actual real life model, I used plywood for the head and shoulders and the hair is MDF. In the keyshot renderings I decided to use simple translucent plastics for the hair and head/shoulders but differing colors to again show contrast and differentiate the two.

Tara Intyrath: Serial Slice

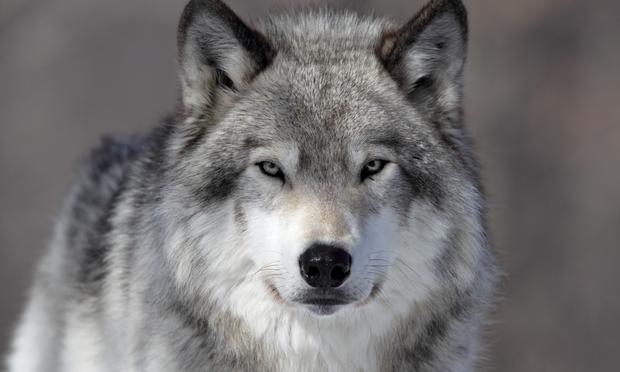
Concept: For this projects concept I wanted to focus on my favorite animal, wolves. I have been in love with wolves since I was a child after reading a book about them for a school project. They fascinate me and I have yet to design anything using a wolf so I thought to take this chance. A full wolf would have taken me far too long to model so I decided to go with the neck up of the animal.
Technique: I had a lot of difficulty working with this model as I haven't modeled something so organic before. I first took the approach of trying to edit a sphere or a box and shape it into that of a wolf head but all the vertices were very confusing. My second approach was to create curves of the wolf using google images as references and to create surfaces off those curves. I found that much easier to do and divided the head into four parts; the nose, main face area, the neck, and then the ears. I had lots trouble getting sweep or surface network to work properly or have an outcome I was satisfied with. It turned out a lot of my curves were not intersecting properly so I learned to make the curves into segments to get a better fit and then joining those segments together to make things work properly. I ended up using sweep2 for the whole process to create the surfaces. To make the swirls and detail of the eyes I made a flat curve and used project to get the curves to wrap around the model, offset them, made them into surfaces then solids, and boolean differenced them. I used various other commands such as join, to join my curves and surfaces once I created them, cap planar holes, and boolean join. Creating the contour lines, unrolling them, and making a spread sheet was the easy part of this project.
Materials: For the laser cut material I decided to stick with the .25 cardboard available at the Fab Lab as it was a cheaper solution and I also wanted to see how the ridges or the insides of the cardboard would look once cut out, hoping it would give an interesting outcome. Gratefully, it came out very well done. My model due to its shape and size has a lot of shapes and parts that aren't in one piece though in the same layer slice which is why I had to go with four rods. I decided to use threaded rods so I could tighten the slices together and ended up liking the "Frankenstein" look of it so left them in. I am very happy with the results of the real model. For my keyshots, I decided to choose a clear acrylic/plastic material and a metal material. I chose these two materials because I wanted to see what it would look like in various materials and hope to maybe make a serious out of these wolf heads.