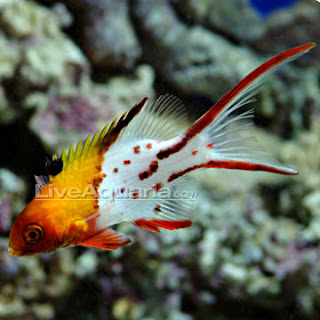
Concept: The Lyretail Prosthesis is a (BK) below-knee design for scuba diving. I’m working with a friend who is a dive master and fairly recent amputee to nail down the functional details of the design, but the concept and modeling have all been done by me. For instance, things I have consulted him on so far include: type of ankle joint and range of motion, height and adjustability of the pylon, the meeting point of the accessory with the socket, easy adjustability of the heel strap, and the openness of the flipper. The name “Lyretail” references a family of fish known for their bright coloring and slightly asymmetrical tails, and it’s also a fun play on words (given that a scuba fin is a fake tail of sorts). The overall shape of the fin mimics the fin of a lyretail hogfish, the materials imitate the coloration of a tang fish, and some of the surface details are inspired by the eagle ray.
Modeling: Keep in mind, this is still in progress and there will be more to come! A simplified modeling breakdown of the work so far:
- Control Point Curves drawn from three perspectives with my concept art as reference (PictureFrame command), then made sure they intersected for later surfacing
- Interpolate Points Curves to create supporting cross sections in the flipper
- Rebuild all curves to simplify as much as possible without losing basic design concept
- Curvature Graph helped to ensure curve continuity
- Split the curves around the ankle, so I could build the leg and flipper separately. This was important, given that the flipper was going to be much more complex than the leg needed to be.
- NetworkSrf to get my first surface! Rebuild some more. NEVER STOP REBUILDING.
- Sculpt the surface with RecordHistory on, and use my new set of curve manipulation tools that Professor Scott helped me set up. (MoveUVN, SelU, SelV, etc.)
- Zebra to check on my surface UVs and make sure it was smooth
- ExtractIsocurve to pull some new curves from my surface and get it even smoother
- Drew interpolate point curves from side view onto the leg and then Projected, and Trimmed the surfaces I didn’t want (trick: if you keep your old surfaces exactly where they are and hide them on another layer, you can use Untrim if you ever want your original surface back)
- OffsetSrf to make my shell a solid with a consistent, defined width
- A combo of BlendSrf and FilletEdge to make the edges of my solid fluid
- ShowEdges constantly to check on surface nudity (no naked edges!)
- DupEdge to get the ends of my leg connections to the ankle joint, then Boolean2Objects/BooleanUnion combination and some Sweep2 to get the irregular cylinders
- Patch to close the bottom of the flipper, JoinEdge to close gaps with very small tolerances
- Side curves Projected onto flipper, then Split to keep certain sections
- Sweep1 with several cross sections to build the strap
- Curves then ExtrudeCrv and FilletEdge to build the button, plus BooleanDifference and OffsetCrvonSrf to finish the ratcheting buckle
- Curves Projected on top of flipper. Trim, then Loft and FilletEdge with handles
- InterpolateCurveonSurface and Pull to draw the gills (only for a change in material)
- CreateUVCurves, ArrayCrv, and FlowAlongSrf to make the eagle ray design on the front of the leg
- Explode and Join multiple times to make sure my dots were all correct so I could apply a different material to them in Keyshot
ghosted
no nudity
FlowAlongSrf
material assignments by layer
Materials: I’m testing out a few different styles, but for now, some fun preliminary renders!
- The leg portion is metallic paint (used so I could control metallic coverage, color contrast, and metal roughness)
- The flipper and the eagle ray detail is tire rubber with the roughness turned down, to look more like a realistic scuba flipper material
- The socket is a carbon fiber gloss material with the scale turned way down, the edge width and weave noise turned up to look more organic, and contrast turned down. I got it pretty close to the material actually used to create sockets for stumps.
- The pylon is a steel ultra scratched material
- The SACH (solid ankle-cushion heel) foot is a soft rough orange material with some translucency that sort of mimics skin, much like a real SACH foot
keyshot materials #1 (diffuse layered with occlusion pass)
keyshot materials #2 (diffuse layered with occlusion pass)
Next Steps: Modifying the ankle joint to be lock-able at multiple angles for swimming or walking, and modifying the pylon to have adjustable height. Potential modification to flipper to make the top flatter, courtesy of a suggestion from a classmate who is a competitive swimmer - I'll discuss with my dive master about whether he thinks it would greatly affect performance.


No comments:
Post a Comment