Showing posts with label Assignment 5. Show all posts

Saturday, April 29, 2017

Brandon Wehenkel: Waffle Lamp


Ghosted Black


Ghosted Colored


 Ghosted Black and Colored


Concept:
My initial idea was to create a lamp with a lid that also doubled as a frame for my engraved object.  However, with the numerous times, I restarted and changed my idea I had to ditch the idea of a frame for the lamp.  So I made a separate object which I talk further about in my engraving blog post.

I was inspired by Quinn Baldacci's rocket lamp with the lid.  I thought that was an ingenious idea to create a cavity for the light bulb while also keeping a design seamless and uninterrupted by large holes.  I created two designs that integrated the lid aesthetic. First was recreating the idea from Quinn Balacci's rocket and second was the bell shape inspired from Taiwanese Buddhist Temples known as a Pagoda.  I used an actual A-Frame design for the body of the lamp.

I saw the pyramid shape in Tamara Brennan's pyramid lamp and DISENO Y MANUFACTURA DIGITAL CAD/CAM's clear (acrylic) hanging lamp.  Their waffle style was what I wanted to replicate: using the corners as the rib for the horizontal cuts, plus the hanging lamp was gorgeous.  I would have enjoyed incorporating chains into the project, but I made a decision to make the lamps static on a flat surface instead.  I didn't have to worry about gravity and all the annoying small holes for the chain links.

I also was planning on using two materials for this project, so I also needed to figure out which ribs and which cuts were going to be what material.  Unfortunately, acrylic sheets are not cut to a traditional thickness measurement that matched wood sheets, so I had to be precise about where my inset slots were going to be.


Laser Cut Sheets


Modeling Technique:
I used polyline a majority of the time to create unique shapes.  I used curves to create an A-frame which I then polar arrayed 10x to get the style I wanted with a the flat triangle/ asymmetrical rectangle, I Boolean Unioned, Boolean Differenced, Boolean 2 objects multiple times.  I used project to slice the lids and the base.  I alt tapped to duplicate shapes.  I used spiral, twist, and pipe to create the light bulb inside as well as Interpolate Curve.  I used revolve to create the lid.

I had a hard time deciding which style I wanted.  I was going to make a frame for my engraved tile that was built into the lamp, but it just looked ugly.  I spent a lot of time deleting and revising my ideas.  The three styles were mostly from manipulating array polar and boolean 2objects.  I really wanted to incorporate an A-frame style into the design with a pyramid.  I ditched the pyramid idea because it covered up a lot of the triangles that were created from the polar array also I used contour multiple times with many failures with that pyramid shape.  Contour was used after I figured out which design to work with.  I have two materials, so I alternated the lid and the base as wood for a size difference of .1875 inches apart.  And the middle part which I call the torso is .220 inches apart.  I hope that small difference in thickness won't matter.  I felt like I might have messed up somewhere in deciding where to cut due to the size difference.

I used surface --> planar curves as well as extrudeCrv several times in the contour and section process.  I messed up a lot and needed very precise measurements when creating the complex waffle structure.  I followed the tutorial, as well as the class discussions.  I used Orient for the piped ribs.  I used split to cut them.  Again I might have messed up somewhere, so I'm hoping the print works.  This design is very abstract to me, and It has become an ordeal for me when I can't quite figure out how the slices will fit.

I also hope the hole I created for the cord works as well.  I didn't like that the cord could just freely sit anywhere through the design, so I had to create a base for the lightbulb to sit in.


 Keyshot 1 w/ Reference


 Keyshot 2


Materials:
In Keyshot:
I used glass for the vertical pieces and the glass on the lightbulb, I used hard plastic for the lightbulb base and soft plastic for the cord and textured wood for everything else.  I changed the colors of everything except the glass.
I liked the bump on the wood, so I made it slightly more pronounced.  I think originally it's at 0.5, I just bumped it up to 0.6.


 WIP


In real life:
2 - 24" x 48" x .220" sheet of acrylic, $56 each
5 - 24" x 48" x .1875" sheet of MDF.  $7.42 each (didn't end up being .1875 for all of them)
Home depot advertises, Medium Density Fiberboard (Common: 1/4 in. x 2 ft. x 4 ft.; Actual: 0.216 in. x 23.75 in. x 47.75 in.) and even that is still wrong.
Westinghouse Snap-in Candelabra base socket, 6'.
1 LED Lightbulb.
1 bottle of Gorilla Glue
3 bottles of Locktight Super Glue
Tears


Keyshot 3 w/ Cut Sheets


This lamp design was definitely not for beginners.  I had experiences I will never want to reproduce again. MDF is not worth the effort.  It's too fragile, and Home Depot does not cut every 1/4 slab the same.  I had 3 different sizes when I bought 5 boards. Needless to say, none of my slots worked with MDF.  It just broke or became very brittle. I think one vertical piece survived intact.


Lamp 1


 Lamp 2


Lamp 3


Friday, April 28, 2017

Brandon Wehenkel: Pepakura


Ghosted Black


Concept:
We had two ideas.
Idea 1. - Jeremiah and I wanted to create something similar to this.  We experimented with five-sided shape, a six-sided, seven-sided and concluded with a five.  Jeremiah liked the idea of twisting the shape slightly, so we ran with that in the model.  Jeremiah also likes illusions so this concept was perfect for his interests.
Idea 2. - We also wanted to create about 30 squares and hang them from the ceiling in a way that looks like they had exploded from one central space.  The viewer would be able to walk around the space and see it from all sided differently.  This plan was much more ambitious and it would be an amazing task to perform but the process could have taken much longer than two weeks, so we chose to make one shape with many interior perforations instead.

Keyshot 1


Modeling Technique:
Jeremiah sculpted the model with truncated pyramid with five sides.  He then created a stamp that was used to create the interior cutout.  He just duplicated the shape seven times and scaled and moved to create steps.  He also rotated each layer about 10 degrees each.  He used Boolean difference to make cuts both inside and underneath.  The shape was not quite finished when it was initially cut from the inside so I made the decision to slice the shape on the side.  Jeremiah wanted there to be at least 2 large cuts which gave the shape a unique backside.


Keyshot 2


Materials:
In Keyshot:
I used marble for the exterior because I loved the shine the lighting gave on the object.  I had hoped to recreate the same gloss but I didn't find a spray paint that was full gloss, only semi-gloss.  The interior colored sections I used soft plastic for the material because it looked similar to the paint texture.  I did not use a bump map.


In real life:
We used cardboard bought from the fabrication lab.  The blue acrylic paint was applied to the internal cut faces.  We used painters tape to cover up the connection points of the pepakura.


 Gluing


The entire building process was a bit tedious, but we managed to get it finished with only two sessions.  Jeremiah did most of the gluing, and we split taping. I painted and folded pieces.


Interior


We started by painting blue acrylic paint onto the pentagonal faces.  I made sure to label the faces with their corresponding numeric values on the back of the cardboard for easy assembly.  The flaps were much smaller than we had anticipated so instead of waiting for the super glue to tack together, we used hot glue.  The project, for the most part, was a simple task from then on until we put on the exterior faces.  Something didn't translate right from the 3d space to real space.  The thickness of the cardboard wasn't translated in real space so when we assembled the interior cuts, there was a significant gap.  It was too big to force the pieces together, so we chose to create L-pieces cut from scrap cardboard.


 Favorite Angle


After it had been assembled, we covered up the holes with paper and cardboard bits, to save the blue paint from being ruined and spray painted the exterior.  We also attempted to color the gap with white spraypaint.


 Distance


Monday, November 17, 2014

Andrew Kelly: Project 5: Waffle

Thematic Description
For my waffle assignment I wanted to make something that could be a monument at the right scale, but with movable parts, since all the projects to this point have either been single-piece or a system of just theoretically connected pieces. The idea of a ball-socket joint seems like the simplest abstraction of a system complicated enough to make the misaligned waffles I desire.

References
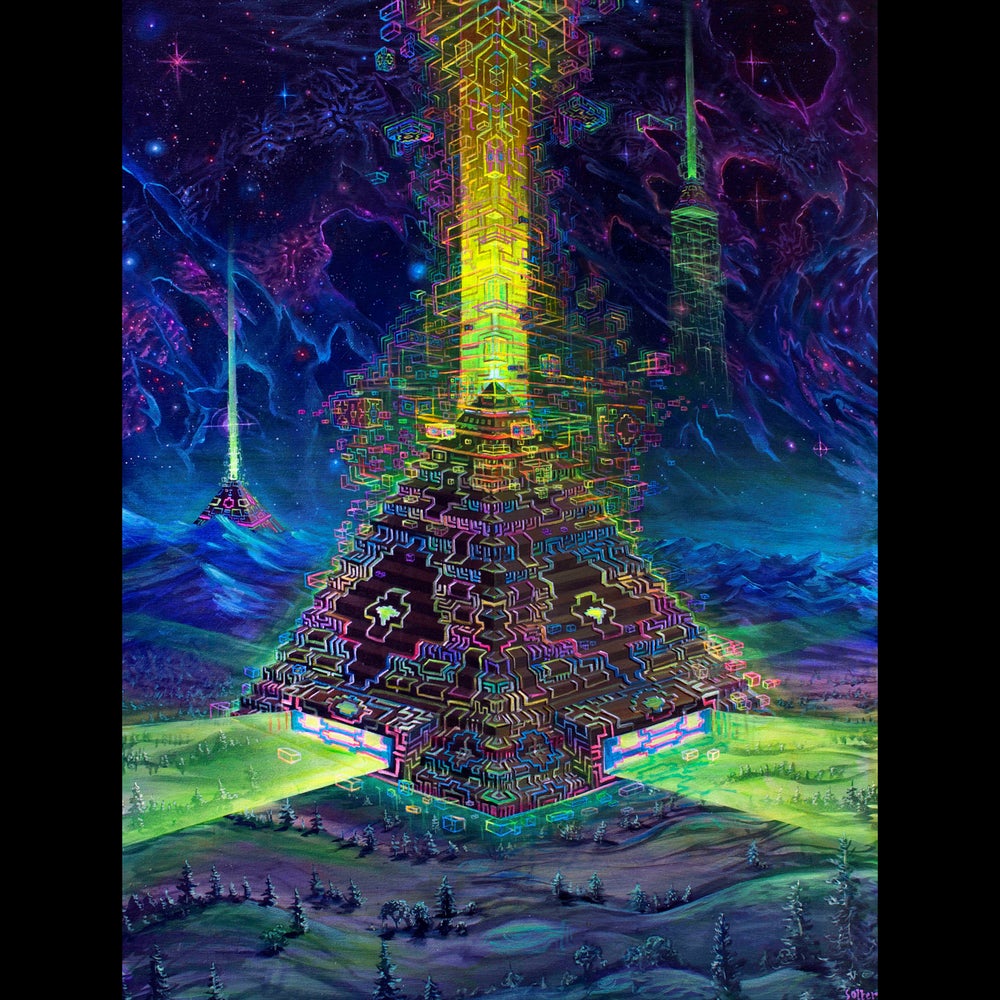
I was inspired by a number of pictures on reddit.com/r/infrastructureporn (beautiful photos of infrastructure from 'round the world), as well as this piece: (original artist = Johnathan Solter)
specifically the with the pyramid at the bottom and the spherical mass of energy near the top.


Rhino captures
 Something strange was happening with the display, couldn't get my rhino to handle transparency properly, shaded, wireframe, or ghosted, but instead the entire object gets rendered with the faces more parallel to the camera being more visible.

Keyshot Renders


Assembly Complete!

Friday, November 14, 2014

Nicolas Vallier - Project 6 - Lamp

Test Shapes:

TARDIS (from Doctor Who) Inspired Model: "T40"

"Cragg"

"Helmet"

"Unicron"

 This is the one that I decided on. 

Inspiration:
Inspiration for this piece came from a device on Doctor Who called "The Moment," which was a box/weapon that was so powerful, it became sentient. 

In regards of design, I couldn't make the gears on the side of the box prominent on the model if it was sliced, so I made it a prominent feature of the top part of the piece.

Naked Edge Check:


Update - The Print Out:


Sunday, November 2, 2014

Nicolas Vallier - Project 5 - Waffle ("Handles")

For this project I took some design cues from the Cybermen (of Doctor Who). I thought about making a shell of their outer casing for their face and using it as a wall mount. It could probably be used as a night light, lamp, or other fixture. 


Rhino Screenshot with no Naked Edges:

Rhino Screenshot 2 (backside): 

I'm having trouble with exploding the y part for laying into the boundaries. 
Keyshot renders coming when I can get access to Keyshot at UTD.

Update:

Keyshot Images


2nd Update:
I redid the slot parts to better fit my board (to .16). Also, due to problems with the middle two pieces, I removed them and replaced them.

Layout:

3rd Update: 
Due to the unroll/cut ribs script acting up, I had to edit the middle of the head so that the ribs would appear. Also, on the final model (the printout) I had decided to remove the top rib, because it wouldn't work out,


The Print Out: