Showing posts with label dravenashornhejl. Show all posts
Monday, December 5, 2016
Draven Ashorn-Hejl: 3D Scan Project - Isabelle Statue
Labels:
3d,
3D Scan,
ashorn,
ATEC,
atecfabutd,
draven,
dravenashornhejl,
Fall2016,
hejl,
scan,
Scanning
Draven Ashorn-Hejl: Box Project - Starlight
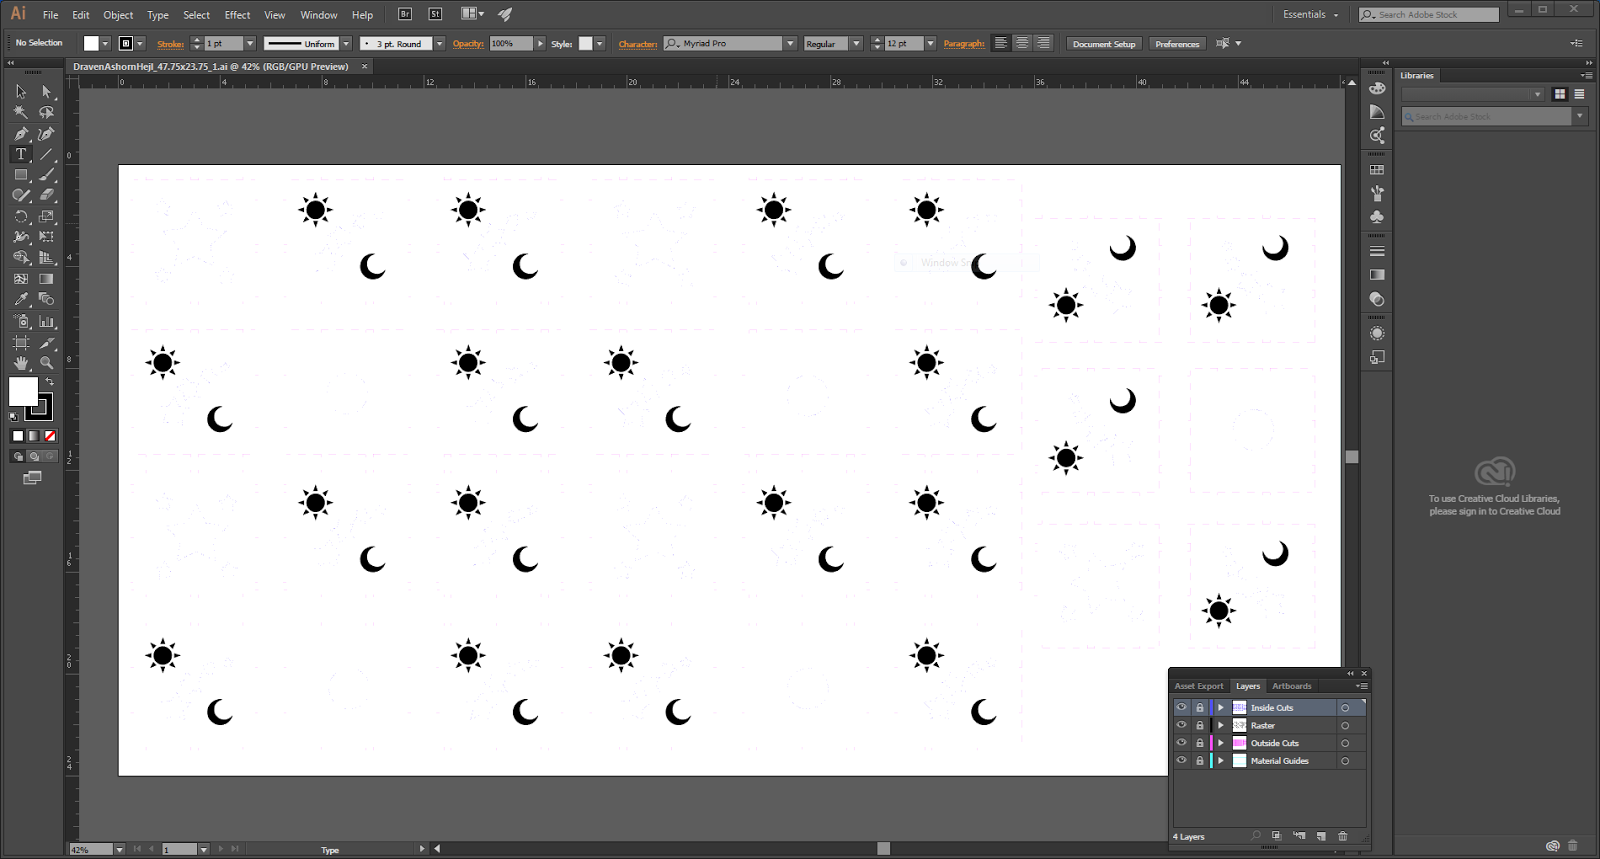
Techniques: I used Box Maker to create the outer shape of the box panels, then imported that into Illustrator, where I added the Star shapes for inner cuts and added vector images of the Sun and Moon for raster engraving, and also cut a hole in the bottom to place an electric tea light to light the box.
Materials: I bought a sheet of plywood from Home Depot that was just barely smaller than the laser cutter window for the material for the box itself (out of which I got 5 boxes), and used the UTD Fab Lab's laser cutter to do the cutting and engraving of the panels. I then used superglue to ensure the boxes held together and added a small electric tea light for the illumination.
Labels:
ashorn,
ATEC,
atecfabutd,
box,
draven,
dravenashornhejl,
engrave,
engraving,
Fall2016,
hejl,
laser
Draven Ashorn-Hejl: Laser Engraving Project - Skateboard
Materials: I bought one of the skateboards Professor Scott recommended because I trust his judgement, and used the laser cutter at the UTD Fab Lab to handle the engraving.
Labels:
ashorn,
ATEC,
atecfabutd,
draven,
dravenashornhejl,
engrave,
engraving,
Fall2016,
hejl,
laser,
skateboard
Sunday, October 9, 2016
Draven Ashorn-Hejl: Week 8 - 3D Print
Concept: My favorite game is Final Fantasy XIV, and in it your character wears a lot of accessories, including a pair of rings. One of the armor sets in the game is the Halone's Champion set, an angelic set of armor with a focus on wing imagery. Unlike many sets of armor in the game however, the Halone's Champion set does not have an accompanying accessory set, so I decided to make my own idea of what the rings of the set would look like.
Process: For the model of the ring, I kept things simple, as in Final Fantasy XIV their ring designs are all simple bands focused on highlighting one feature. In this ring's case, the focus was on the wings at the top, which I made by manipulating a sphere with Gumball until it was flattened, then cut a notch into it using BooleanDifference to add detail and some dimension. I then grouped multiple "feathers" together into a wing, then mirrored the first group to the other side of the ring to make the matching wing. To keep the wings solidly attached to the core band, I used simple cubes the length of the band to fill in the small gaps between the feathers. For some extra detail and flair, I added a 7-sided pyramid to the top as a small decorative gem, and cut small gaps into the core band of the ring so that it wasn't plain and flat all around. After the model was printed, I hand brushed on 2 coats of XTC-3D and then hand painted it with acrylic paint to finish it.
Materials: In Keyshot, I used Brushed Metal in gray and yellow for the core ring band and the wings respectively, but tweaked them to be more silver and gold. For the gemstone I used Blue Gem Stone, tweaked to be less transparent and rougher, with a deeper blue hue. For the physical ring, it was printed with basic 3D printer plastic, and I hand painted the ring with acrylic paints.
Monday, September 12, 2016
Draven Ashorn-Hejl: Week 2 Duck
Concept: Whenever I think of a duck, thanks to reading the webcomic El Goonish Shive I generally end up thinking of those hilarious little demon-themed rubber duck toys. Since I am ridiculously new to modeling, a simple toy seemed like an attainable goal, so I went for that.
Modeling Techniques: Since I don't know much about 3D modeling, I mostly followed the tutorial. I used multiple spheres and then deformed them to create the body, head, bill, and eyes of the duck itself. To keep from exactly copying the tutorial, I focused a bit more on trying to make spread wings on the duck. I also added horns for the signature touch of the demonic duck idea.
Materials: For the materials, I simply used the Rubber material for all of the pieces due to my goal being to replicate a toy rubber duck, and recolored the material for each individual part to create the look and coloring I was going for.
Draven Ashorn-Hejl: Week 1 Castle
Concept: This is the first time I'd ever used a 3D modeling program before, so I wanted to keep things nice and simple. In many videogames that use sprites, a castle is depicted as a wall with a single keep inside of it, so that tends to be how I think of them. It is this simple idea that I went with to recreate in 3D.
Modeling Techniques: As this was the first thing I'd ever made with 3D modeling I kept things extremely basic, using only basic cubes, cones, and a cylinder to make my castle, using specific number coordinates to place each piece to keep it from becoming a mess. To keep it from being too boring, I used Boolean Difference to cut a gate into the outer wall and hollowed out the central keep to create a 2-story inside, and I also added windows to it so you can see inside.
Materials: For my castle's render I went with an Obsidian texture to give it a dark sheen, enforced by me removing the marbling by customizing the texture to be just the pure black. I also used a glass texture for the central keep's windows so that they could keep their function of letting you look inside the keep.
Subscribe to:
Posts (Atom)