Showing posts with label duck. Show all posts

Monday, January 30, 2017

David Rake - Week 1 - Duck

Concept:
As a fan of Phineas and Ferb, or at least when I was younger, I chose Momo from the series which is a stuffed duck-type character.


Process:
The Duck body is a sphere stretched out with the use of control points. The mouth is two torus(es?). The feet are one disc that was manipulated then duplicated. The eyes both have an indention to make a upside down v shape pupil but I couldn't quite get it deep enough to show well.


Materials:
I made multiple parts the same color because I liked it looking simple and being able to focus on the indents and curves. As best seen in the top photo of the two.

Sunday, January 22, 2017

Brandon Wehenkel: Mandarin Duck


 Black & White


Color


Concept:
If you google Mandarin duck you can see a bunch of very vibrant and pretty ducks.  Looks like the most colorful duck I've ever seen.
I like seeing those photos of cute animals in places you don't expect them to see so I wanted to make a duck in a flower pot.


Keyshot 1

Modeling Techniques:
I followed the tutorial for the head.  I used rebuild, projected curves, and trim, on the head and neck and used blendsrf to create the connection.
I spent an excruciating amount of time on the head.  I was looking at this image, and this image to make the model.  I used the 3-point eclipse to create the flowerpot.
I duplicated and resized/rotated the body to make the wings and the extra protruding feathers you see when the ducks swimming.  These organic shapes are still quite difficult for me to create.  I find myself individually moving control points which takes a very long time to do.  I need to find a better way of making complex shapes.


Keyshot 2

Materials:
I used various colors of velvet for the bird.  I changed the colors to match similarly to one of the images linked above.  I used black hard plastic for the eyes.  And red hard plastic for the beak.  I used ceramic and changed the color for the pot.  And I used rippled transparent water and changed the water settings as followed:
Refraction 1.33
Transparency .2
Scale 4.045
Bump Height .2
Levels 5
Falloff 1


Keyshot 3


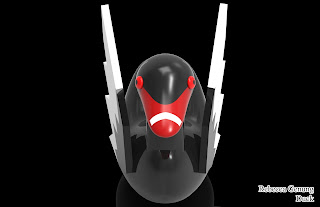
Rebecca Genung: Week 1 Duck


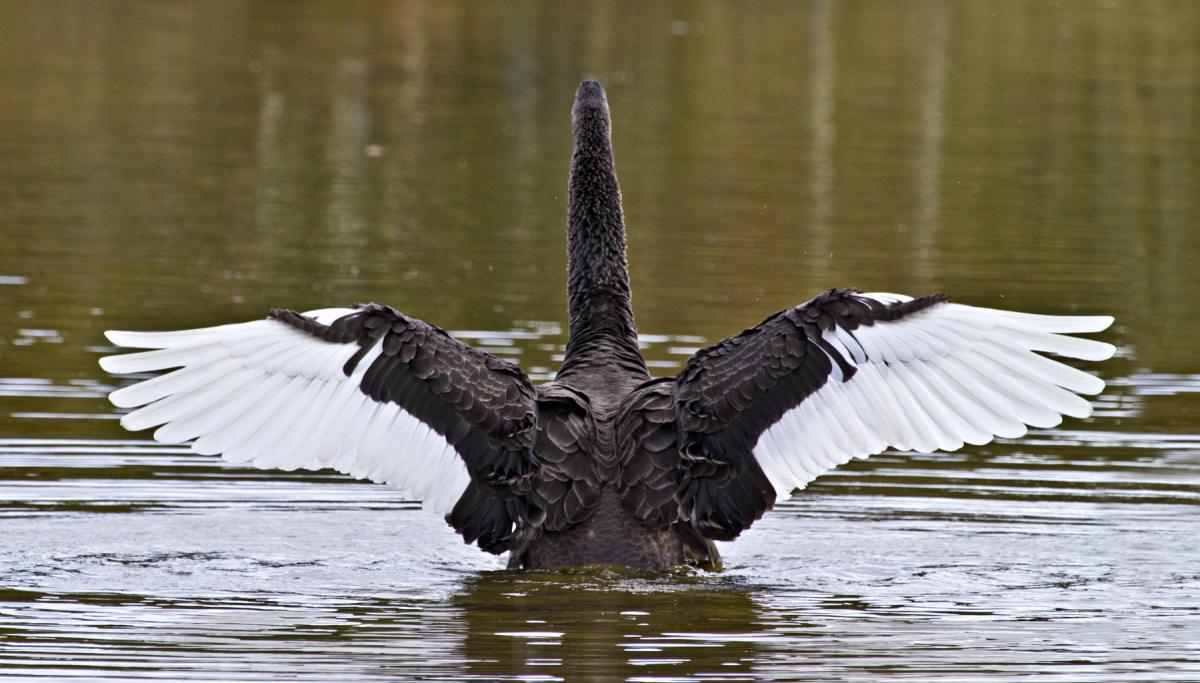
I've always liked the dual imagery of a black swan and a trumpeter/mute swan so I suppose I can say that black swans are my favorite waterfowl (Is that a thing? Do people have favorite waterfowl?). I also thought back to glass statues I've seen in shelves. Normally a swan is either in the heart-neck shape expressed by the birds in real life or they have their wings partially visible. I wanted to emulate the latter. I also find black swans themselves to be very beautiful and underrated.
I'm afraid my model is rather derpy in comparison to the real thing...

I immediately wanted to make a swan rather than a duck and planned accordingly. I made the beak thinner and the neck longer.  I was thinking trumpeter swan at first because their beaks are only one color, but when the tutorial talked about cutting the model and splitting the shapes to have multiple colors I thought about using a swan with more than one color on their beak. I then thought about how black swans have two colors on their wings as well and decided to add wings to the model via drawing them out, extruding, and cutting the two colors. The beak color is also done through cutting.

For materials, I used paint gloss and colored it accordingly. The red of the eye is a slightly lighter color than the red beak. I was thinking about colored porcelain at the time, but I didn't like KeyShot's porcelain texture as much as the paint.

Saturday, January 21, 2017

Saturday, September 17, 2016

Michael Hosler- Week Two- Duck


My inspiration for the duck project was collectible wooden duck statues and decoys, common among hunters and bird enthusiasts. to make my duck, I used solid tools, stretching, point manipulation, orientation on a surface, tangential blending, trimming, splitting, and boolean unions. The entirety of the duck is various types of wood, owing to my inspiration. The head is wood planks and the eyes are herringbone, the beak being light ash. The main body is mahogany because I like to say the word mahogany (no, really). since there were certain things I couldn't figure out to do without taking another entire week and I still needed contrast between body and wings, I simply did a split where the wings would be and rendered them in a different material, black walnut. 


Monday, September 12, 2016

Chelsea Griffin - Week 2 - Duck


Concept
This is Steve. My initial idea was to create a swan as opposed to a duck.  As you can see, I kind of got carried away. While making the swan, the feathers on the wings became a little too complex to execute for me and my newbie modeling skills. I had the body of the swan completed and I was pretty proud of it so I came to the conclusion that I would have to mutate the poor thing. I came up with the idea of bat wings, as those are significantly simpler than birds wings. After that, I decided that this monstrosity needed to have some pretty unique limbs as well, and that's how I came up with the idea for his tentacles. I came to the decision of the three eyes and head spikes in a similar manner. While being created in Rhino, Steve was mainly green and purple, sort of like a dragon. But once I brought him into Keyshot, nothing really seemed to look right in these colors. I began messing with metallics and came to find that Steve actually makes a pretty gnarly robot. And thus, Steve the mutant robot kaiju was born.    

Modeling Techniques 
Although Steve was a bit different from the original duck example, I tried to use most of the techniques that were used in the duck tutorial. For example, for the wings and the head, I used the project tool as well as blend surface to make the body parts blend naturally. I used the project tool for the tentacles as well. The eyes were also oriented on the surface, just like in the duck tutorial. I utilized the mirror tool for the wings as well as the tentacles. The most useful of all in creating Steve was creating the neck, wings, and tentacles using the curve and the pipe tool. 

Materials Used


As I had mentioned before, the final materials I chose for Steve were not what I had originally intended. When messing around with Keyshot, I came to find that scratched metal was perfect for him. I used the infrared gradient material for his eyes to complete the robot look. As for the tentacles, I still wanted that part of him to be natural and organic, to emphasize the fact that he is a mutant. Creepily, I found that the best effect for this was using the human skin texture, which I darkened quite a bit to look a little less human. 

Corrina Spurlin: Week 2 Duck

Ghosted painted black

Ghosted with Keyshot assignments


Concept
The main idea I had when creating this duck was that it would be some form of minimalistic. By forming the body and other parts into simple shapes, or with simple geometry, this was achieved. I also kept this idea throughout the whole composition by reducing the amount of parts that would need to be created. Parts that already seemed connected were combined to continue this theme. I also attempted to make the duck have a more stylized and cute look rather than being realistic. 

Modeling Techniques
The main modeling techniques I used when creating this duck were varying commands relating to the surfaces of the objects. For example, I used commands to orient an object onto the surface of another one. I also used the command Rebuild in order to create the simplistic look. F10 was used in order adjust the shapes of some of the objects. 

Materials
The materials I used for my duck were chosen around the idea of simplicity. I almost used materials that appeared to be toon-like but they lacked depth and seemed too fake. Instead, I ended up using smooth materials that would work well in showing the shapes and edges of the design. The colors I used with the materials followed the general idea of a standard rubber duck but included underlying tones of colors from other objects. For example, the red objects would have underlying tones of yellow and vice versa. 

Draven Ashorn-Hejl: Week 2 Duck


Concept: Whenever I think of a duck, thanks to reading the webcomic El Goonish Shive I generally end up thinking of those hilarious little demon-themed rubber duck toys. Since I am ridiculously new to modeling, a simple toy seemed like an attainable goal, so I went for that.


Modeling Techniques: Since I don't know much about 3D modeling, I mostly followed the tutorial. I used multiple spheres and then deformed them to create the body, head, bill, and eyes of the duck itself. To keep from exactly copying the tutorial, I focused a bit more on trying to make spread wings on the duck. I also added horns for the signature touch of the demonic duck idea.


Materials: For the materials, I simply used the Rubber material for all of the pieces due to my goal being to replicate a toy rubber duck, and recolored the material for each individual part to create the look and coloring I was going for.

Sunday, September 11, 2016

Muhammad Martinez: Week 2 Ducky

Ghosted black

Ghosted with colored layers

Keyshot with material - bird's eye

Keyshot with material - ant's eye

Concept
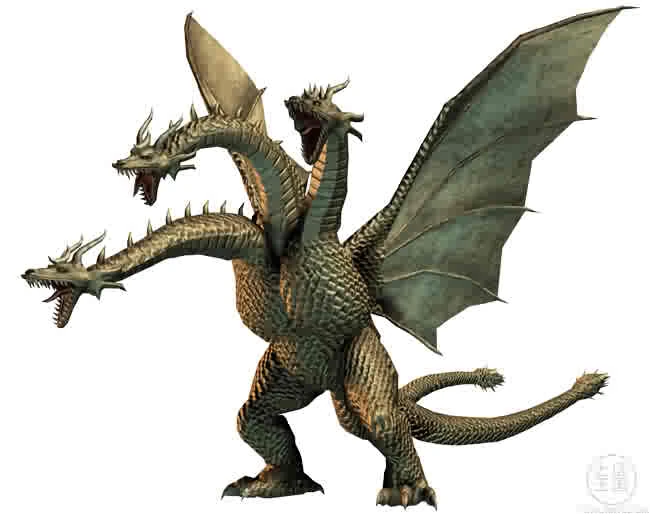
With ferocity only matched by King Ghidorah himself, this terrifying trio transforms the rubber ducky into a force to be reckoned with. These guys can proudly join the ranks alongside other three-headed avians.

Model Techniques
I continously rebuilt the body with different points while teasing it into shape. The shape of the bills were drawn out in the right viewport then projected onto the heads. Commands like Join, Explode, Blend, Patch, and EdgeSrf were needed remove the naked edges formed between the head, bill, and neck.

Materials
Colored plastics were used for the body and heads of the model.Colored stainless steel is used for the bills along with precious metals for the eyes (gold and platinum).

Friday, September 9, 2016

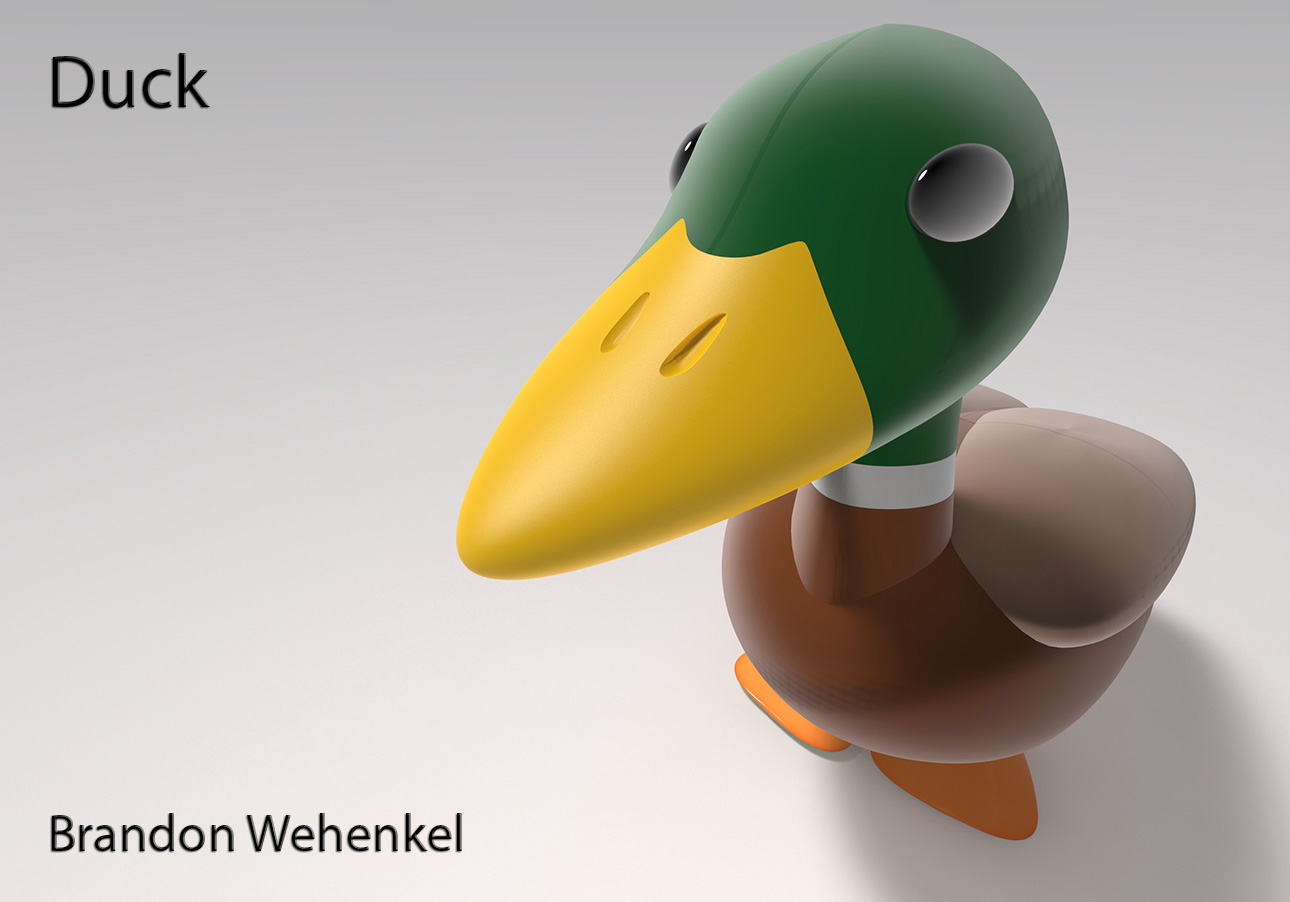
Brandon Wehenkel: Duck


 Black & White Ghosted

Colored Ghosted

Concept:
I googled "Duck" and saw a Mallard duck and thought it was the cutest variant of duck that I could find.  I liked their distinct green head.  I don't see ducks very often and I noticed a lot of the submissions were of rubber ducks, so I felt that making a more natural duck would be interesting.


Modeling Techniques:
I followed the tutorial to the teeth.  This was my first organic model EVER and it was quite up there on the difficulty scale for me. Just like the tutorial guided, use Edit --> Rebuild, to create more geometry in the sphere to work with.  Press F10 to get more vertex points to manipulate in to workable shapes. Use Transform --> Set XYZ Coordinates to manipulate points according to set coordinates.  Use Polyline tool to Project new curves onto surfaces.  Use Trim tool to cut out holes. Use Blend Surface to create the neck.  Repeat steps for new geometry.  I used Boolean Difference to create the wings and the nostrils, and Boolean Union for the flippers.
When designing the duck I had noticed that the body shape and the neck were different than what the tutorial had described so that's where I broke off.  I added the wings to add more detail, and the flippers to balance the body.  I also skewed one of the feet to hopefully aid in the stabilization.


Materials:
I liked what the Velvet material did to imitate the sheen of the feathers on the birds head.  So I added that material on everything except the flippers, the eyes, and the beak.  The beak and the flippers have a hard plastic material.  The eyes are a translucent metal with black as the diffuse.


Problems:
  1. I was not sure how to create closed polysurfaces once I used the polyline tool to dissect and trim the shapes. The best example was the beak to the head, the complex line that I drew to create the curve could not close to make a closed shape.  I was using Cap Planar Holes and Extract Surface but they weren't working.  In the initial photo when displaying that I had zero naked edges, I had combined the head and the beak as well as the few parts of the neck together so that I had closed poly surfaces.  Then once I took the photo I separated them to take into Keyshot, where I had a couple errors.  I fixed the errors by re-opening the program till there wasn't any texture bleeding, that way I could separately materialize each part the way I intended.
  2. I had more than one seam ending in the textures on multiple surfaces.  I was unsure how to fix them.

Jeremiah Baker: Week 2 Duck

ghosted painted black

ghosted with keyshot material assignments


Concept: I pretty much just followed the tutorial to the letter to get this one put together. I'm not very practiced at organic modeling, so it was difficult enough managing that.

Modeling Techniques: I used two circles for the body and the head. Control point editing helped a lot in making the modeling process easier, though I did struggle with selecting the right points. I used curves, projection, and split in order to cut off the beak and make the holes for the neck and head to join. I used surface blend to join the neck and head. For the eyes, I created a distorted sphere, used curve>project>split to separate the pupil, and then aligned it to the head. Then I used mirror to make another one on the other side.

Materials Used in Concept: I just tried out a lot of different materials for this one until I found one I liked. The Axalta materials stood out to me, so I used those and modified the colors a bit to go with the coloring I wanted for the body and head of the duck. I also used an environment with more interesting lighting because of the very reflective quality of the Axalta materials.

Monday, September 5, 2016

Sarah Roberson: Week 2 Duck


Ghosted Painted Black


Ghosted with Keyshot Material Assignments


Concept
I had a hard time with this assignment because I couldn't get a lot of the commands to work so some of this is isn't how the tutorial explained it. But my inspiration for this design and the color scheme is a Mallard Duck. I have a pond out in front of my house and I see them every now and then and so that inspired me. The green mixed with the yellows are a mix of a traditional rubber duck and the color green reflect the look of the head a mallard. The inspiration for the top hat and the monocle came from a picture that I saw of a man with a top hat and a monocle. I just love the look and was going for more of a stuck up look which to me, most people with monocles are stuck up people.

Modeling Techniques
I used circles to form the body and the head. Most of the rest of the body is stretching the geometry of both the head and the neck to make the shape of a duck. For the wings, I squashed ellipsoids and for the neck, I created a  truncated cone because I couldn't get the merging of the shapes to work the way that I wanted. I modeled the monocle and the top hat to make it look like a posh British wealthy man.


 Materials Used in Concept
How my material choices reflect my concept is that all the colors are from the plastic such as some rubber ducks usually are. I also wanted to make it shiny instead of a dull plastic such as rubber ducks usually are because I like  the look of a shiny surface rather than a dull one.