

 Concept
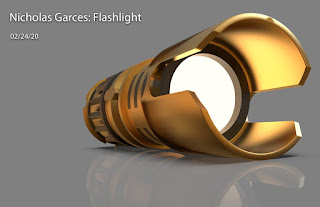
For the flashlight model, I decided to try and create a custom lightsaber design. I remembered that in the new StarWars Jedi Fallen Order videogame there is a lightsaber customization system that allows you to combine several parts to create your own lightsaber design. I used this to create a unique design that still felt true to the StarWars universe. I loved the gold and black color pallet and the extended walls that are easily recognizable from the game’s starting saber.
Process
I started by creating the basic outline of half the cross-section and used a revolve to create the basic shape. I repeated this process several times until I found a shape that worked. I used polar arrays and booleans to add details and cut-ins that revolve around the cylindrical base. I separated two top walls to more easily add details and fillets. To get all the edges filleted, I scaled the model by a factor of 100 allowing me to add detail to the fillets without stressing the system for a value smaller than 0.001.
Materials
For the materials, I went with a gold and black metal design similar to what is shown in the reference. I also added a stand-in light and rubber button to approximate how the flashlight might look once it is set up with the LED inside.


No comments:
Post a Comment