Showing posts with label form. Show all posts

Monday, April 13, 2015

Tanner Mortenson Week 12: Geometric Lamp

For week 12, I continued to build on the idea for my geometric lamp.
After last week, I had finalized my idea and began to get the design ready for Laser Cutting.
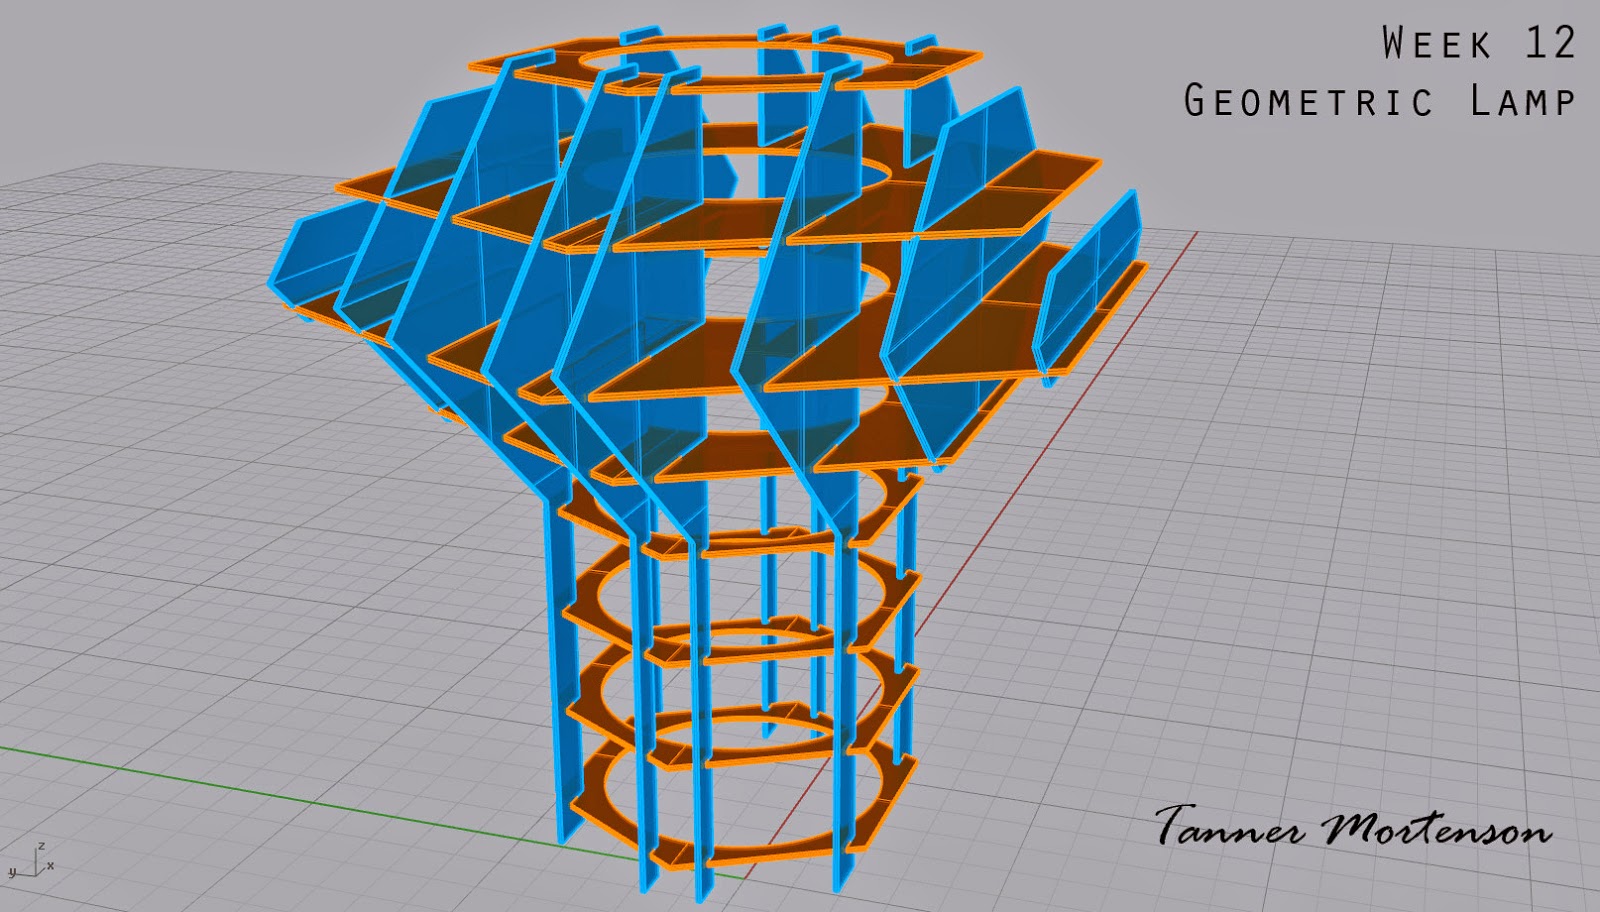
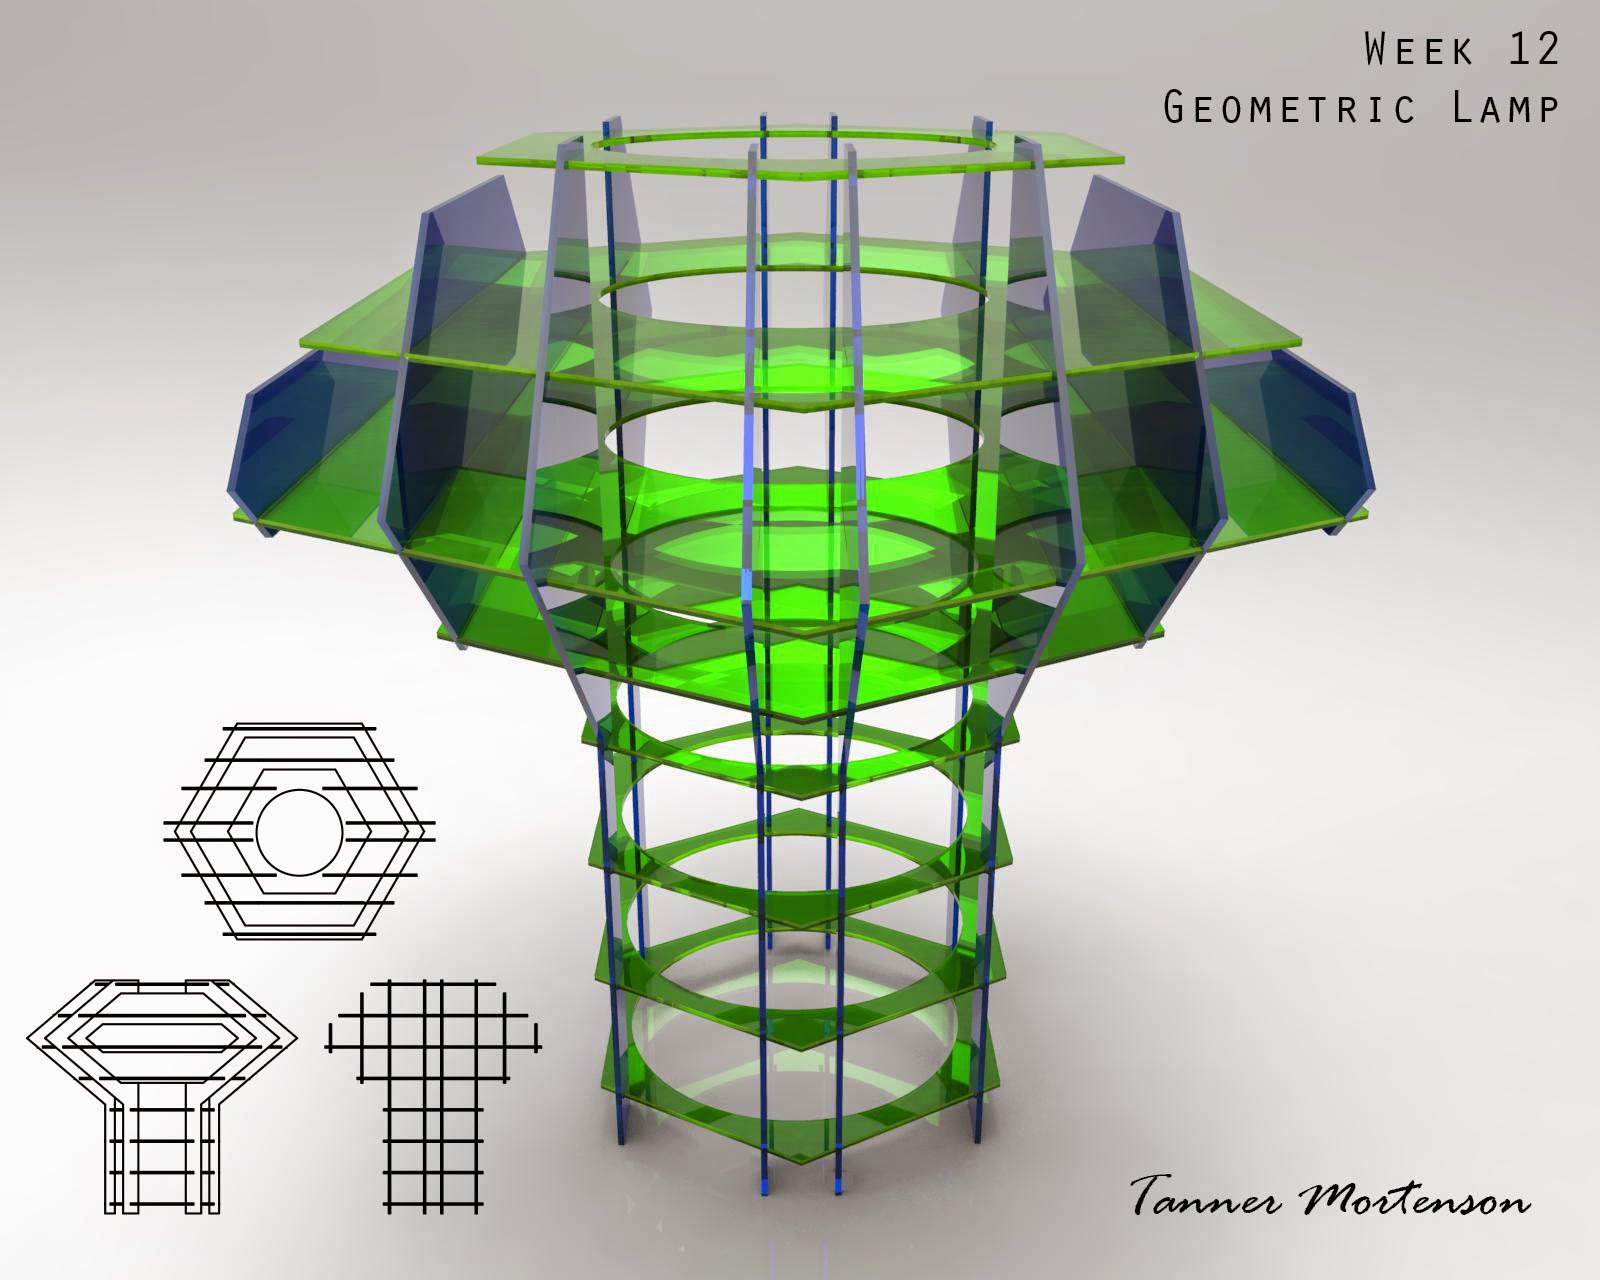
Once the design was finalized, I used two helpful scripts within Rhino- "Cut My Ribs" and "Massive Unroll". Cut My Ribs allowed me to select the different oriented pieces, and then allow the program to automatically cut slots into each piece upon their intersection.  Next, Massive Unroll allowed each of those individual cut pieces to be laid out cleanly so I could then arrange them on my cutting sheet.

I chose to use a 30x36 sheet of plexiglass to make my lamp out of, purchased from Home Depot.
In addition, I had to get another small piece of plexiglass to account for the excess pieces that were unable to fit on just one sheet.  

I decided to choose the thinner plexiglass sheets to reduce the overall weight of the lamp. Looking back, I would have loved to know silicone was not the best adhesive for this project, as it turned greasy and was not clear as I had hoped it would be.  It was also very flexible still when dry, so the structure of the lamp was very shifty.
The light was placed in the middle of the upper portion of the lamp, allowing light to not only be projected left to right and out of the top, but also downward in an ambient fashion.
This unique direction of light is one of the reasons I chose this design.

Rhino model screenshots:

Laser Cut sheet design and layout:

Keyshot Renderings:


Final Product:


Light on: 


At rest on a stool.


Sunday, October 5, 2014

Sowmya Rajendran: Project 3: Serial Form

___________________________________________________________
Week 6:

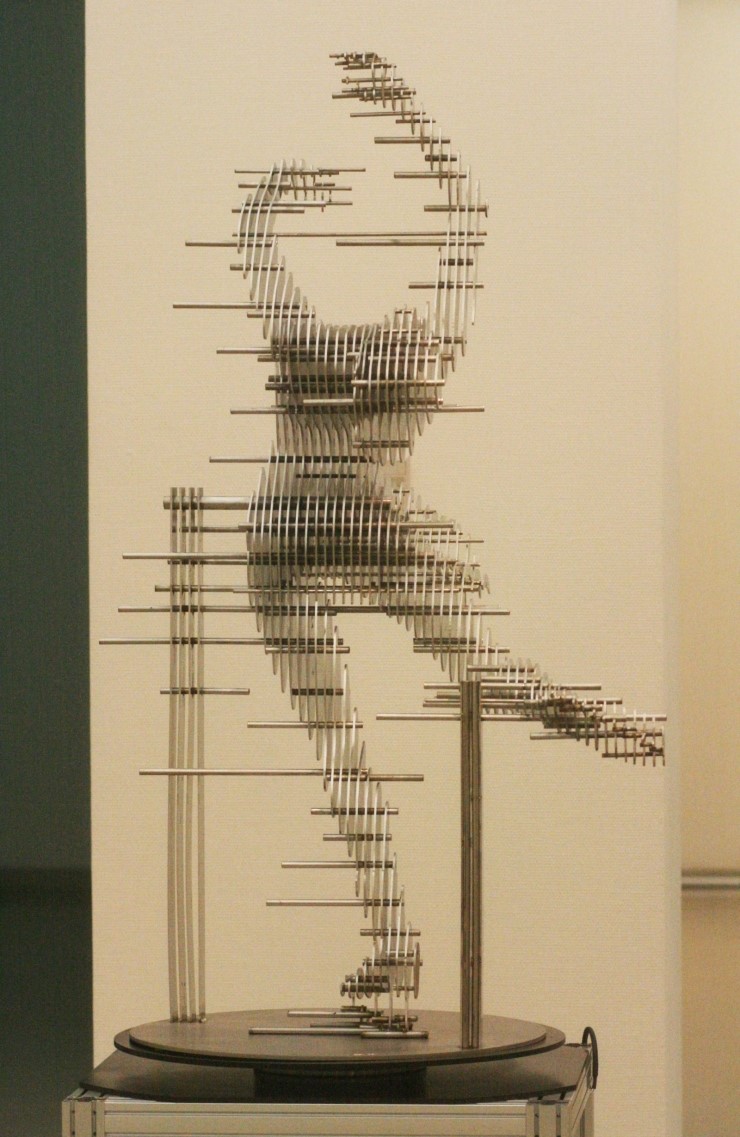
For the laser cutting project, I decided to use my form model I printed out a few weeks ago. I found a Korean sculptor by the name of Park Chan Girl who makes some beautiful figure sculptures using this same method. I love how some areas of the figure disappear when viewed from different perspectives. 


http://elpoderdelasideas.com/wp-content/uploads/parkchan13.jpghttp://media-cache-ak0.pinimg.com/236x/46/78/2b/46782b7087574795cc790e3d4bbb2f58.jpghttp://i245.photobucket.com/albums/gg62/witchyhoy3/000ABC/B7B9C0CCB9E9.jpg
Sculptures by Park Chan Girl

First, I went into Maya and made my figure a solid, imported the model back into Rhino and began setting up the layout for laser cutting. 

Ghosted View of Model

Cut sheets laid out & labelled using horizontal contours
Horizontally Sliced Model
Vertically Sliced Model

I used a grey plastic material, in order for the contours to be easily seen. If this piece were to be translated into a larger sculpture, I would prefer it to be made using metal, so that the piece better interacts with the environment it is placed in.

Sunday, September 7, 2014

Sowmya Rajendran: Project 1: Form

___________________________________________________________
Week 1:

I’ve always been interested in figure studies, so I decided to translate one of my old figure drawings into a 3-D model. I wanted to explore the organic forms and beautiful S-curves of the human form – especially focusing on the line of action of the figure. First, I looked at some of my old figure drawings for reference.


French artist Gaston Lachaise perfectly juxtaposes a solid, weighted form with  fluid  gestures giving the piece, aptly titled "Floating Figure", a weightless and serene quality. 

I really loved the curves of the second gesture drawing, so I decided to build something similar, but with a little more exaggeration. In Maya, I started with a cube and used the extrude and edge loop tool to build the torso and bottom half of the figure.


I continued extruding quite a bit more to build the rest of the areas, and I also used a very handy tool called the sculpt geometry tool to soften the edges, which resulted in a smoother form.  I wanted the form to be asymmetrical in nature, in order to capture the movement of the gesture drawings, but create balance at the same time; so, I pulled the left arm out, and I pushed the hips on the other side out a little as well. 

And here's the final design!
___________________________________________________________
Week 2:

For this week, I decided to fix some areas of my model (the figure felt too stiff). First, I separated the legs and positioned one leg in front of the other to give the figure more movement. After hearing some feedback from a fellow classmate, I also brought down the chest area a tad bit and rotated the torso to exaggerate the pose even more. 

New and Improved Model
No naked edges found. Off to printing!

___________________________________________________________
Week 3:

I uploaded my model to Shapeways and it passed the initial tests. The material I chose was white strong & flexible plastic. Shapeways sent me an e-mail a day later letting me know that my model had passed the manual test, and it was ready to be printed out. I'm pretty excited to see how it will turn out! 

I found hollowing out your model can save you a ton of money. If anyone is interested there's also a 10% discount for students and the promo code for that is C65GX.


___________________________________________________________
Week 4:

I really loved the weathered texture of the Floating Figure sculpture (pictured above), so I applied the Steel Ultra Scratched material in black to my sculpture to replicate the same look and feel of Lachaise's sculpture. The lighting environment I used was 3 point Sharp Low 2k.


___________________________________________________________
Week 6:

Here is the final printed model I received from Shapeways. 


___________________________________________________________