Inspiration:
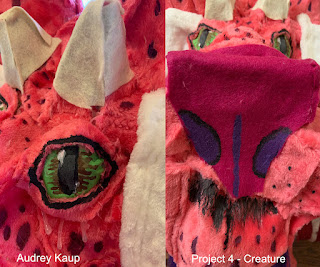
My inspiration came from a multitude of different animals and mythical creatures, then used different aspects and combined them into one. This creature I have designed has the face and mane of a lion, spots of a cheetah, ram horns, and ears that swirl upward, similar to those of a griffin or a dragon. In fact, this creature resembles more of a dragon than anything, due to the horns, color and the elegance the creature contains.
Modeling:
For this model I broke it down into basic shapes. The head I made by using a sphere for the base, a cylinder for the snout, and flat spheres for the eyes and mouth. For the neck and torso, I used a cylinder and a flat cone. The ears, nose, and horns were made by making custom shapes. The ears and nose were made by lines and curves, with fillet curves to fill in any smaller gaps before extruding with the extrude solid tool. Flat spheres were also used for the ears so that they would not look so flat. The horns on the other hand, were made by using the curve tool, then making it 3D by using the pipe tool. I then used the mirror tool for the ears and horns so that they are aligned in the same position. To make the holes for the registration rods, I made multiple cylinders for where the structure needs support. Then I made a double of each cylinder and used the boolean difference tool to make the holes. I also used the boolean join tool so that every part will be combined to one smooth piece. I also used a new tool called contour lines, which is a tool that that makes the model in line format. This is a useful tool when preparing to laser cut a more complex shape. I also extruded the contour lines by using the extrude solid tool, then set it to 0.25 for a cardboard model. As for the laser layout, I used Grasshopper to lay out all the layers, then organized them by cut and put them in a 24"x 28" rectangle for the cardboard. Pros about this project was that it was the easiest model that I have created in Rhino due to its unique tools. The cons were settings the model layers flat so that it will be ready for laser cutting.
KeyShot:
In KeyShot I went for a paper mache look for my model instead of cardboard for a more finished look. I used a cracked texture for the surface so that the model looks like it has tattered paper all over it. As for the lighting I chose exterior lighting and made an area light for the right side of the model so that it would not be as dark. I adjusted the brightness and contrast until it was to my liking, and this was the final result.
Post Processing:
First, I had to laser cut the layers out of cardboard, then assemble the layers together with super glue. I asked Mr. Jeremy to laser cut the layers and finished them the week before thanksgiving break. I then glued the pieces together with wooden dowels to support the structure, then paper mached it with lots of newspaper and glue for a smoother finish. The last part was adding on the fur because this creature has a mane. I cut pieces of blanket material in various sizes and covered up the model as best as I could with hot glue. As for the mane I wrapped faux fur around the neck, then trimmed the access off till it looked like a beard. For the final touches such as the eyes and the smaller details I painted on using acrylic paint.


No comments:
Post a Comment