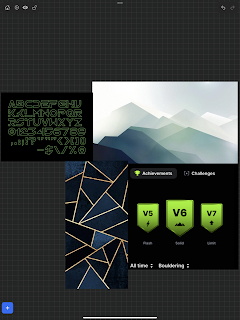
Concept/Inspiration:
My primary source of inspiration for this model has been my climbing progress. As I've gotten better at climbing, I wanted a way to track and display my progress in an interesting way, and thought this project would be an excellent way for me to do just that. My references were very few, only using ideas from vector art and finding a typeface that would look good when laser-cut. The words are terms used to determine one's level of climbing. Solid refers to what grade I am able to climb consistently. Flash, what I am able to do first try. Limit, what I can climb with many attempts. And Top, the highest grade climb I have ever sent.
Process:
For my model, I used quite a few different commands to achieve my final product. I first made my final design with the polyline tool and connected the pieces together in a way that would be easiest for the laser to cut. For the parts that would need thicker line work for the raster engraving, I used the Hatch command. then separated out the pieces and used the PlanarSrf command to make the faces I would then be extruding with the ExtrudeSrf tool. For the inner cuts, I would turn it into a separate solid and use BooleanDifference to cut the space out. The Move command was my best friend for lining everything up together in the end.
Materials:
After finishing the model within Rhino, I made a lightbulb out of a few primitives along with a wire using the tube command on a control point curve. Within Keyshot, I was unhappy with the results of wood textures, so I found a texture online and imported it for use over the entire model. I used the same texture for the raster engravings but with a toned-down color. For the lightbulb, I opened the material graph and changed the diffuse to Arealight so that it would act like a real lightbulb. The wire was assigned a slightly rough texture to imitate the wire I have more closely.
I found a very good piece of birch wood from a store nearby and took it to be laser cut at the north lab. During post-processing, there was far more work to be done than one would think at first glance. I had to sand down the surface of my wood so that it wasn't as rough and to get rid of the laser's burn effects. I then used a wood conditioner with mineral oil and gave the model several coats of wood stain. I made the mistake of somehow deleting the curve for the hole the light would come through, so I used a drill and Dremel to make a new hole on the bottom. I superglued magnet strips to the lamp and the small numbers, put my model together, and that was it!


No comments:
Post a Comment