Wednesday, November 30, 2022

Audrey Kaup: Project 4 - Creature


Inspiration:

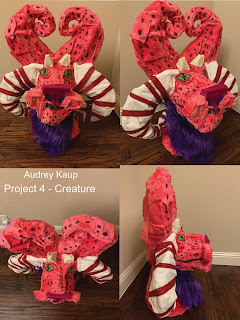
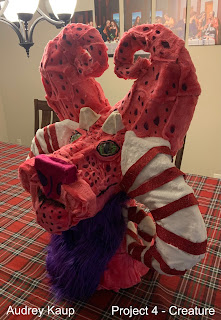
My inspiration came from a multitude of different animals and mythical creatures, then used different aspects and combined them into one. This creature I have designed has the face and mane of a lion, spots of a cheetah, ram horns, and ears that swirl upward, similar to those of a griffin or a dragon. In fact, this creature resembles more of a dragon than anything, due to the horns, color and the elegance the creature contains.       


Modeling:

For this model I broke it down into basic shapes. The head I made by using a sphere for the base, a cylinder for the snout, and flat spheres for the eyes and mouth. For the neck and torso, I used a cylinder and a flat cone. The ears, nose, and horns were made by making custom shapes. The ears and nose were made by lines and curves, with fillet curves to fill in any smaller gaps before extruding with the extrude solid tool. Flat spheres were also used for the ears so that they would not look so flat. The horns on the other hand, were made by using the curve tool, then making it 3D by using the pipe tool. I then used the mirror tool for the ears and horns so that they are aligned in the same position. To make the holes for the registration rods, I made multiple cylinders for where the structure needs support. Then I made a double of each cylinder and used the boolean difference tool to make the holes. I also used the boolean join tool so that every part will be combined to one smooth piece. I also used a new tool called contour lines, which is a tool that that makes the model in line format. This is a useful tool when preparing to laser cut a more complex shape. I also extruded the contour lines by using the extrude solid tool, then set it to 0.25 for a cardboard model. As for the laser layout, I used Grasshopper to lay out all the layers, then organized them by cut and put them in a 24"x 28" rectangle for the cardboard. Pros about this project was that it was the easiest model that I have created in Rhino due to its unique tools. The cons were settings the model layers flat so that it will be ready for laser cutting.
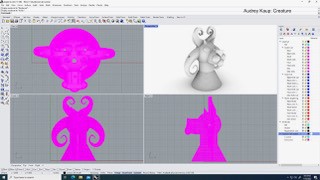
Orthographic View
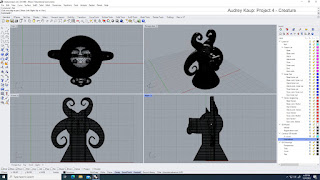


 Ghosted extrusion
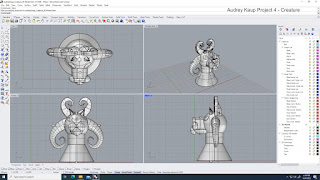

 Ghosted model


KeyShot:

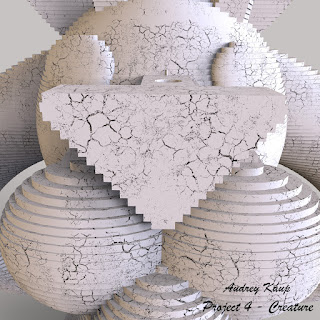
In KeyShot I went for a paper mache look for my model instead of cardboard for a more finished look. I used a cracked texture for the surface so that the model looks like it has tattered paper all over it. As for the lighting I chose exterior lighting and made an area light for the right side of the model so that it would not be as dark. I adjusted the brightness and contrast until it was to my liking, and this was the final result.  
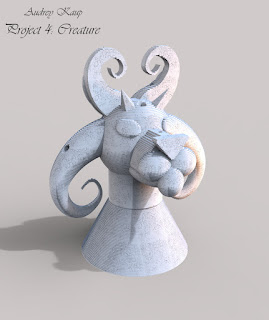
 Perspective
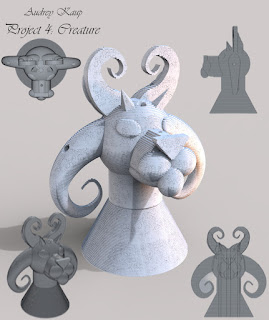
 With 2D drawings
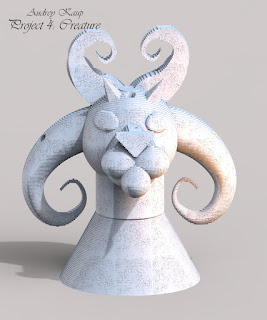


 Front
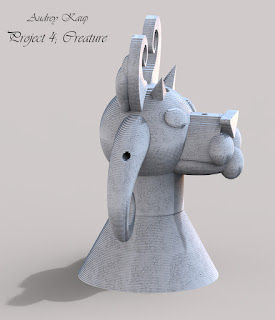
 Side
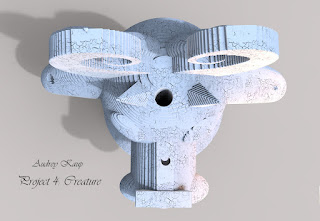
 Top

 Closeup 1


 Closeup 2


 Environment


Post Processing:

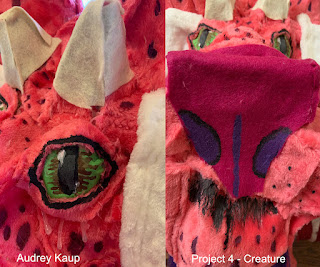
First, I had to laser cut the layers out of cardboard, then assemble the layers together with super glue. I asked Mr. Jeremy to laser cut the layers and finished them the week before thanksgiving break. I then glued the pieces together with wooden dowels to support the structure, then paper mached it with lots of newspaper and glue for a smoother finish. The last part was adding on the fur because this creature has a mane. I cut pieces of blanket material in various sizes and covered up the model as best as I could with hot glue.  As for the mane I wrapped faux fur around the neck, then trimmed the access off till it looked like a beard. For the final touches such as the eyes and the smaller details I painted on using acrylic paint.


 Paper mache

 Final

 Closeups


 With 2D drawings

 Environment


Tuesday, November 29, 2022

Lindsey Nguyen: Week 13 Architectonic Lamp


Design Intent


For my architectonic lamp, I wanted it to be a lamp that I would use and a style that I would like as well. I decided to go for a jello on a platter look because I like eating jello and I think it would be a great way of creating a lamp for it. 


Modeling Techniques


The modeling techniques I used is that I started off with a star, then free formed the curves and used control points to make it more smooth on the curves. Then created a circle in the middle and started to create more curves on the edge to the top of the jello. Then used the sweep 2 rail to create the jello look. Then created a pipe way for the dish, then finally created my model. 


Rendering Materials 


For the rendering materials, I decided to keep it the same as the material that will be created in the end. So I used a wood texture on the model, and it really stood out very well and nice. 


Luke Landis Project 5 - Cosplay Glove (Prosthetic Cover)

 I'm gonna confess something. This project snuck up on me. It was Fall Break/Thanksgiving Week, I had a couple other assignments in the pipeline for another class, and my Rhino Evaluation License expired. Yay. Fortunately for me, my Rhino app glitched, and I was able to use the program without a License.

2D Blue print of Prosthetic

If you ask an artist what they consider the hardest body part to draw, most likely they will answer with one word: Hands. This, as I quickly found out, is doubly true for 3D modeling. Rhino 7 is an inflexible beast on a good day, so I decided to go in a more feasible direction.
 
My inspiration: A magnet made in the image of C-3PO's severed arm from A New Hope.

I had already chosen the robot C-3PO as my inspiration, but with Rhino's severe at best limitations, I had to abandon my original plan for a faithful recreation of the famous Droid's arm. So, I decided to do a sort of "crappy cosplay" version, using Rhino's toolset the best I could.


A screenshot and two Keyshot renders of my design.

Is it accurate? No. Could you print it out and wear it? Maybe. At least it's finished.


That's All, Folks!


Monday, November 28, 2022

Faith Romero: Week 15 Skateboard 2


Design Intent 


    For my design I wasn't sure on what I wanted the design to look like, I maybe created five different versions till I found a design I would like to replicate. I decided to go with a trendy look that I found on Pinterest. 


Modeling Techniques 


    I copied the skateboard base I made for my previous design, and began modeling on top of the reference. I placed my reference photos and created point curves to make a asymmetrical circle. I created a surface and trimmed the excess to make a shallow engraving. Since this was the biggest element I decided to make it the only shallow element. I began working on the medium layer. I replicated the frame, leaves, and dot circle. I stretched the new drawings to fit the board. I thought the board had too much blank space so I added the spiral circle. Finally I created another surface and trimmed the excess. 


Rendering and Materials


    While rendering I wanted to simulate what the board would look like after the engraving, I went with a base wood type for the board, a slightly darker wood for the shallow lines, and a dark wood for the medium lines. 

Faith Romero: Week 15 Extra Credit Skateboard 1

Design Intent 


    For my design I found a YouTube video I wanted to incorporate. The video went over how to use a Food4Rhino plugin called Parakeet. I wanted to challenge myself with what I could create from the grasshopper script.

https://youtu.be/dTN-VIO5zwI


Modeling Techniques 


    I began with creating the skateboard base, I placed an image and modeled the board. I then ran grasshopper to try the Parakeet plugin. The plugin created geometric patterns I placed a point, xyplane, and brep. I set the point and geometry and dragged a tilling and pattern generation. I played with different patterns looking for something that I liked. Once I found this star pattern I baked it to my rhino plane.  
    I assigned the colors, looking for a way to make the pattern more dynamic. I made the majority of the lines red since it took up most of the surface area. I then went into the pattern and created polylines to define the stars. I wanted the medium laser line and placed a surface over them, I then trimmed the object giving the individual stars a plane. I wanted more depth on the bigger stars and repeated my process with the shallow lines. 

Rendering and Materials


    While rendering I wanted to simulate what the board would look like after the engraving, I went with a base wood type for the board, a slightly darker wood for the shallow lines, and a dark wood for the medium lines. 

Jonathan Conde Architectonic Lamp


  Concept: I wanted my lamp to be simple-looking but also have a unique-looking shape, so I decided to reference it from an hourglass. It is unique as the top and bottom parts are wide while the middle is narrow. It is also a shape that would stand perfectly. 


Modeling: To make this shape on Rhino 7, I used a wide short cylinder as the base. I then added a taller cylinder but not as wide as the first one, and I made the top face narrower to get that hourglass shape. Next, I copied those two shapes and made them upside down. Finally, I added another cylinder but smaller in the narrow part to make this whole shape more interesting. The width and length of this are 116.73 millimeters, and the height from top to bottom is 162.36 millimeters. 

For the slicing part, I used the Grasshopper file that was provided along with the Bowerbird plug-in which makes the power slicing easier. For the Radial Slice Count, there are 10 so the lamp would stand firm, and 7 slices for the horizontal slice count. I believe 7 is enough to hold the 10 radial slices together without them falling apart and balancing each other.


Rendering: After getting the slicing part done, I rendered my model on Keyshot. I used a wood texture for this. For the name, I called it 'Olielamp', which is the Dutch word for 'lamp'. 


Vincent Joubarne: Architectonic Lamp


Design Intent:
For the original concept, I liked how the sphere transitioned into the model of the lamp. So from there, I added a cube for the base. I then manipulated using a cage to make the shape look unique and come out in a way that looked interesting.


Modeling Techniques:
For this project, the main tool that I learned how to use was the cage edit which allowed me to manipulate the basic shapes into shapes that had movement. Other than that the use of booleans to add and subtract elements from the object was the other command that I used to create this shape. However, the most essential part of this project was the use of the grasshopper to convert the body into a grillage. I messed around with the number of cuts and rotations, along with baking the object into Rhino in order to render it and create the cut sheet.
Materials:
Looking back I could of downloaded wooden textures from food4Rhino to create a more accurate representation of the final product. However, I ended up using some basic colors in Rhino to create the renders. 

Final Print:
Printing the model came with some trial and error the first sheet I brought in was too warped, and after I did get the correct sheet I had issues with my comet card. I still need to get sandpaper. get the lightbulb and glue it together, But I am happy with the result of the print


Ramos Pedro: Week 12- 15: Architectonic Lamp


Design Intent:

    When I designed this lamp, I took inspiration from the Minas Morgul tower from the Lord of the Rings. I wanted to create a shape that mimics the architectural design of the building. I focused on copying the spikes on the top of the tower as they are memorable from the movie.


Modeling Techniques:

    I created a shape from the cylinder object. I molded the design by using the control points. I then used another cylinder to cut out the center of my original object. I used the grasshopper program to create the inner and outer cuts for the laser cutter.


Material: 

    The material used was the light oak wood material and the point light asset to mimic the illumination of the light bulb when placed inside the lamp.


Laser Cut: