

render 01

render 02

original model

extruded contours with dowel placement

material assignments for key shot

engrave layout

contours in 3D space


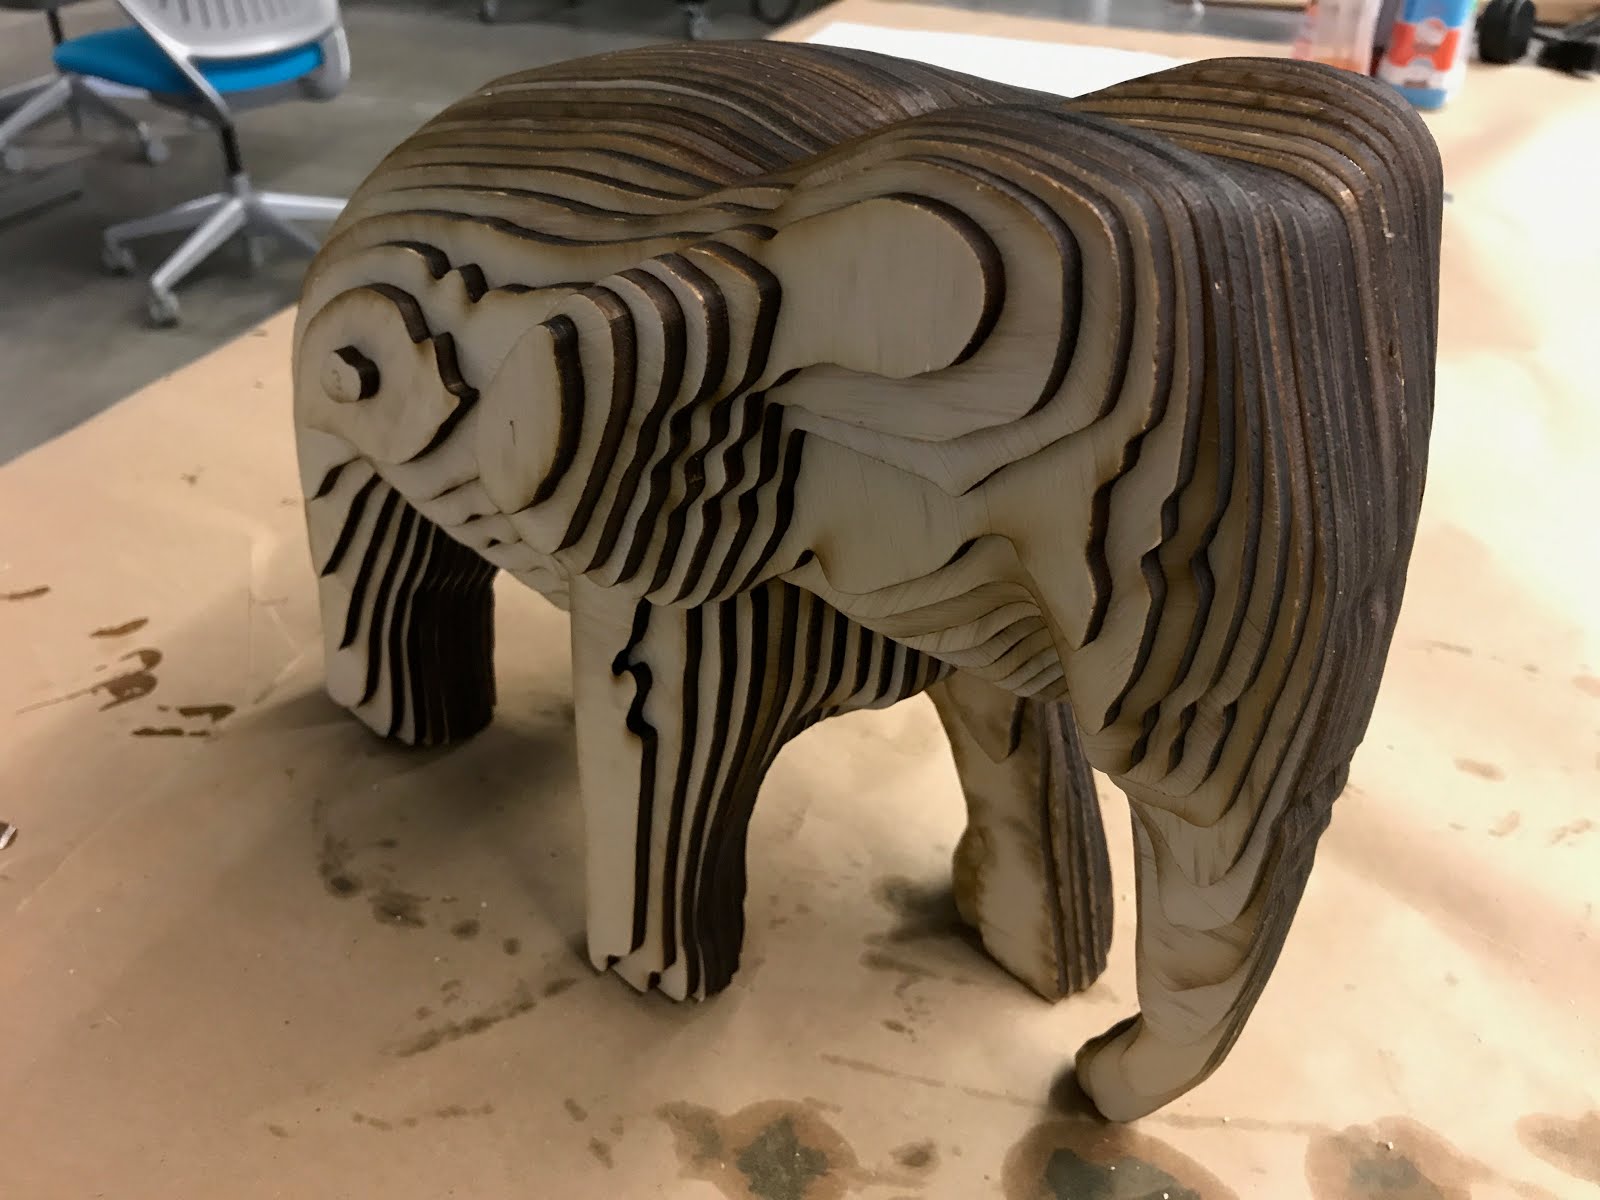

finished model

finished model
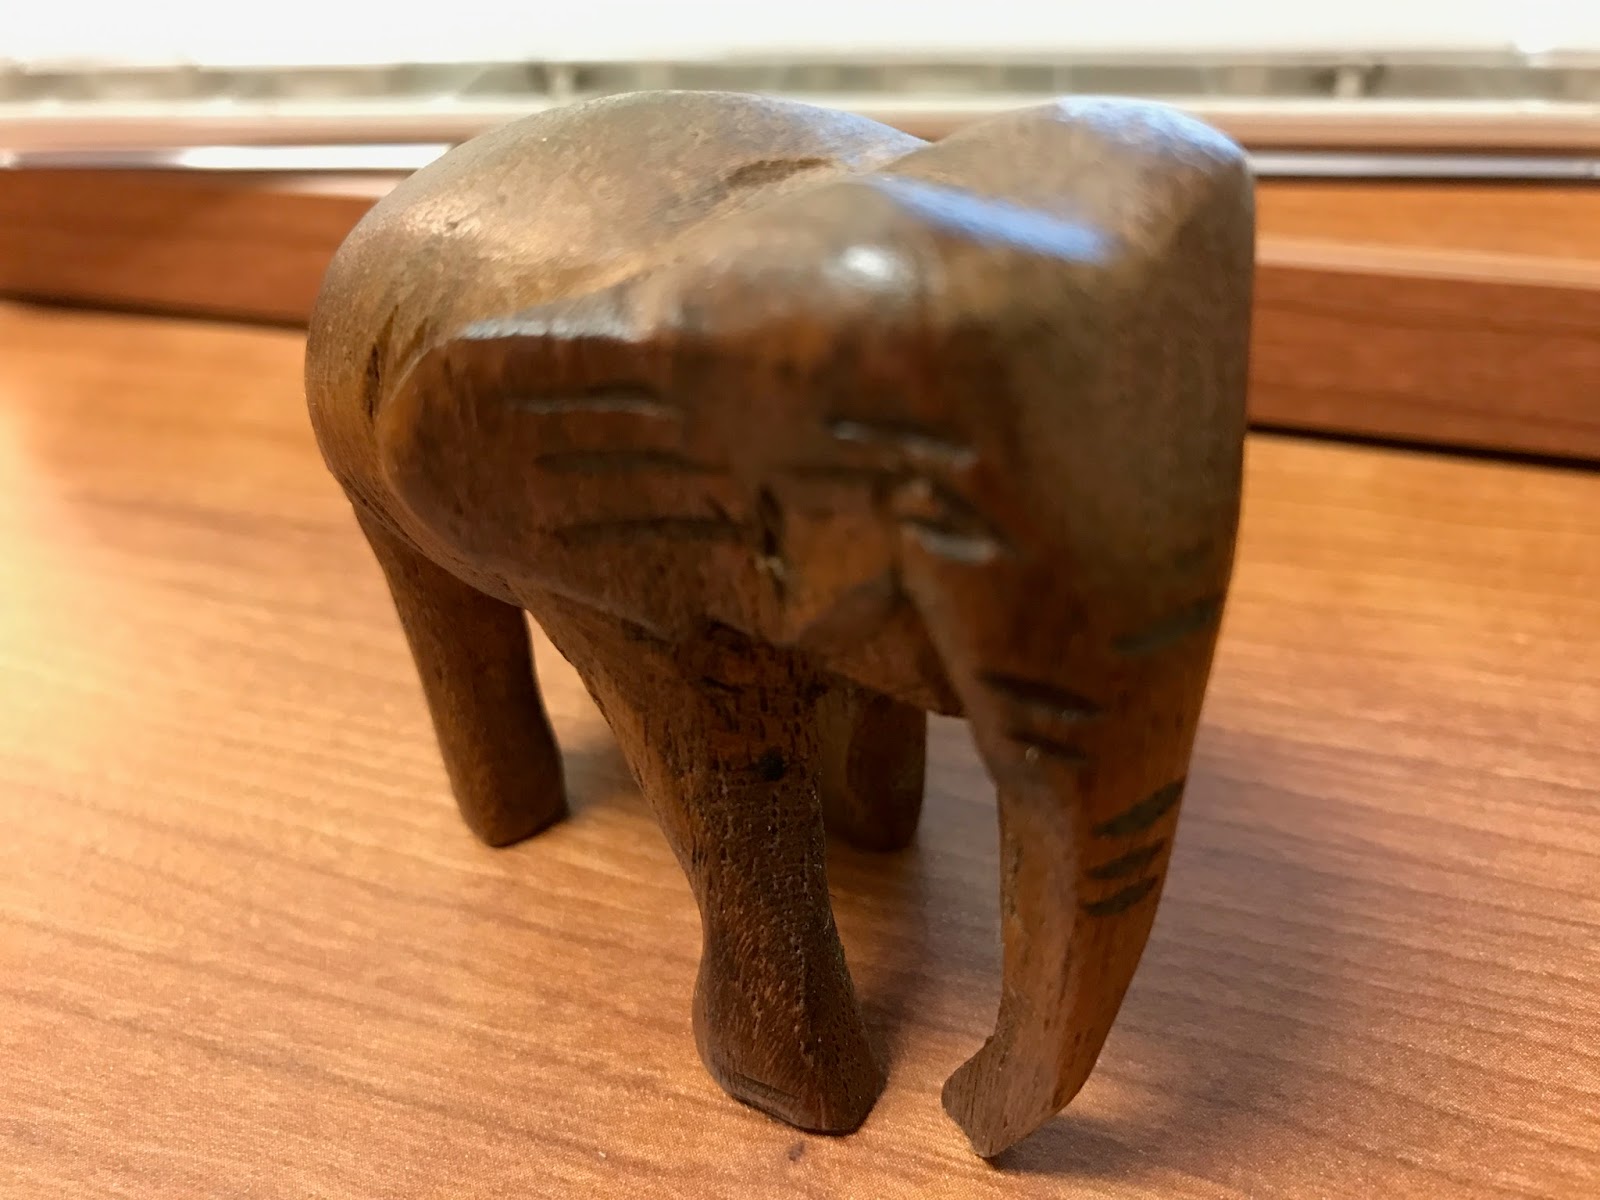
original object
I decided to use a model that I had 3D scanned from last semester for this project. For my previous project, I made a low poly concept that I thought looked really cool, and this would give a similar effect. The original scan was of a small hand carved elephant from Thailand. I thought it would look really cool to scale it up by 300% and see what it looked like and what detail would be preserved. It seems to have worked really well.
Modeling Techniques:
For the contouring, I started with all 3D objects. I placed the scan file into the workspace and scaled it to fit my wants, and then contoured it in multiple directions to see which one would look the coolest. I decided to go with contours in the x direction. I then placed dowels in multiple spots to make sure I would be able to line all the layers up correctly. After this, I couldn't do much until I decided on material. I had some plywood lying around, so I used my caliper to get its exact width and contoured again to that size, this time contouring the dowels as well. While doing this, I went ahead and put the dowel contours and model contours on different layers to make it easier for later with color assignments.
After this, I turned the model sideways to make the contours parallel to the base plane, and began separating them out. I laid them all out in a grid without rotating or anything first, so I could number the layers and delete the dowel holes I didn't want to get cut out. Once the numbers were in place, I began working the puzzle and laying everything out, trying to be as efficient as I could with my materials. (It's tough; there's got to be a program that can do this for me) I also used the outline engrave technique Prof. Scott discussed in class on the layers that weren't large enough to have a dowel through. I also mirrored one half of the elephant so that both sides of the finished model would show the nice side of the laser cut wood instead of the stains from the laser bed. I ended up fitting everything on 3 and a half sheets, which wasn't bad, because I had the materials for it already.
Materials Used:
After I got all of the pieces cut out (which was really cool to watch btw), I did a couple test fits to make sure everything looked ok. Turns out I bought the wrong size dowels, which made fitting everything together correctly a bit more labor intensive, but everything still fit together. I was a bit impatient to get started, so I ended up not using the dowels at all, just lining up the holes by eye. I used locktite professional glue to stick everything together, and I completely agree with Prof. Scott. It's great. I didn't have to wait more than 30sec for any of the layers to stick together before I could stop pressing them together. I highly recommend investing in some. I then applied a wood stain to the model to bring out the grain and darken the color a bit.
No comments:
Post a Comment