Sunday, March 31, 2019

Jack Purcell: Project 3 - Laser Cutting

FlatFab

Concept: I wanted to create something organic using FlatFab. I also wanted to create a sculpture with a somewhat solid 3D form. The main reason I wanted to create a chicken is that it would be recognizable and that I have a friend who loves chickens, it's pretty much a custom between us that whenever we exchange gifts I get them something chicken related, so I've seen many different kinds of chickens represented in many different types of mediums, so I wanted to create my own.
 Process:  I used FlatFab to create this project. I'll admit I wasn't as used to its vector tools as I was to Illustrators tools, but I managed to create something I was happy with. Most of this project was post processing of the file. First I exported the FlatFab cutting paths as a SVG file and imported it into Illustrator. Second I exported that to a DXF that could be imported by Rhino where I fixed some of the errors created by FlatFab. I submitted the 3DM file to be laser cut but something was wrong with the line width and my file was sent back. Finally I fixed the file in Illustrator as it was the program I was more comfortable with, and sent it back and picked up the cardboard once it was cut. I did have problems where FlatFab didn't generate some of the connections properly and I had to cut and glue some pieces together to create the final model together.

Materials: While the material we used for this project was cardboard I feel that this sculpture would best be visualized in a transparent material like glass or acrylic, because I feel like the viewer could see all aspects of the sculpture at once and appreciate the form.


Wednesday, March 27, 2019

Kaylie Moore: Week 9 Laser Cutting

Concept:
While learning how to use FlatFab I made a series of practice models, mainly just a few abstract shapes and models of the heads of various animals. After I felt I was comfortable with FlatFab, I decided to adjust and expand one of those practice models, and decided to go with an elephant mostly just because I liked that model best.
FlatFab Model


Techniques:

Using FlatFab, I first created the head of the elephant, adding ears and experimenting with both separate and connected trunk pieces. I then created the body and connecting leg shape, duplicating the leg four times, flipping them across the X or Z axis, and rotating them to create enough stability to support the weight of the body and head without each leg being flat on the ground. To finish I exported it into Illustrator and made sure each part connected cleanly before exporting it into Rhino to clean up the cuts and format the layers properly.

Rhino file


Materials: 
I sent my file to the Machine Shop to be laser cut from a 24x48 in. piece of E-Flute cardboard. I didn't really like the look of the plain cardboard, so I then decided to add a thin layer of fiber paste for texture and spray painted it grey, adding a few details such as eyes with acrylic paints. In Keyshot I used very simple colors to go with the simple design and structure. I envisioned it placed as a large sculpture in a park.
Cardboard model
Painted model
KeyShot


Ryland Smith Week 11 FlatFab

Concept: The medium flat fab presents, has a lightness to it in its planar segmented forms in 3-d space. In order to harmonize with the material, I sought to create a form that had a lightness to it, thus the form I sought had a flight in mind. I would create the form of a snake that could fly. By shaping the pieces to appear to flow organically and directionally, the form appears to have movement as if it might be in flight although standing still. The thinness of the body would allow it to appear airy pronouncing the lightness of the form.

FlatFab 

Process: Using FlatFab I created the body from using the pen tool. I created 2 perpendicular cross sections at the head. Then I made the head forms, top and bottom with the pen tool, and positioned them parallel to the body and on the cross sections. I then angled the headpieces inward. Following I created the wings top down by creating one side and reflecting it. Perpendicular to the wings I created pieces that would span them and then used a blend function across them.
Flat Pattern

Rhino Layered

Rhino Ghosted Black
Materials: In Key shot, I used Hard Shiny Plastic red for the head, I used Hard Shiny Plastic Black for the body and I used Hard Rough Plastic White for the wings. I chose these colors as the red reflects energy, power, and is ultimately eye-catching, like a phoenix, and like a cardinal. The body is black and sleek to complement the vibrant red and provide the body as well as the lithe nature of a snake. The wings have a bit of roughness to give them body but are white to reflect lightness and provide contrast to the black body. The Lazer cut prototype was in e-flute cardboard a light material good for rapid prototyping at a low cost.

Key Shot

Key Shot 2


E-flute cardboard model

Tuesday, March 26, 2019

Charlene van Zyl: Project 3 - Laser Cutting

Concept: When I searched for inspiration for this project, I looked through the gallery on FlatFab's website. Many of the projects there were animals and I really liked how they were able to create organic forms out of 2-D geometric shapes. After playing around in FlatFab, I decided to create a dog.


Techniques: I started by creating the dog's body and tail. I then went on to create a segment for the chest and a segment for the flanks, then used a blend to fill in the space in between. I added a front leg and a back leg, mirroring each of them to give the dog its four legs. For the head, I decided to use two mirrored shapes set at an angle to give the head a 3-D look. The two segments were joined by the ear piece and the neck.


Materials: I used e-flute cardboard for the project once it was cut out. In Keyshot, I decided to use brightly colored shiny metals, imagining that the sculpture would be displayed at a park.


Monday, March 25, 2019

Jacob Hunwick: Project 3 - Laser Cutting

Concept: For my piece I wanted to make use of the lightness of the e-flute cardboard and decided to create a plane. In the end the piece turned out very sturdy, but too small to be able to glide. For the design of the construction I wanted the transition between the wings and the plane body to be seamless so I utilized the body cross sections to hold the wings on. Adding to the planes structural soundness are the 45 degree angled body cross sections which also give the plane more movement.

Process: Using FlatFab, I first created the large profile piece of the plane, then created the cross sections making up the body. Then I completed it with wings. For the process of getting the plane laser cut, first I exported the file as an .svg to illustrator, then as a .dxf to rhino. In rhino I made finishing touches. Next, I sent the file off to the machine shop and after a few days picked it up and assembled it.

Materials: For my laser cut I used e-flute cardboard. I think if I were to laser cut my piece again I would use the same cardboard because it is very light, except make the plane larger so it might be able to glide.

King Wang Wong: Project 3 - Laser Cutting


Concept:


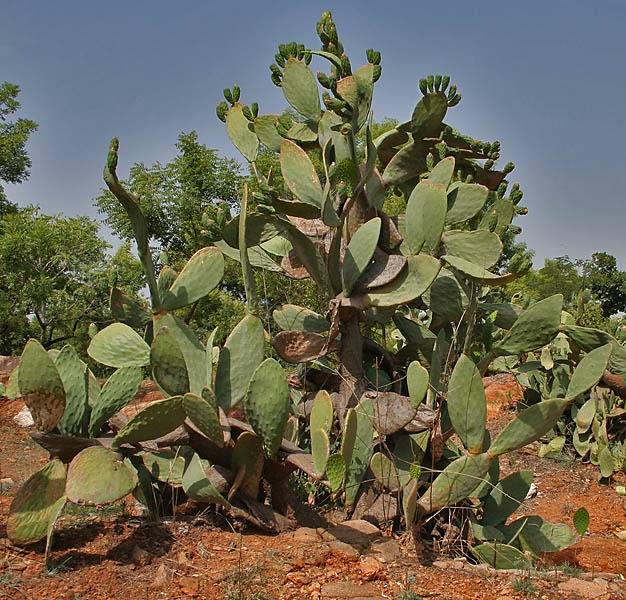
I created a pear cactus using laser cutting on cardboard. I saw that Flatfab allowed one to create smooth, organic shapes and curves so that inspired me to make a cactus. 


Process:


I wanted the cactus to be asymmetrical and organic. I used branching techniques to create the sections growing out of the main parts. I had the small sections come out at different angles and become gradually smaller the more iterations there were. 


Materials:


After printing my design on cardboard, I painted the cactus with acrylic paint so it more closely resembles a cactus. 


Keyshot Renders:


Sunday, March 24, 2019

Quinn Sherer: Week 9 - Laser Cut


Concept
    
I went into this project without a solid idea in mind, and just started by messing around and trying out FlatFab.  After figuring out how the program worked, I made a couple more abstract designs, but decided I wanted to try a more concrete one.  I was inspired by the way a lot of cardboard sculptures look like skeletons, so I went with a dinosaur/dragon that would have the ribcage and spine pieces that I like going along its body.
   

Process
  
I drew the long face/neck/tail portion as the root piece, then started working off of that with the pelvis.  For parts like the ribs or tail, I made the first piece, then duplicated and shrunk it to the size I wanted for the last piece, and used the blend function to make a series of fitting shapes in between the two.  I contemplated having a higher number of spines on the tail because the smooth transition gave it a more interesting look, but I decided against it, mainly for ease of printing.
When I was satisfied with the design, I exported it to Illustrator to convert it into a DXF file, and then adjusted the file in Rhino until it was ready to be sent to the machine lab.


Materials
   
The pieces were laser cut from a 24x48" sheet of .06" E-Flute cardboard.  I was able to fit multiple sets on the sheet, since the pieces are all relatively small.


Friday, March 15, 2019

Jesus Vela: Project 2 Week 8 3D Printing

Ghosted View and No Naked Edges

Concept

     In the context of shape, the design of this pendant is based off a geometric pattern I created in an earlier painting of mine. Materials were inspired from popular crystal pendants. The materials lend themselves well to my design considering how rectilinear it is. 


Layers

Techniques

     The gridsnap aid me achieve a symmetrical appearance in the pendant. I started by laying out  polylines based off the geometric pattern in my painting. Each polyline was assigned its own layer: Inner V, Hear, Outer V, and Periphery. Next I extruded each polyline to the same height. Making the triangular tops to each layer required that I use object snaps. Most joints were made by half-trimmed cylinders. One joint was made using the arc tool. I created a Boolean union to get rid of unnecessary lines between layers. When unified, naked edges were not apparent, but I did explode pendant only for create the layers image in this blog. I did not have to scale the pendant to be lesser than 4" in each dimension.


Opening Shot
Back View

Materials

     Crystal pendants are often made using a crystal and wire, but wood has also become a popular additive to pendants. Lighting was important to convey the aesthetic realism of the crystal pendant. Materials used in Keyshot for rendering the pendant include: Ginger Bronze, Glass Red, and Glass Clear. Brightness was increased to help distinguish the curves around the crystals. Refraction was also increased to help the crystals look realistic. During the actual 3D Print, I chose blue because of what was available at the location I printed at. Looking at the pendant physically helped me decided that the top edges of the pendant shouldn't be as tall as the rectangular base.


Printed Front View
Printed Side View