ProtoXeno

Since this was to be a functional piece of work, I needed to obtain measurements of my headphones. I wanted the headphones to be completely retracted into the headband, with the ear-cups separated to provide just enough spring to stay in place on the stand. I decided the ear-cups should be about half the distance from each other compared to normal use to reduce wear.
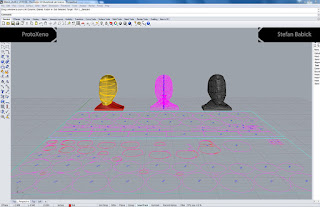
With the measurements, perpendicular curves were created in front and side profile. A Split and Mirror were used to make sure that the left and right curves matched symmetrically.
Once I had the two curve profiles to my liking, I Lofted the Curves and rebuilt the surface. I then selected the bottom control points and brought them up along the Z-axis to create a cavity that the stand would flow into.
The needed surface detailing and I wanted a wanted a wrapping effect like a hand grasping a fist. To obtain this, I use the Helix tool to generate a curve that would be swerve left and right along the Z-axis when viewed orthographically.
I projected this helix curve through the surface of the head. The head was then Split along this projected curve. The Split wasn't clean with several surfaces being created. After joining adjacent surfaces within each half, I was ready to make the last adjustment to the head.
With the larger of the two halves selected, I adjusted with ScaleNU to make the surface larger. It took some time to get the settings right, but I was able to use BlendSrf to join the two halves together.

It was time to create the stand. I started with two rectangular curves which were then blended together to obtain a gentle sweep to the profile.
I then used the Twist tool to add more flow to the stand. To avoid clipping between the jaw of the head and the volume of the twisted stand the head was lifted long the Z-axis. The top stand surface was then extruded to intersect with the elevated head. With the volumes aligned to my satisfaction, it was time to place the cylindrical volumes that represent the alignment dowel rods and slice the model at 1/8th inch thick intervals.
While laying out the grouped serial slices of the model, a number of slices comprising the jaw and back of the head would need engravings to align the slices below. The slices with engraving were to mirrored to place the engraving on the bottom of the slices.
Once laser cut, I started placing the slices onto the wooden dowel rods. There were several spots where the laser did not cut through due to inconsistent wood density. The spots were in stark contrast with the burnt edges. Matching colors, I used a brown marker to conceal the spots.
I went baltic birch wood for its subtle wood grain and light color knowing it would contrast nicely with the burning of the laser. A 1/8th inch thickness would provide a higher resolution to the silhouette, particularly in extrusion along the face of the head.


No comments:
Post a Comment