Showing posts with label Midterm. Show all posts

Sunday, March 3, 2019

Ryland Smith: Week 8 3D Print

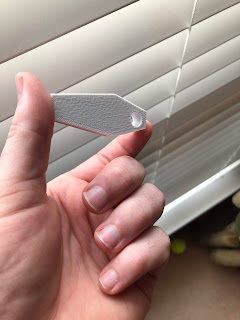
Concept:  I pondered on the macabre. I had been looking at Memento Mori art when contemplating this piece. Death and life may be rather bleak. After seeing the fillet tool I thought that the tool would work well for a coffin. So I began making a coffin and to give it character I would add some stylized carve work. Perhaps the character of death isn't so grim or bleak but an expressive character that imprints on us all the joy of life.
Dimensions in inches

No Naked Edges

Ghosted Painted Black

Layered


Techniques: I knew from the start I wanted a uniform material choice, that I would use the white 3D print material and explore the space and interaction with the light it has. I created rectangular prisms and then booleaned2Objects them at the angles and positions to make the general shape of the coffin. I then outlined the coffin with polylines and scaled it up slightly to create the base of the coffin by extruding the shape and capping it to add dimensionality and weight at the bottom. I would boolean union this to ensure the objects were one. I then took cylinders and union them to the coffin to add more dimensionality, or holding points to carry the coffin. I then drew my character with polylines and extruded the object. Following, I booleaned2Objects the extruded character and the coffin to imprint the character in the coffin. I capped it to fill it and added a sphere in the bigger eye. Finally, I filleted the edges around the coffin and the skull character. I then added a hole by making a cylinder and boolean2objects so I might put a chain through it and add it to a key chain.

Render 1

Render 2


Materials: In keyshot I used soft rough plastic to simulate the 3d printing material. The 3d print material I ended up using was the PLA process. I left the final product untreated as I enjoy the serial signature and the way it functions as a monochrome object. Ultimately, the flat object corresponds with the bleak feeling I strive to evoke and add subtlety to the character.
Final Shot 1

Final Shot 2

Final Shot 3


Monday, February 29, 2016

Alec McKay - 3D Print: A Joyous Mug


Concept: After seeing several interesting mug shapes, from those designed to hold a cookie inside to those that are shaped like various animals, I decided I wanted to do my own design for a coffee mug. A Joyous Mug came about from my desire to create a mug with a surprise on the inside that reveals itself as the drinker finishes their coffee. From there, I was inspired to make a mug that looked quite dark on the outside, but with a shining smile on the inside. The ring of semi-spheres was inspired by a common decoration for dungeon levels in Mario, which is a single row of silver spikes on a dark grey background. I decided to do spheres rather than spikes so as not to stab the coffee drinker’s chin.


Modeling Techniques: The cup shape was created with a Sweep around two curves, using circles to create a round mug shape and Offset to make it hollow. The top edges were rounded off with filleted edges for smooth drinking. I created the face by starting with a sphere, and then building other shapes to use for a Boolean Difference for the facial details. A polar array followed by a Boolean Union created the ring of semi-spheres around the top.


Materials: The mug is made of a glossy ceramic material, as most mugs are. The outside coloring was designed to be similar to my inspiration for the outside, with dark grey for most of the mug and the semi-spheres painted a light grey. On the inside, the colors were inspired by emoticons, with a bright yellow face, round black eyes, and a bright red for the inside of the mouth. 


Sunday, March 1, 2015

Charles Person Midterm Laser Cuts


For inspiration for the laser cuts I began to think of representations of atoms, bones and constellations. Specifically the image of larger nodes connected by smaller lines to convey a greater image. So I decided to work with that and create a base node shape that could be interconnected.

The modelling techniques I made use of were curves and curve booleans. I worked with a few base node shapes but kept coming back to the circle as I thought it was the simplest and most effective at conveying what I wanted. In hindsight I'm thinking I maybe should have gone even simpler with my shapes, with maybe just a single node circle shape and a few connector shapes.

For the final assembly I tried drawing influence from a few different constellations but ended up settling on Orion's Belt. I liked the overall simplicity of it as well as how recognizable it is, along with a bit of a personal attachment as it's usually bright enough to be seen as I'm walking to and from night classes despite the light pollution.


Charles Person Midterm Free Model

My main inspiration was a previous art project I had made freshman year in highschool, where we had to hand model a piece, and my chosen piece was a sword embedded in a stone.  The imagery itself is of course common place, though my particular inspiration back then was the game Fable. For this revisit I went for a more enshrined image, more befitting the Legend of Zelda series.

For modelling I primarily worked with booleans, difference in particular to make the lines of the components line up better in the model, even if it won't be especially noticeable on the print. I also did some array work to create the grip on the hilt and the base. The spiral part of the base is a spiral pipe, sized to give it a particular coil I wanted.

For the materials on the render I ran with the idea of the sword being enshrined in place and went with an overall light color scheme. I chose to make the spiral a glass to give it an ethereal effect, especially working with the metallics around it. The rest of the base is composed of marble and gold, again to convey a sense of wealth, power, honor etc, the kind of things you'd see around a prized artifact.


Charles Person Midterm Flashlight

For this sleeve I went for a big clunky feel, something that could take a beating. In particular you can see this on the rim of the shade, which is up to a centimeter thick on the finished model. The grips along the side were also intended to help bulk it out visually.

The primary modelling techniques used for it were a combination of curve boolean and revolve for the base shape and grip. Next array polar and boolean difference were used to create the ring of indents along the bottom. And finally the cylinders used to create the indents were moved to the top of the flashlight to repeat the process on the top.

For the materials on the render I wanted to carry on the bulky and durable effect so I went with a hard plastic for the main body and a hard clear plastic for the grip.