
Inspiration
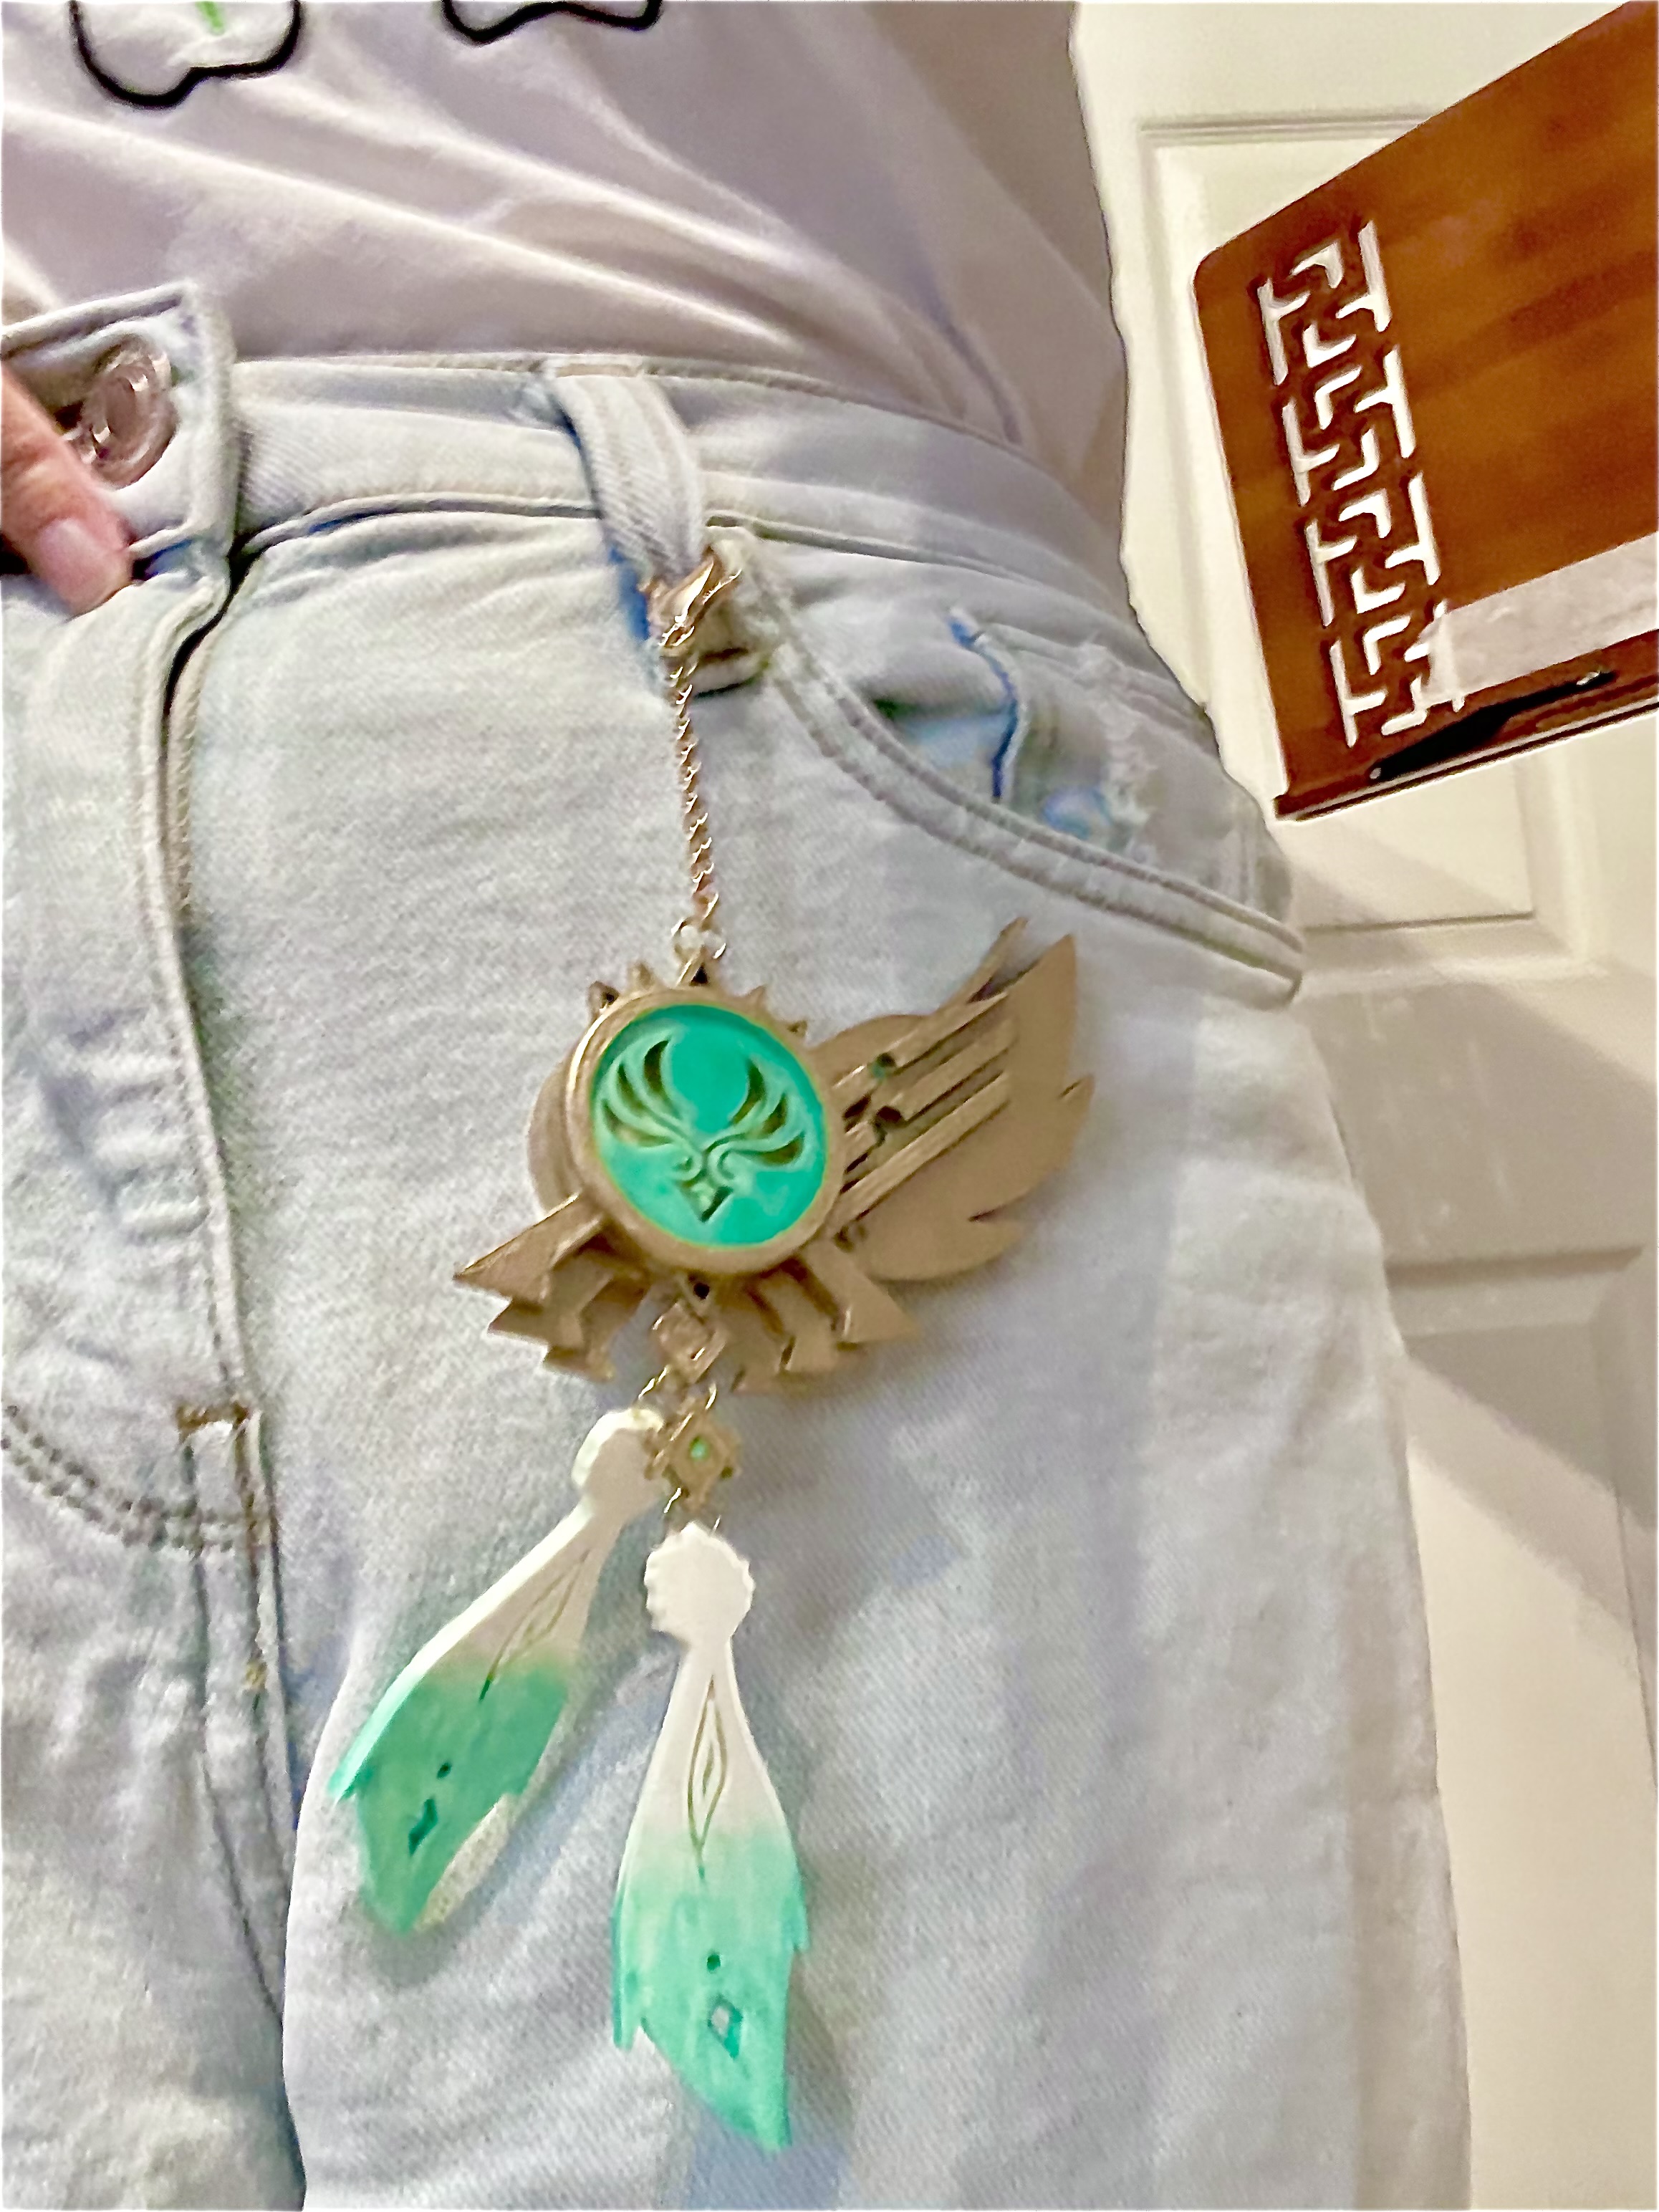
I chose to make part of a costume based off the character named Venti from the game Genshin Impact. On the bottom left of his belt, Venti wears his "vision" which is what I chose to base my model off of. For the majority of it, I kept the key components like the center and the feathers; however, I added a few details like the keychain and the stripes of the wing.
 |
| Reference Images |
 |
| Concept and Design |
Process
At the start of making my model, I used the polyline, square, and circle tools to create the base sketch of my model. After, I extruded the parts and used boolean difference to add the details. For the holes on the wing, I used the array tool before I used boolean difference. I used the extract isocurve tool to add the extra detail for the top of the wing and fix the placement of the keychain holes. I also used the fillet and chamfer tools to get rid of some of the hard edges like around the center piece and the sides of the stripes on the wing. Throughout the process, I used the linear dimensions tool to check my measurements.
 |
| Rhino Ghosted - Layers |
 |
| Rhino Ghosted - Naked Edges |
 |
| Rhino Ghosted - Orthographic |
Materials
In keyshot, I made the clear part of my model out of glass and the basis of the brooch out of brass with the texture called herringbone. The feathers at the bottom are made of a shiny blue translucent plastic. I added in the small blue and black parts and made those out of plastic as well. I also added an object behind the front part and made it into an emissive white light to make the model look like it glows. All my choices of material were to make it look like the original from the game. In the environment, I added pin lights to make the center part look shiny and adjusted everything to balance the light and shadow areas. I also adjusted the lights like this for the model shown being worn.
 |
| Keyshot Orthographic |
 |
| Keyshot Worn |
 |
| Keyshot Closeups |
For my actual 3D model, I made the base out of plastic and painted it a brass color. To add the glow of the center, I used glow in the dark paint and painted inside the center piece and the feathers. I used resin to fill in the center as a substitute for the glass as in the keyshot rendering. The chain and clasp, both of which were bought from Michaels, are made of iron. I took pictures of my 3D model in a well-lit room and edited the lighting afterwards to make it easier to see.
 |
| 3D Model Orthographic |
 |
| 3D Model Worn |
 |
| 3D Model Worn Closeup |
 |
| 3D Model Closeups |
 |
| 3D Model Glow |


