Showing posts with label DavidNorkiewicz. Show all posts

Thursday, December 11, 2014

David Norkiewicz: Project 8: Pepakura Chess Piece w/ Philip Barker

Statement of Purpose: For this assignment,we to expound upon the last object we created from cardboard. This time were told to model and create a chess piece. The piece that Philip and I chosose to do was a king piece. We took the idea from the the Lord of the Ring. We used Barad-dûr, aka The tower of sauron.


The piece was originally going to be a castle piece, but the idea of using this specific tower did not feel right to use it as a lesser piece on the board. Instead, this iconic tower would be used as our kingly piece to the set.


Modeling techniques: This model, while simplistic, was difficult to make while staying within the 200 polygon limit we were told to use.


As can be seen, the tower looks remarkably like the picture above. Orgionally the model looked much more exact, but the spires on the sides  had to be cut.


The final image above is our finished king piece. Putting together the tower took around 1.5 hours, but then again it stands about 4ft tall. I have to say that I really like this piece and will be looking into doing something like it in the future!

Sunday, December 7, 2014

David Norkiewicz: Project 7: Unfold Shape

Statement of Purpose: For this assignment, we were tasked to create a foldable model, and were given a website (korthalsaltes.com)where we could browse and choose a pre-made design. I chose the dodecahedron. A dodecahedron is supposed to be a 4th dimensional object that was composed of right angles. I always found  this fascinating and want to create one.


Modeling techniques: This model require very little effort on my part, because it was provided by the website korthalsaltes.com. They provide several different pepakura shapes that can be used to create paper crafts.


We used adobe illustrator to create curves based on the PDF documents that can be downloaded from korthalsaltes.com. We broke up the lines into two different styles: Mountain and valley folds. After that, the curves were brought into Rhino and cut on cardboard.


The cardboard was stronger than expected, but with patience, and superglue, the model was complete.


Saturday, November 8, 2014

David Norkiewicz: Project 6: Wafle Lamp

Statement of Purpose: The inspiration for this model came to me while I was playing with sculpting clay. I took a sphere and cut it in half and smashed it into two other hemispheres. I really liked how the curves spilled around each other while still having a representative sharp edge.
I used the same thought while creating my lamp. I wanted to create a feel of round curves while having a sharp jutting edge of the two hemispheres.


Modeling techniques: To create this beginning design, I took a sphere and hollowed out the center. I then scaled the outside of the sphere back into the object so that the top halves produced a sharp curve. Afterwards, I scaled the edges so that the tucked underneath each other.


 The materials have been dropped off at the laser cutting lab, and I hope to get them back soon!
 I am using a .13" hardboard to produce my lamp.


Sunday, November 2, 2014

David Norkiewicz: Project 5: Waffle

Statement of Purpose: The inspiration for this model came from a table design I saw several years ago.I have wanted to find out how to do this type of sculpture for some time, and after seeing furnature created from this method, wanted to try to design a piece. The current table is a prototype of the design I would like to design in the future, that involves twisting and bending the table into a curling structure. I hope to be able to take this idea further with our next projects.


Modeling techniques: By creating a cube and booleaning spheres into it, the cube gains pockets from people to put their feet. The model that I ahve created is much smaller (rouchly 9-10 inched tall) and could be used as a small end table or placed piece.


The final model turned out better than expected. However tyhe bottom most piece did not fit on the model correctally and had to be scrapped.

Sunday, October 26, 2014

David Norkiewicz: Project 4: Slots

Design Concept

For our fourth project, we were given instructions to create a "slotted" piece. This consisted of us creating pieces from a sturdy board, and construct a sculpture using the pieces.

To help us with understand slots, we were able to design sculptures from sample pieces that Professor Scott provided. While creating different designs, I was struck with the idea to create organic shapes with the geometric shapes provided. However, I was not happy with the results that I encountered. 

The main problem I had was the shape of the pieces. I am a large fan of geometric shapes; however, the pieces provided only contained a few very hard ridged pieces. The pieces I created are sharper in design (or at least contain many corners) and overall contain very few curves. However, the shapes contain a variety of different slots at different angles. This will let me create twisting organic shapes with geometric shapes.

Techniques:

To accomplish this, I used a variety of move, copy, and array combinations to produce several shapes. After measuring the thickness of the plywood underlay board that I purchased, I created a small box and booleaned it into the meshes that were created. This allows for the pieces to intersect and not be to small (or large).


We are submitting our materials and Rhino file the next time our class meets to cut our materials and design our sculptures. I am very excited to see what type of sculpture I can create with these geometric pieces!


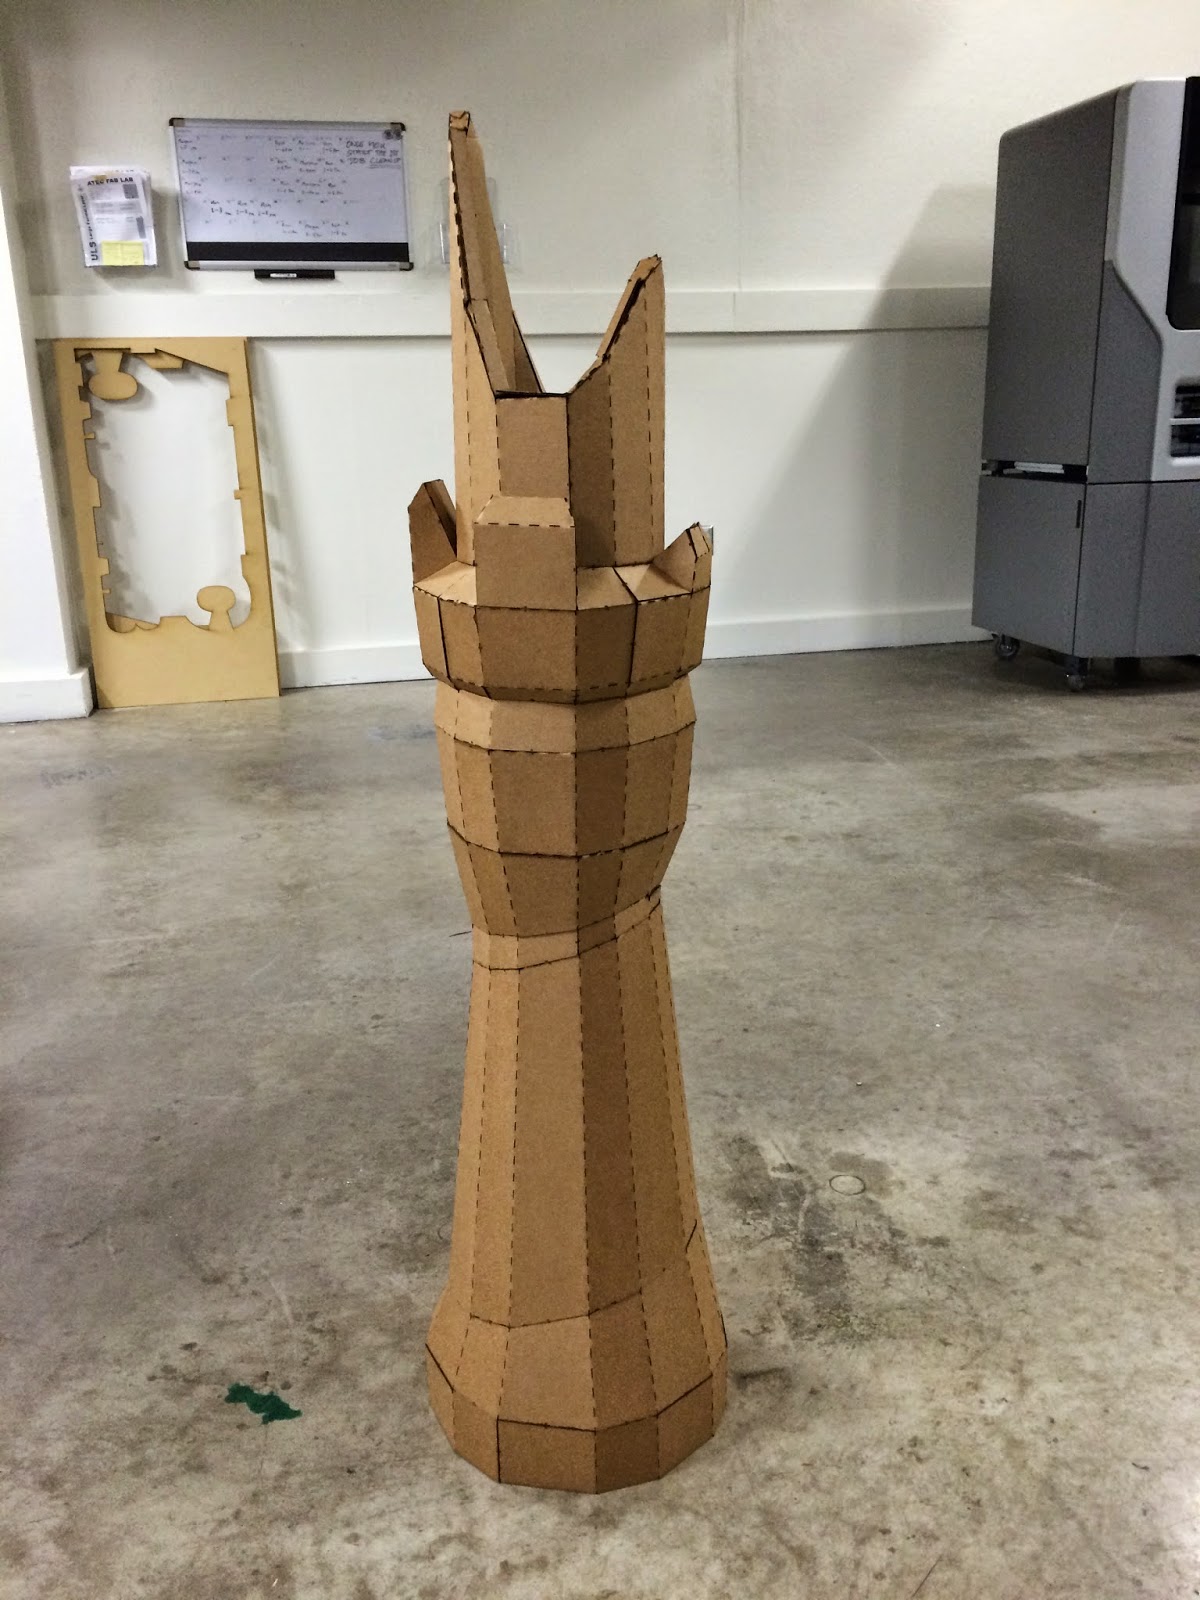
I have received the cut pieces!

Sunday, October 5, 2014

David Norkiewicz: Project 3: Contour

For week 6, we were given the task of creating a geometric shape that could be sliced into pieces for laser cutting and assembly.

    I have contoured a model that I created in maya for laser cutting. The model, while simplistic, becomes difficult to piece together as it curves. However, with clever placement of the support pipes, the model would look great!


The overall model is a cube that was twisted in Maya, then sliced vertically sliced to provide the contour. The model was then given supports that will support the model as it turns.


The inspiration for this piece came from one of the several different lamps that I have stationed around my apartment. However, the overall shape has changed to be more rectangular.

I like the overall design, and am thinking to make a different version in the future!

Sunday, September 28, 2014

David Norkiewicz: Project 2: Flashlight

The flashlight cover was the second project that our class was given. We were provided with a template to work from and create with.

The main thought I had when designing the cover was not to create somthing so complex that it would be a hassle to handle. Instead, I approaced the model with the intent to slade and fit in the hand nicely. The top part of the flashlight is beveled and cut in such a way as to make it easy to hang from a piece of string or lanyard.


The overall shape of the the model was created off of a template, but several extrusions and booleans shapped the side to create the ridged edges.

I have completed my Keyshots for both my flashlight cover and Lightsaber.


I am really looking forward to getting both of these printed!


The printing process has gone through, and I should get the model back in a few weeks!


The Flash light has arrived and looks great!

Saturday, September 13, 2014

David Norkiewicz: Project 1: Model LightSaber

I decided to do a basic light saber that I found online. It is not a very complex model, but I am more interested in seeing if the 3d printer can handle the weird pieces that make up the handle of the model.

The very first model that I ever created was a light saber, and I wanted to have fun with the idea of having a copy of a simple model that I can relate to. I see myself moving forward with 3d printing in the future, and I feel that having something that I can refer back to as my roots in modeling to be something important to me.

The light saber is a very simplistic use of extrudes and booleans to create the ridged effect throughout the model.


I have just sent my light saber model out to shapeways for printing.

Hope it turns out well!

I have completed my Keyshots for both my flashlight and Lightsaber.
Here is the lightsaber.


Just received my lightsaber back from Shapeways!
The model is in excellent condition, and I will have a picture up in the next few days!
The model looks great! I am thinking of making more 3d objects now!