Friday, September 9, 2022

Saniyah Zaheer: Week 1 Castle


The Forbidden City


Redwall

Concept

Besides the castles of Disney, my childhood consisted of the great walls of Redwall Abbey. Although not a castle in the sense that it belonged to royalty, Redwall is a fortress. It has a great strength and ferocity in its walls, but the people inhabiting it, though warriors, are peaceful and kind people. Ever since I discovered Redwall as a child, the Abbey has given me a sense of security and harmony. In order to incorporate these feelings in my model, I borrowed the blueprint of the building: the four great walls and towers in each of the corners. As I grew older I discovered the intricate world of Chinese monarchy. For all the goodness and simplicity of my beloved Abbey, Chinese Imperial Palaces were a stronghold of viciousness and intrigue. But I was attracted to the majesty of the buildings all the same, causing me to use tiered roofs in my model in a style reminiscent of the Forbidden City. 


Ghosted

Layered

Techniques

While building my model I used the boolean tools a lot. In the beginning, I continuously used the boolean join tool to bring together the different pieces of my castle. However, at one point in my work I realized that some of the pieces I had joined would end up on different layers with different textures. So, I created a surface, aligned it where I wanted to break up the object and boolean split it. This helped me save a lot of time in rebuilding everything. The other boolean tool I used was boolean difference. This tended to be used in conjunction with the array tool. To create the repeating windows in my towers I made a cube first. Then I used the array tool to create multiple boxes that surrounded the whole tower in one go. The boolean difference tool was then used to turn the location where those boxes were into empty space for the windows. I knew I wanted to borrow the style of the roof of the forbidden palace, but I wasn’t sure how to go about building it with the regular shapes. So I drew it first with the pen and used fillet to pull it out into a 3-D shape. Finally, there was my favorite align tool. This really came in handy for making sure everything was straight. When making the roofs of the towers it was hard to tell if the tiers were straight and they sometimes moved around, the align tool helped straighten this out. 


Pedestrian View


Perspective View


Top View

Materials

I chose bricks as my main material. Most old fashion fortresses were built up of bricks and stones and Redwall is no exception. So keeping in line with that aesthetic, my walls are red and brown brick. To give some contrast, I made the roofs out of stone. Since I imagined my castle out in an open land I found an open landscape environment for my lighting. 


Project 1- Castle, Jonathan Conde

 Concept: I wanted to do a simple, but at the same time, recognizable castle for this project where people can automatically see what it is. The reference I use is the Tower of London in England. I chose this reference because my parents recently visited this location and it looks like a stereotypical castle people usually think of. 

Techniques: The first thing I did was make a large flat base for my castle. I then built a tower with one cube and added the details on the top where the lookout terrace would be after just out of the cubes. I selected all the objects of the tower and copied and pasted them three times. For the windows, it was a bit of a learning curve. I made the outlines of the window frames with the line tool and extrude them by approximately 2 units to make them 3D, and closed up the empty spaces by adding surfaces to them. How I made the door and the frames for it was also similar, except this was scaled bigger. 

The walls that connect the four towers was just a tall, narrow cube without details. The door was placed on one of the walls between two of the towers.  

This is the part where my model looks different from the reference I used. In the middle of the four towers inside the walls, there is a bigger tower. It has a door, a window on each side, and on the top, has the same details as the four smaller towers. 


Materials: I wanted my castle to be stone-textured, similar to The Tower of London reference. However, there weren't any textures I would like to use in Keyshot. I made the walls of the castle whiteish light gray, the door and window frames gray, the windows black, and the doors brown. For the floor inside the walls of the castle on top of the towers, I used picked the color gray so it will have contrast with the white color of the castle. I used dark green for the base. 


Thursday, September 8, 2022

Luke Landis Weeks #1-2 Castle Project

Assignment: Learn Rhino Fundamentals by modeling a "Castle." I chose to create a design inspired by the town of Mos Eisely from Star Wars. Due to a lack of good reference material, I chose to make something evocative of Mos Eisley rather than recreative.


Ghosted View

Birds-Eye View

"Pedestrian" View

Perspective View


Yadira Anguiano: Week #1 Castle

 
Design Intent

The intent of this project was to use rhino modeling fundamentals to model a castle. For my castle, I decided to imagine a 3D version of a cartoon castle. I'm a fan of Adventure Time, so I wanted to model a version of Princess Bubblegum's castle (also called the Candy Kingdom). The castle needed to capture a cartoon-like feel to match the source material. Below is a reference photo I used. While I wanted to create a version of the castle, I wanted to focus on the main structure rather than all of the extra elements of the kingdom. 


References


Modeling Techniques


Ghosted

I began modeling the castle by creating reference curves. I made sure to keep grid snap and O-snaps on while creating these references to ensure clean modeling later on. The castle base is made with basic primitives, stacked on top of one another and then boolean-ed together to create one solid. For the castle frills, I began by drawing a rectangle curve. I edited the base rectangle by adding curve points and creating a round side. From there, I extruded the curve and then used Array Polar to circle the entire span of the castle. For the tree branches/tower base shapes, I first used a curve followed by the pipe command to create a solid. To create slightly cartoon-ish tower triangle tops, I used the bend command on a pyramid primitive. For any doorways or windows, I created a sort of "hole punch" shaped cylinder, positioned it accordingly, and then used boolean difference. 


Bird's eye
Materials

Returning to the original source material and design intent, I decided to choose bright and smooth materials. The majority of the castle uses either smooth or shiny plastic in assorted colors. As for the environment, I decided to use an outside field to simulate outdoor lighting. I made sure to turn up brightness for all lighting situations to match the cartoon theme. 


Pedestrian's view


Perspective


Sunday, December 5, 2021

Anita Chap: Final Project

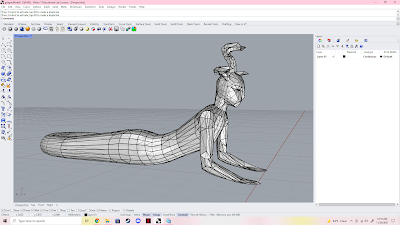
Concept: The concept of the design I went for was a sphinx and a gargoyle. 


 Final Pepakura Group Project: Gorgon


    For the final project we chose Keyerra's Gorgon design because we loved her design and thought it was different and unique. Looking at Will's design he wanted to do a horse and dachshund but if we move forward with his design we would've faced the issue of his top head being to heavy.


    The responsibilities for this project originally was for Keyerra to model her design, Will gets the model ready to cut in pepakura and then cut out, and I work on post processing. We all agreed to go in equal on our material but during the beginning of the project I got sick with Covid and I couldn't come into class or attend the open house. In return of not being able to attend I offered to pay for all the materials for post processing. In the end I had to get the cardboard from Keyerra and do the get the model cut in Pepakura and learn how to cut out the model.


     Our group had many difficulties during this project. Unfortunately the file I received wasn't going to fit the laser bed so I had to redo the entire model and get it cut out. I found it a struggle having to start all over and not having a lot of time because I didn't get the file till the week of Thanksgiving. I went up to TheLab Makerspace and got someone to train me on the laser bed to get the file cut out. Although once I was ready to get the file cut out the file didn't transfer over the cut lines correctly and my cuts shifted and overlapped.  I found it very frustrating with the lack of time I had then having to learn a few applications and learn how to cut it was a little stressful. I wish the outcome could've turned out differently because I thought this project would've been really awesome.


Saturday, December 4, 2021

Sebastian Tatum Lamp Project

Makercase Lamp Project - The Void

For this project I decided to take advantage of the lack of specifics, so I made a hanging wall lamp, plus I don't have any extra table space in my room/fablab anyways. I personally don't like the look of laser cut wood, especially in the use of electronics, it makes them look cheap. With that mentality, I used the laser cut wood as the backbone of a foam sculpted lamp. The last time I ever worked with floral foam was in high school, but back then I did not have the tools I have today.


To create the digital files for my project, I used a lot of scanned drawings and Adobe Illustrator. Working with separate svgs was a very different work flow than I am used to. Usually all of my drawings are made in the same software as my stls. When I needed to create a shape with a lot of weird angles, I would draw the shape on graph paper, scan it, open it in Illustrator, trace it, then finally bring it in to rhino to work with. Of course there are thousands of more efficient ways to do that, but I like being able to use a pencil when I can.


After signing up for the free trial for the 3rd time, I setup the scene in Keyshot. For the materials I went with wood, of course, for the laser cut wood sections. With the raster burns I just used a slightly darker wood. The foam was really easy, the foam gets an interesting texture when painted that is very similar to the fuzz materials in Keyshot. The insert is paper, but when its turned on its a luminescent material.


Wednesday, December 1, 2021

Miko Aguon: Makercase Lamp Week 12

 Concept 

==========================================================================

The board I wanted to make would be a board that is based on the old comic strips I used to draw as a kid. It would be the centralized image of them all spreading their wings out to the other drawings that have stuck with me. While it may not look good, it still holds sentimental value to me. Nothing much else to it. Characters from both the past and present.

Characters include Jimmy, Mr. Bass the Bass, Alchestbreach, Steve the Roach, the Love Monster, Me, Kyle the King, Kara the Killer, Annikah the Agile, Bob, and some misc. faces and side characters. 


Techniques

==========================================================================

I used an already made model for the skateboard to 3D with then used the AI file to extrude from it, leaving a hollow hole, then used a copy of the AI file to "fill" it in, giving it the colors and engravings. For the laser cutting, I went to Makerspace and they helped me out. I had to hatch my drawings in Rhino first and then convert it into an SVG (that was required for maker space) and then start laser cutting after a few test runs. 


Materials

==========================================================================

The material used for the render was the wood pine material as it was closest to what my skateboard's material looked like. I used Keyshot to get my render and grabbed the render and put it into photoshop to get the final images. 

Close Up

Tony Hawk Holding My Skateboard

Skateboard Leaning On Wall

Skateboard Hanging On Wall


Finalized Product

==========================================================================

I ended up using an alcoholic marker (do not recommend, use colored pencils instead) to color the engravings. It bled onto the rest of the board and I could not get it out. I am however somewhat happy with how the colorings turned out.