Thursday, April 30, 2020

Bayang Flores: FlatFab Model

For my FlatFab assignment I wanted to create some sort of model with a dress. Originally I wanted to create a ballerina with an ultra-wide tutu, but found that the idea didn't lend itself too well to balance if I were to make it into a decorative standee on my desk.  

I've been watching a lot of The Jetsons lately and decided on a retro-future type aesthetic for this model instead. Looking at a lot of modern minimalist sculptures as well, a lot of them tended to be quite abstract, so I wanted to go down that same vein.

I made her skirt to be big and asymmetrical but still fashionably stylized. I ended up adding a derby hat as well to pull the bombastic look altogether. I was sadly unable to render these properly, but I imagine if I were to actually fabricate this, I would make it with painted plywood or laser-cut it out of acrylic. 

Wednesday, April 29, 2020

Cameron Ouille Week 14/15

Reference

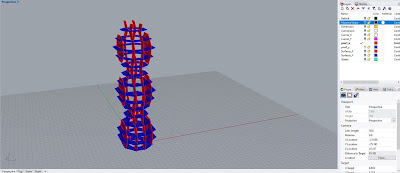
I was inspired to design my lamp to have the dual purpose of a cd holder like you would see back in the 90's but also give it a wacky shape like a swimming pool if you put the light at the base.
Spartan Pool & Patio


Process

I first designed the pool shape via sketch book. After creating the design in Rhino I focused on spacing the racks far enough apart that cases from cds, dvd, and even games consoles could fit in the racks. I struggled with getting the pipe function to work properly and found myself repeating a few steps once I had realized I forgot to select something before a command and only found it later down the line. While working on the 2nd half I became quite sick and had to postpone my work. When I resumed I was able to complete it and have all of the wedges and teeth fit together.


Rendering 

Unfortunately I did not have the money available for Keyshot so my renderings were all done in Rhino. If I was to Render in Keyshot I would have used plywood fow the horizontal pillars and a darker wood for the vertical.


Tuesday, April 28, 2020

samuel toro project 1


Samuel Toro Project 1


For the project i was supposed to create a castle using the basic shales of rhino. I based my work on the Disney castle. something really basic. So i started creating the outside walls. then the 4 corner towers. simple shapes, just cones, cilinders and rectangles. and like that until i finishis it.

for the ouside i wanted to create a fountain. so i just made a cilinder and then pusj down the face to create a deep prespective. Then make a tower like the castles on the middle.
arrond the fountain there is the keepers of the castle. wearing a cute hat.


For the rendering i wanted to use cold colors. so there is a lot of blue. For the textures just use solid painting for the castle and the outise is metalic blue. 
I chose a black background because it will highlight more the castle colors

Samuel Toro FlatFab

Samuel Toro FlatFab Project

 For this project i was required to create some kind of animmal using Flat Tab. I wanted create something crazy. i have seen some dinosaurs and mammals, but i dont felt confortable with that. so investigating i decided create a gryphon. tThis mythical creature is in part lion and eagle most of the times.So i started with the body shape.The figure is quadruped, so the legs at the back are supposed to be bigger than the front ones. it has shaped claws and the back legs have one claw at the back to create more stability on the figure. I wanted to create a very extrovert shape. So insted of one tail it has two, creating a huge simmetrycal shapepointing the head.
The head is like an armor over the real head.


I created this to be a pretty figure to have inside houses. Nothing too big or small. Something just can be apreciated . 


For the rendering i decided use dark metal because it makes it shine. The background is a kitchen where everyone could appresiate it. 

samuel toro project 3

Samuel Toro Project #3


For this project i had to renderize a model using tools froms photoshop. so i decided use this type of sphere with some spike outside and inside. there is some wholes that let see inside the model.


The first thing that i wanted was let the spectator see the inside spikes, so the object has to be some transparent. I decided use, in the inside a red glass texture.While the outside is a dark metal with lower oppacity. All the modifications was maded using the clown layer. i wanted to make the shadow red because the inide of the object is red glass. And for highlight the shadow i leaved the background black. It creates a greater impact. shining the red inside and the birghtness outside.

samuel toro :project 2


Samuel Toro :Project 2


For this project i wanted to make something creative. so i tryed to made a cartoon taking of base a cube. I used topMod starting with a cube and then subdividing the faces, then i just extrude the faces that i wanted, making something like pixel art just that in 3D.


The rendering proscess was simple. i saw my cartoon as a toy of plasctic, so i just took that texture and applied to it. The blackground is simple and i put the figure on a side. making it a good wallpaper to have all the aps on the left side and highlight the model. 

Monday, April 27, 2020

Rochelle Offret: Final Project: Architectonic Lamp

Concept:
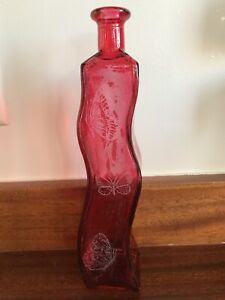
For this project I wanted to create a lamp that had more of an organic feel to it, yet would still be seen as functional, and tasteful.  Part of my inspiration for my organic shape came from an old olive oil bottle that I held onto for years, because I thought it was intriguing. I wanted to create a lamp that had similar qualities but with my own twist on the design. I no longer have the bottle but it looked similar to this one.

Process:
 
I struggled to achieve the shape I was aiming to achieve for quite some time.  I think this is because in the beginning I was overthinking the way I should approach the project.  So I took the advice of a very wise professor, and slept on it.  Upon my second approach I was able to attack this project with a much clearer outlook.  I created a circular curve with a 6" diameter, then I created a vertical curve using interpolate curve to create the "wave" that I wanted to achieve as the eye traveled along the lamp.  I then used polar array to duplicate an exact copy of it on the other side of the circle curve, and followed that with a 2-rail sweep to get my inner shape for the lamp.  For the outer shape I took the two vertical curves from the inner shape and copied them onto a rounded square curve, and then rotated them so they were on a 90 degree offset from the original two, then once again I used a 2-rail shape to get the beginning of my outer lamp body.  I then made a copy of that and rotated it until it was lined up the way I wanted it to be with the original.  From there I combined all three objects together to get my final massing shape.   

From that massing shape I used the Contour command to create the waffle like planar surfaces I would need in order to create an architectonic lamp.  Then using the cut-my-ribs script and the massive unroll to create the cut out sheets that will be needed for laser printing later on down the road. The end result was pretty impressive and I'm excited to get this lamp cut out and put together!
Massing Model & Planar Model

Planar Model Painted


Materials:
  For the materials I decided to go with a combination of wood for the horizontal pieces.  Then for the vertical pieces I chose to use a glass material that I created a marbled effect and added some color for eye appeal.  


Carlos Franco: Week Fourteen/Fifteen Architectonic Lamp

 Week Fourteen/Fifteen: Architectonic Hearth


Concept


When approaching the topic of an architectonic lamp, I thought about the relationship
between architecture and lighting, and got excited by the potential of how much lighting, in tandem with the waffle structure design, could change the perception of simple geometry. I decided to construct my lamp out of a strong geometric shape, embracing the angularity and sharpness of simple wood cuts. I drew inspiration from James Turrell's unique blend between the disciplines of architecture (shape and form) and light (perception and emotion). Additionally, a series of Nordic-inspired lamps designed by George Nelson helped me think about form.


James Turrell Exhibition

Nelson Propellor Lamp


Process


The process for creating the right geometric shape took some playing around. Eventually, I landed on an octagon for the base and a rectangle for the top, which would open out and deliver ambient light to the atmosphere. I used a polyline to form the cross section for a two-rail sweep, which was able to seamlessly connect the eight sides of the octagon with the rectangle's four. Then, I trimmed the pieces as to create a consistent rectangle shape. The overall object can take on various looks, dependent on the angle.

Ghosted Model/Show Edges


Materials


In KeyShot, my main focus was ambience. It was important to find an aesthetic blend of materials that showed of the versatility of the form-factor and the color of the light within. The hearth uses dark walnut to convey the simplicity and warmth of wooden construction. Lastly, a more artistic and abstract pass invokes Turrell and further solidifies the range of perception associated with a singular shape.


Twinkle Shah: Final Project: Architectonic Lamp


Architectonic Lamp:Tree Stump Lamp 

Concept
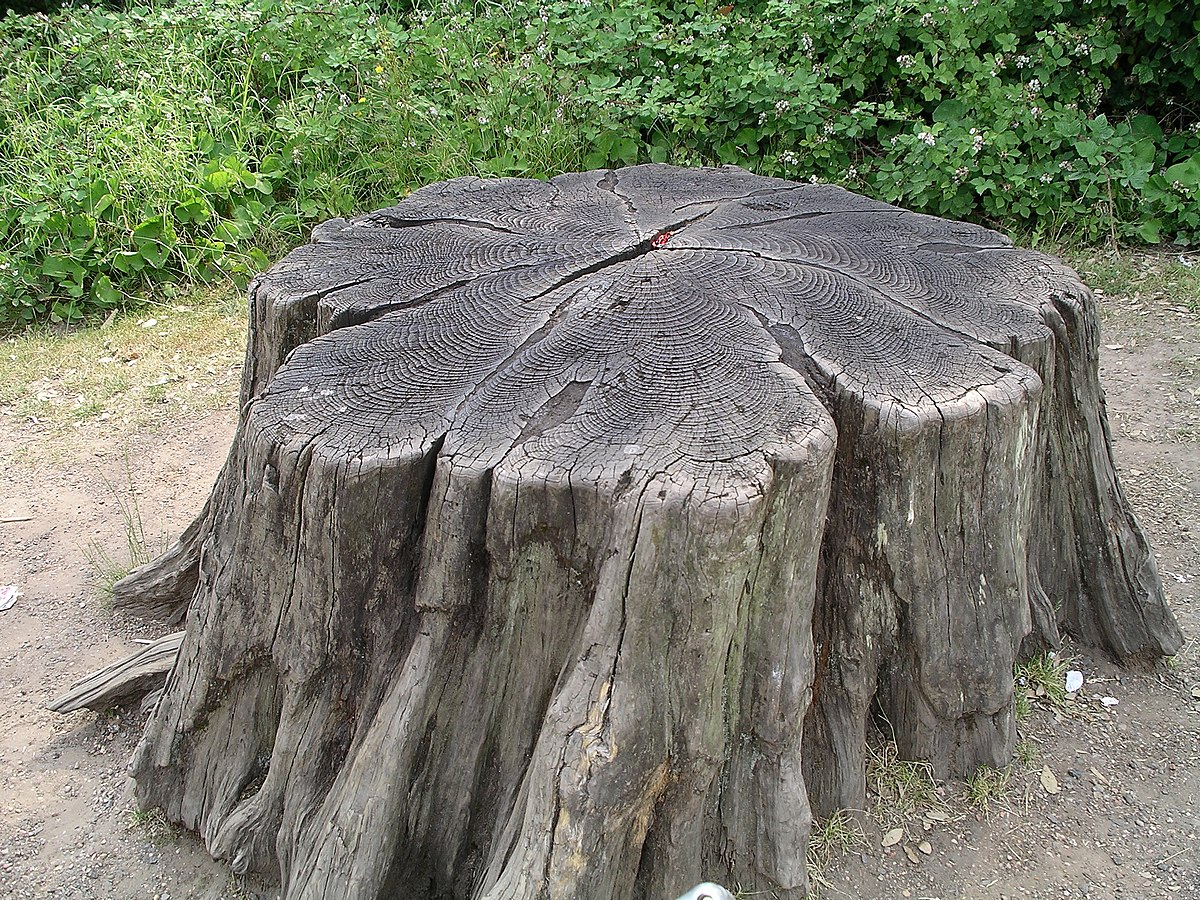
The inspiration for this project came from a piece of furniture that I have in my room: a small table that is made from a cross-section of a tree. I think the shape of the table is very beautiful and I love how organic it is. I derived the inspiration of the base of my lamp from the shape of this table, and built it up so that it looked like a tree stump. Once I made the radial and horizontal components, the structure had some architectonic qualities. 
Tree Stump Table


Tree stump - Wikipedia
Tree Stump

Process
To begin building this lamp, I drew a closed curve that had an organic shape that resembled my table. I then drew another similar shape, and stacked that on top. I created a loft from those two curves. I then duplicated both of the curves and then scaled them down to fit within the outer loft. I then created a second smaller loft inside the bigger one. After that, I did a BooleanDifference to make a hole shaped like the inner loft, within the outer loft.
From this Massing model, I produced vertical and horizontal components using the Contour and Section commands. Then, I used the piping method to make all the intersections into 2 pipes each. After that, I created notches using the Split command with the pipes and the horizontal and vertical components. The result was a lamp that looks like it could be a building too.

Massing Model Painted Black 

Planar Layers Painted

Perspective Lamp with Orthographic Views

Detail Perspective View of Lamp with Cutsheets


Materials
The materials I used in Rhino Renderer were Crackle Porcelain for the horizontal components, and Zebrano wood for the vertical components. I really liked the textures of these two materials, and thought that their colors and textures complemented each other very well. The wood grain along with the porous crackle helped achieve a nice variety and contrast. I think a real lamp made of these materials would be beautiful because of how the materials would interact with the light. 

Cameron Steele: Architectonic Lamp


Concept:

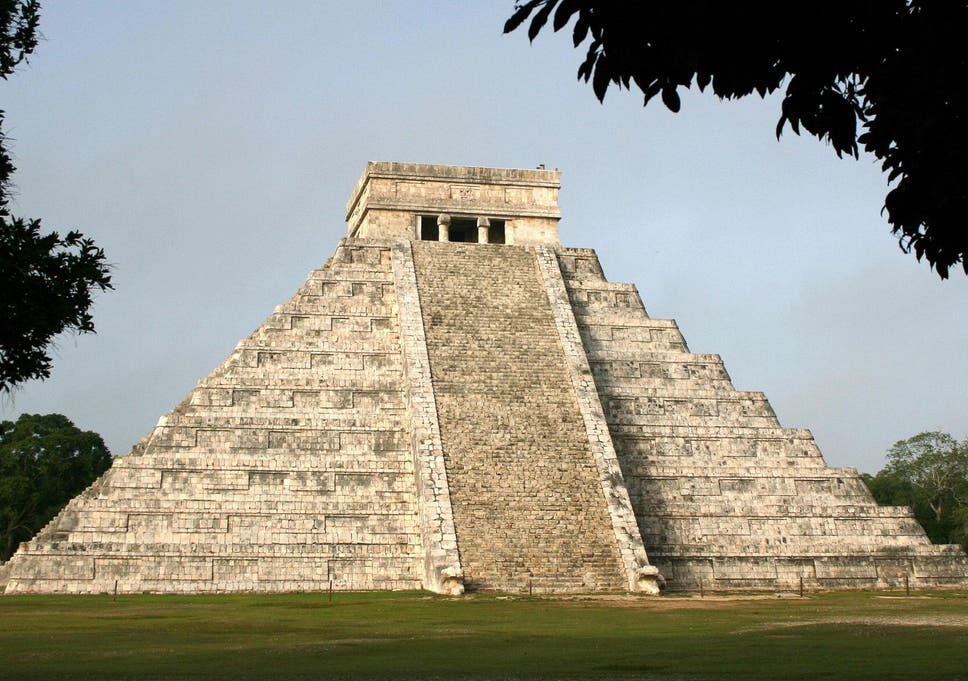
Hidden passageway discovered under ancient Mayan temple | The ...

My main inspiration for this lamp came from Mayan Temple designs. But I also wanted to keep it minimalistic, simple, and symmetrical.

Process:


The majority of the construction of this piece consists of boolean unions and subtractions. As well as creating blocks using curves and the revolve tool

Final:

The final piece consists of wood texturing, ideally, I would eventually be able to use a variety of translucent acrylics that would culminate in a rainbow allowing it to cast a rainbow in all directions and a white light down the end of the lampshade.


David Hobson: Architectonic Lamp

Concept:

Back at it again, trying to reintroduce brutalism back into the world. For this project, I took the tower from my castle project and but it through the CutMyRibs script. I wanted to keep as much of the brutalist feel to it as possible while also adding a more modern feel. To that end, i wanted to make this lamp a fair bit bigger, so it could hold more fixtures and illuminate more.

Process:

To my own detriment, I made far to may ribs. 74 to be exact. Some of the scaling came out a bit off but after tooling around it all came out fairly decently. I started by contouring the x and y planes from the front and went in and removed some parts to help it feel less cluttered and also to allow more light through.
comparisons w/ layers

Materials:

Falling away from exterior brutalist design, I choose a dark wood to give it a homely appeal.


Hayden Staples: Architectonic Lamp

Concept:

For my lamp, I wanted to make a design with a square shade that incorporated the ideas from modern abstract art: shapes blending together to make aesthetically appealing appearances.

Process:

Form Comparison

Layers

To build the massed object, I used a method similar to the way we built the flashlight model: revolving a curve around an axis. Then, I built a cube around the top half of the revolved shape and boolean split both objects along a curve in the side view. I then joined the two objects together. To get the middle hollowed out, I made a curve, revolved it, and then subtracted that volume from the lamp. Then I used the method described in the videos to make the ribs.

Renders:

Render 1
For my first Render, I imported a desk model and a computer model from free3D.com to give my lamp a digital location to exist in. Then I built a house around it and gave materials to the desk computer and the lamp. This version of the lamp has burnt copper for the vertical pieces and green brushed metal for the radial slices. These are the UTD colors because I was feeling a little homesick. There is a setting sun, a light inside the lamp, and a third lamp from the "roof" of the house.
Render 2
My second render is a lot sleeker than my previous version and has shiny dark gray radial slices with translucent-lavender plexiglass ribs. In Photoshop I used 5 different passes to emphasize transparency and reflections while making the color pop. This render also has the make 2D drawings, dimensions and unrolled slices.

Concept:

When it came to the concept of the box, I just wanted something simple. I decided that I should go with an open-top box so I could use it as a simple desk container for something. I also wanted the box to be themed around things I enjoyed. I decided that I was going to draw from a video game I enjoyed, being the Legend of Zelda series.


Process:

I got the initial SVG files for the box from one of the provided resources. I then took it to rhino and made a sketch of the shapes I wanted to cut out. I then extruded the box pieces. After that, I extruded the shapes and used boolean split to cut them out. I then used the rotation tools to stage the model for the box that I would use in KeyShot.

Materials: 

In KeyShot I used birch plywood for the box. So I decided that if I were to make this physically, I would use 1/4in thick birch plywood.


Andrew Psencik: Architectonic Lamp

Concept:

My main inspiration for this project was the helmet of the Mandalorian from the TV series. This helmet is simple but is very defining in its few details, which I think would look good as a lamp. I used the schematic above to help with the initial modeling and the position of the visor. Obviously, most of the detail was overlooked so the lamp could not look too busy.


Process:

I started creating the main mesh to be,"piped," by creating the outside shape with curves and lofted the remaining side part indentation. This proved to be quite difficult as all the curves were complicated and non-planar which added some warping that I had to fix. After I finished the main model I simply followed the tutorials and piped the model with success. 


Materials:

Using Keyshot, I simply used a dark wood material as that would be what I would use to create the lamp in person. I then added a simple light to help portray how the lamp would actually work. I then used a dark plastic for the visor and I'm not sure how I could replicate that in person. Overall I was pleased with the look of the lamp, especially how the bottom is not flat and rests at an interesting angle.