Sunday, March 3, 2019

Project 2: 3D Printing Midterm

Zane Alberts 3-D Printing Midterm


Concept

As a fairly practical person by nature, I decided to come up with something I would actually use if I were to have it. Knowing I have a problem with organization and have many papers spewing across my desk, I thought perhaps a paperweight would be useful in this case. Fairly basic and easy to create, I nonetheless wanted to give the creation a little bit of visual interest. In order to be heavy enough to hold down paper, I figured a bottom heavy design would be best, not to mention one not overly tall or wide. Having worked with 3D printing in the past (I had an engineering class in highscool centered around this, we used the CAD program if you were interested), I know that intricacy is not very easy to accomplish with the cheaper printing options available to me, and often can take away from the overall look. Thus, I went with a simple, yet effective creation.


Process

Well, technically, I began with a completely different concept in mind called the "eye cannon", however it was both too large and too impractical to be worth making. For the paperweight, I begna with a simple cube, 2x2, in Rhino. I created a cylinder from the base rising up to 3 inches high, overlapping with the cube. It was slightly overlarge and stuck out of the sides of the cube, so I rectified that. Then I made a sphere at the very top of the cylinder, creating a dome atop my glorious paperweight. Following this, I bonded all of the shapes together via boolean union. Completing the design is naturally the eye socket coming from the dome, which I accomplished by placing a sphere against the dome and using a subtraction based boolean union. Then, I checked for any naked edges (there were none, though I expected some inside the socket), and transferred my creation over to keyshot for rendering. 


Materials

In Keyshot, I chose a slightly unconventional cartoon material for my piece, as I felt the simple style and exaggerated smoothness of toon made it quite appealing to look at. The color was an improvisation, as seafoam green is one of the color's I've grown to tolerate more and more as of late. When printed, I chose white due to a greater opportunity to paint and customize, not to mention being a very no nonsense color. The material itself was acrylic.


Carol Newhard Castle model


The concept for this project was a farm house with wrap around porches. As I began to work I put a more eclectic and unorthodox spin on the porch idea. My ideas were to add objects to this structure to make it have an unusual appearance. I wanted it to look like something no one has seen before.

The modeling techniques used were very basic and elementary. I used basic objects from the tool bar and tried to combine them in away that would create interest.

The materials used in Keyshot were  all elements are shiny white plastic. This was done to give the image a look of a industrial colony. By industrial colony I mean a corporate owned town. The lighting was meant to highlight this somewhat sterile environment. 


Jack Purcell: Project 2 3D Printing


Ghosted Image


Layered Image

Concept: I wanted 3D print something that would represent me. I was originally going to try to create a chess piece, but then I thought I should make a piece of jewelry instead as I could better customize it to represent me. Per Professor Scott's suggestion I watched P.J. Chen's tutorials for making jewelry with Rhino. She had a tutorial for making a signet ring which appealed to me, and I wanted to create a signet ring with my logo on it.


Process: I followed P.J. Chen's tutorial for making a signet ring but I improvised on a lot of it rather than using a curves network I lofted a series of hexagons. I however found her use of the boolean and alignment tools very useful. I also imported the logo which i made in Illustrator into Rhino. When I was finished with the object I did a test print and found that the orientation that It had to be printed at reduced the detail so I went back into Rhino and sliced the object in half adding pins to connect the two halves so each part could later be joined and aligned properly. I then printed the separate parts in an orientation that allowed for maximum detail eventually gluing it all together. To remove the serial signature of FDM 3D printing I sprayed the ring with several coats of sandable filler primer, and sanded the ring to a uniform smoothness. I left the ring without a final coat, as I would one day like to create a mold from the ring and cast more out of different materials and it wouldn't need another coat if it was just going to be a master copy.

Ring Components
Ring Glued Together
Ring Filled and Sanded
Ring Filled and Sanded 2


Materials: I chose MatterHackers Lilac ProPLA to print this model with as it has more dimensional accuracy and isn't as subject to warping during printing as ABS or regular PLA. I also chose the Lilac color as I thought it would contrast with the primer showing which areas have been filled and which are the ProPLA material. While I would have preferred using an SLA print with high resolution resin the Dallas Makerspace's FormLab 2 printer was broken, but the inexpensive cost of FDM printing ProPLA allowed me to test multiple iterations.


Charlene van Zyl: Week 8 Midterm

Concept:
I initially wanted to do an abstract piece for this project, but later wanted to do something with a concrete meaning. I really enjoy working with organic shapes in Rhino, so I wanted to model an animal. I decided on doing a cat for this project since my kitten had fallen asleep on my foot when I opened up Rhino to test around with models.


Techniques:
I used many of the techniques used in the duck tutorial for this project. I started off with a sphere for the body, manipulating the control points until I was satisfied with the shape. This process was repeated for the cat's head. I sculpted another sphere into an ear-like shape, trimmed it down the middle, and offset the surface to create the ears. Ellipsoids were used for the flanks, and spheres for the front paws. To create a flat bottom, I trimmed the lowest parts of the cat and capped the open shapes. I knew that I wanted my cat to look simplistic and minimal, so I used a single layer because there would only be one material.


Materials:
Since I went for minimalist look for my cat, I didn't want an organic surface for it, instead going for something sculpture-like. I eventually decided on a red-gold metallic texture, since the color also went well with the red plastic used for the 3D print.


Twinkle Shah Week 8 Assignment 2 Pendant

Keyshot Main View of Pendant

3D Printed Pendant with Attached Chain


Concept:
At first, I tried playing  around in Rhino to see what I could come up with because I didn't have anything in mind. I didn't make anything that was worth printing in my opinion, so I tried to step away from Rhino for a bit and think about what I like. I own a lot of jewelry and really like wearing it, so I thought it would be a good idea to make something I could actually wear--perhaps a pendant that I could put on a necklace. I'm fond of astronomy, and an emblem that I feel attracted to is of the sun with the moon wrapped around it. I decided then that I'd make a pendant of this emblem.

Ghosted Image Painted Black Rhino

Process:
I started with a small sketch on paper, then I created a single curved line within a circle, to make the moon inside a circle. I turned both into pipes and I trimmed the excess part of the curve with the circle. I then joined the two. To create the sun's rays, I created a small, slender cone, oriented it onto the torus, and used ArrayPolar to duplicate it 3 times for some rays coming out of half the circle--making that part look like the sun. To add more interest to the moon's side, I created some small stars with the star tool, extruding them, and ArrayPolar. Then I used Boolean Difference to cut star shapes into the torus. 

All Views of Pendant in Rhino

Materials:

In Keyshot, the materials I used were Anodized Titanium Champagne Brushed 90%. I liked the delicate look it gave and I think it suited the celestial objects. The pendant was 3D printed in PLA Black at a bit under 2 in x 2 in x .13 in. I liked the black color for it as well, although I think it gave a very different vibe to the piece. Unfortunately, the engraved stars I had made with the Boolean Difference didn't turn out so well because they were so small. According to the man at MakerTree, this was because it was printed in PLA. He recommended that I choose FDM for more detail-oriented prints in the future. 


Keyshot Material Assignments

Keyshot Perspective View


Ryland Smith: Week 8 3D Print

Concept:  I pondered on the macabre. I had been looking at Memento Mori art when contemplating this piece. Death and life may be rather bleak. After seeing the fillet tool I thought that the tool would work well for a coffin. So I began making a coffin and to give it character I would add some stylized carve work. Perhaps the character of death isn't so grim or bleak but an expressive character that imprints on us all the joy of life.
Dimensions in inches

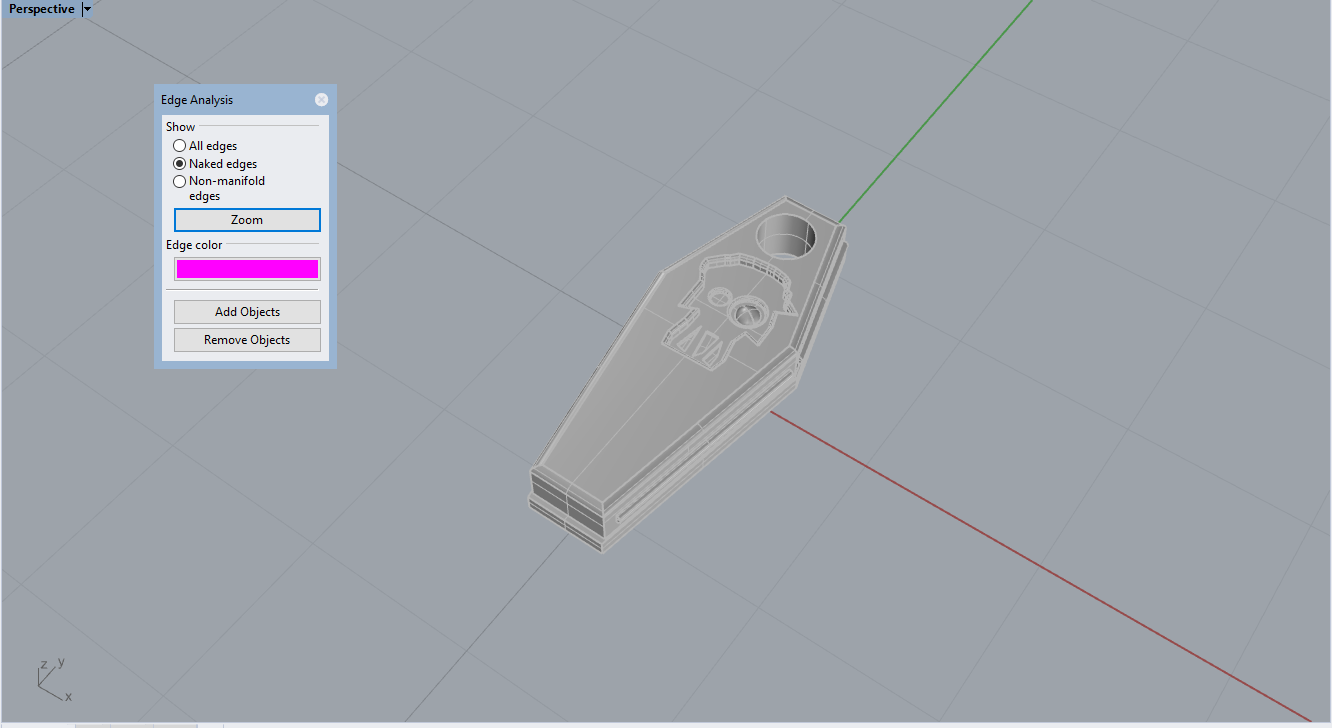
No Naked Edges

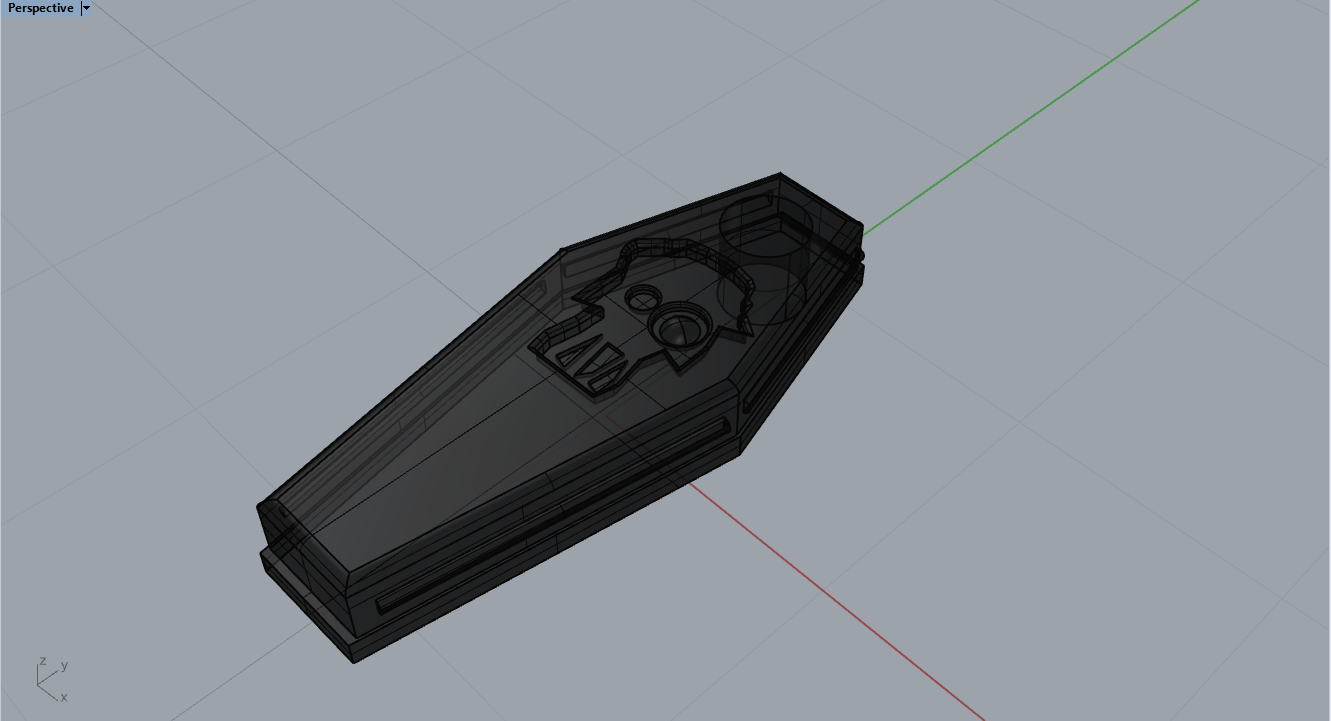
Ghosted Painted Black

Layered


Techniques: I knew from the start I wanted a uniform material choice, that I would use the white 3D print material and explore the space and interaction with the light it has. I created rectangular prisms and then booleaned2Objects them at the angles and positions to make the general shape of the coffin. I then outlined the coffin with polylines and scaled it up slightly to create the base of the coffin by extruding the shape and capping it to add dimensionality and weight at the bottom. I would boolean union this to ensure the objects were one. I then took cylinders and union them to the coffin to add more dimensionality, or holding points to carry the coffin. I then drew my character with polylines and extruded the object. Following, I booleaned2Objects the extruded character and the coffin to imprint the character in the coffin. I capped it to fill it and added a sphere in the bigger eye. Finally, I filleted the edges around the coffin and the skull character. I then added a hole by making a cylinder and boolean2objects so I might put a chain through it and add it to a key chain.

Render 1

Render 2


Materials: In keyshot I used soft rough plastic to simulate the 3d printing material. The 3d print material I ended up using was the PLA process. I left the final product untreated as I enjoy the serial signature and the way it functions as a monochrome object. Ultimately, the flat object corresponds with the bleak feeling I strive to evoke and add subtlety to the character.
Final Shot 1

Final Shot 2

Final Shot 3


Wednesday, February 6, 2019

Marvin Robinson II Project 1 Castle


Concept:
My prototype castle was inspired the Kuwait Towers. I chose to add several more towers and add a rail system to add more character to the tower base that is sat upon a pentagonal base.


Techniques:
The use of the shape tools and extruding and extrapolation helped give shapes elongated towers and each of the spheres are shape in a more oval ellipse to allow the flow of light through the structure tubing and spheres were used to create the rail system with a slight variation of pattern to add character.


Materials:
The tower is of polished yellow gold to give it a sense of grandiose to match its large scale. The sphere are of clear glass to maxims the god ray effect that shine between the towers. the pentagonal base is that of a polished copper to give the effect of rose gold and blend with the wood tones of the larger base while complementing the metallic colors of gold and silver. The rails are that of black marble and polished silver