Showing posts with label andrewfscott. Show all posts

Monday, September 18, 2017

Conrad, Michael: Castle Fall 2017

concept
I appreciate the roundness of the features of Antoni Gaudi.  Ultra modern simplicity was imbribed into the sculptural space that could serve as an expansive living space.
Image result for antoni gaudi works

technique
Using the polyline tool, I lofted a wall structure to make a facade.  Then, I incorporated a central space that could serve as a courtyard.  I added a slanted partition to the larger of the vessel rooms.  There are two paraboloids on the surface to offset the loneliness of the ingoing cylinder and to serve as decorative elements.


material
Urban concrete texture best matched the theme of the concept because of its rigidity and absoluteness of form.  

Monday, September 11, 2017

Andrew F. Scott: Castle Fall 2017

Concept
Starfleet Machine 2 IIHIH

A conceptual description of your projects and any artistic influences used to create it. My castle is based on the kardasian homeworld


Techniques


ghosted image

ghosted image with keyshot layer assignments


 Describe the modeling techniques used to create your model


Materials


 Describe your material choices and how they reflect the initial concept of your model.

Sunday, October 9, 2016

Draven Ashorn-Hejl: Week 8 - 3D Print


Concept: My favorite game is Final Fantasy XIV, and in it your character wears a lot of accessories, including a pair of rings. One of the armor sets in the game is the Halone's Champion set, an angelic set of armor with a focus on wing imagery. Unlike many sets of armor in the game however, the Halone's Champion set does not have an accompanying accessory set, so I decided to make my own idea of what the rings of the set would look like.


Process: For the model of the ring, I kept things simple, as in Final Fantasy XIV their ring designs are all simple bands focused on highlighting one feature. In this ring's case, the focus was on the wings at the top, which I made by manipulating a sphere with Gumball until it was flattened, then cut a notch into it using BooleanDifference to add detail and some dimension. I then grouped multiple "feathers" together into a wing, then mirrored the first group to the other side of the ring to make the matching wing. To keep the wings solidly attached to the core band, I used simple cubes the length of the band to fill in the small gaps between the feathers. For some extra detail and flair, I added a 7-sided pyramid to the top as a small decorative gem, and cut small gaps into the core band of the ring so that it wasn't plain and flat all around. After the model was printed, I hand brushed on 2 coats of XTC-3D and then hand painted it with acrylic paint to finish it.


Materials: In Keyshot, I used Brushed Metal in gray and yellow for the core ring band and the wings respectively, but tweaked them to be more silver and gold. For the gemstone I used Blue Gem Stone, tweaked to be less transparent and rougher, with a deeper blue hue. For the physical ring, it was printed with basic 3D printer plastic, and I hand painted the ring with acrylic paints.


Muhammad Martinez: Week 8 3D Print


Ghosted black
Ghosted with colored layers
Keyshot with material - bird's eye
 Keyshot with material - ant's eye

Initial print
In-process painting
In-process painting
Painted model


Concept
A 3D print of my week 1 castle. The print was done through Shapeways with little to no markings. Colors were redone to feel more like a monopoly token. All details were large enough to be printable, and difficult to paint. 

Model Techniques
Minimal modifications were made from it's previous design in week 1 such as size. It was designed by manipulating 3d shapes. However, materials in keyshot were swapped with matte plastics. Their colors were based on the paints available.

Materials
The model was printed using colored sandstone in this case a white polished color. Acrylic paints were used in place the metallic design originally designed.

Monday, September 12, 2016

Draven Ashorn-Hejl: Week 2 Duck


Concept: Whenever I think of a duck, thanks to reading the webcomic El Goonish Shive I generally end up thinking of those hilarious little demon-themed rubber duck toys. Since I am ridiculously new to modeling, a simple toy seemed like an attainable goal, so I went for that.


Modeling Techniques: Since I don't know much about 3D modeling, I mostly followed the tutorial. I used multiple spheres and then deformed them to create the body, head, bill, and eyes of the duck itself. To keep from exactly copying the tutorial, I focused a bit more on trying to make spread wings on the duck. I also added horns for the signature touch of the demonic duck idea.


Materials: For the materials, I simply used the Rubber material for all of the pieces due to my goal being to replicate a toy rubber duck, and recolored the material for each individual part to create the look and coloring I was going for.

Draven Ashorn-Hejl: Week 1 Castle


Concept: This is the first time I'd ever used a 3D modeling program before, so I wanted to keep things nice and simple. In many videogames that use sprites, a castle is depicted as a wall with a single keep inside of it, so that tends to be how I think of them. It is this simple idea that I went with to recreate in 3D.


Modeling Techniques: As this was the first thing I'd ever made with 3D modeling I kept things extremely basic, using only basic cubes, cones, and a cylinder to make my castle, using specific number coordinates to place each piece to keep it from becoming a mess. To keep it from being too boring, I used Boolean Difference to cut a gate into the outer wall and hollowed out the central keep to create a 2-story inside, and I also added windows to it so you can see inside.


Materials: For my castle's render I went with an Obsidian texture to give it a dark sheen, enforced by me removing the marbling by customizing the texture to be just the pure black. I also used a glass texture for the central keep's windows so that they could keep their function of letting you look inside the keep.

Sunday, September 11, 2016

Muhammad Martinez: Week 2 Ducky

Ghosted black

Ghosted with colored layers

Keyshot with material - bird's eye

Keyshot with material - ant's eye

Concept
With ferocity only matched by King Ghidorah himself, this terrifying trio transforms the rubber ducky into a force to be reckoned with. These guys can proudly join the ranks alongside other three-headed avians.

Model Techniques
I continously rebuilt the body with different points while teasing it into shape. The shape of the bills were drawn out in the right viewport then projected onto the heads. Commands like Join, Explode, Blend, Patch, and EdgeSrf were needed remove the naked edges formed between the head, bill, and neck.

Materials
Colored plastics were used for the body and heads of the model.Colored stainless steel is used for the bills along with precious metals for the eyes (gold and platinum).

Muhammad Martinez: Week 1 Castle


Ghosted black

Ghosted with colored layers

Keyshot with material - bird's eye

Keyshot with material - ant's eye

Concept
My original castle was inspired by the Weisman Art Museum with its use of partial cones and cylinders. Needless to say these designs were over-ambitious as a beginner to modeling. After a few iterations, I learned to compromise with Rhino to create something simple and interesting.

Model Techniques

This model exercised editing, rotating, and positioning polysurfaces. After plenty practice, I began quickly switching between viewports and getting a feel for thinking in three dimensions. ArrayPolar is a fun command that I played with in every castle attempt. This project gave me a solid introduction to the various objects in rhino.

Materials
Earthy materials like porcelain, red granite, and a paint matte gray were used for the buildings. Metals including copper, steel, and gold were used to add detail. Ruby was used for the rings, and everything sits on a glass base.

Monday, August 29, 2016

Andrew Scott: Week 1 Castle

 ghosted image painted black

ghosted with keyshot material assignments


Concept
The concept behind your model is based on satellite designs.

Modeling Techniques
Modeling techniques employed to execute the model


Materials
How you material choices reflect your concept.

Monday, January 26, 2015

Andrew F. Scott: Week 3: Keyshot101

This is the layout from the 4pm section
These are the elements that should be included in each blog posting.
Each of these elements get one paragraph.

Conceptual Description with influences
Modeling techniques used
Material assignments and how they reinforce your conceptual intent.

ghosted image

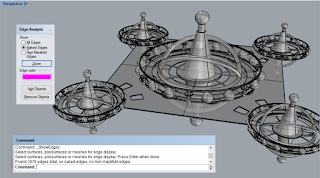
Ghosted image reveals that the model is completely watertight and ready for 3d printing.

keyshot material organization


Keyshot rendering 1

keyshot rendering 2

for more images of my work go here

Andrew F. Scott: Week3 Blogposting

This is the first Blog Posting of the winter semester at UTD

Conceptual Theme
Modeling Techniques Used
How materials are used to express the conceptual theme.

keyshot 1

Keyshot 2

material assignment

More work by Andrew F. Scott can be found here