Sunday, September 11, 2016

Muhammad Martinez: Week 2 Ducky

Ghosted black

Ghosted with colored layers

Keyshot with material - bird's eye

Keyshot with material - ant's eye

Concept
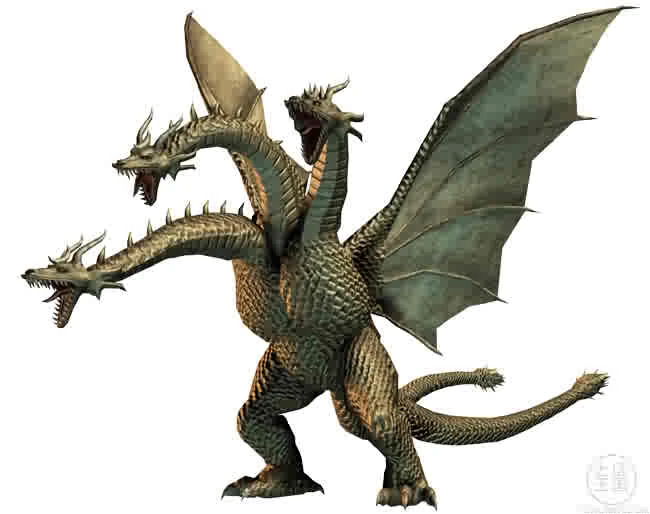
With ferocity only matched by King Ghidorah himself, this terrifying trio transforms the rubber ducky into a force to be reckoned with. These guys can proudly join the ranks alongside other three-headed avians.

Model Techniques
I continously rebuilt the body with different points while teasing it into shape. The shape of the bills were drawn out in the right viewport then projected onto the heads. Commands like Join, Explode, Blend, Patch, and EdgeSrf were needed remove the naked edges formed between the head, bill, and neck.

Materials
Colored plastics were used for the body and heads of the model.Colored stainless steel is used for the bills along with precious metals for the eyes (gold and platinum).

Muhammad Martinez: Week 1 Castle


Ghosted black

Ghosted with colored layers

Keyshot with material - bird's eye

Keyshot with material - ant's eye

Concept
My original castle was inspired by the Weisman Art Museum with its use of partial cones and cylinders. Needless to say these designs were over-ambitious as a beginner to modeling. After a few iterations, I learned to compromise with Rhino to create something simple and interesting.

Model Techniques

This model exercised editing, rotating, and positioning polysurfaces. After plenty practice, I began quickly switching between viewports and getting a feel for thinking in three dimensions. ArrayPolar is a fun command that I played with in every castle attempt. This project gave me a solid introduction to the various objects in rhino.

Materials
Earthy materials like porcelain, red granite, and a paint matte gray were used for the buildings. Metals including copper, steel, and gold were used to add detail. Ruby was used for the rings, and everything sits on a glass base.

Timothy Smiley rubber duck assignment 2


Concept

I had a great idea to make a model of something seemingly harmless into a borg drone like a goldfish 
or a rubber duck. so when I got the assignment i immediately knew I needed to make a borg duck (from star trek if you didn't know). 

modeling technique

I used maya polygonal modeling for the duck starting off with a cube and shaping it out. I was surprised at how easy the basic shape was to carve out.to make the prosthetics i used faces from the ducks face and duplicated it so it would fit perfectly.

materials

I used plastic material for the duck and black chrome and stainless steel for the implants. there was a very cool emitting shader i used for the light from the bionic eye.

Saturday, September 10, 2016

Melanie Estes: Week 2 Rubber Duck

Ghosted

Layers

Overview

Closeup

     I intended to make my rubber duck to look like a cartoon character. In light of the recent Olympics, I decorated the model to be “Katie Leducky”. I gave the duck a swim cap and some goggles, and made a gold medal to go around its neck. Overall I tried to make the rubber duck look like a cute toy that loves to swim.
     After modeling the general shape of the duck, I added accents to the body. I used modified ellipsoids for the tail feathers. The wings were made by projecting a curve onto the sides and extruding the wings out. I used a similar process to make the swim cap. I made the feet by drawing a curve of the outline and curving the silhouette to keep it from being flat. I extruded it slightly and added a cylinder to connect it to the body. I used the mirror tool when modeling the goggles. I made one lens out of cylinders and pipes and made half a strap out of extruded curves. I then mirrored it across the face and connected the straps. I used an extruded curve for the ribbon of the medal as well. To decorate the cap with the name, I used an image found here to trace the letters with curves. I then positioned and projected them onto the cap, used the split tool, and moved the cut out names to another layer. I traced over this image to make the design on the gold medal. As a last accent, I made eyelashes for her out of extruded curves, and made sure she was to be smiling.
     I wanted to make my duck look like a toy, so I applied mostly plastic-type materials. I chose a skin tone for the body of the duck and a classic orange for the bill and feet. I made the cap blue like some of the ones used during the Olympics. I was able to add the American Flags as stickers above the name on either side. Finally, I made the medal an appropriately shiny gold.

Melanie Estes: Week 1 Castle


Ghosted

Layers

Overview

Closeup

     One of my favorite movies growing up has been The Little Mermaid II. I used this image of the castle to base my design. I tried to put the visible towers in the right places, but had to imagine what the back looked like. The angle of the reference image shows an open area between the staircase in front and the sand pillars on the left. Part of a ship and its teal sails is visible in this gap, so I imagined that a small pier might be hidden from view. I added the large doors because it seemed appropriate for the front face of the castle. I continued the picture’s railing on the front edges near the door. I decorated the door with trim traced from this image. I tried to maintain the appearance of the castle from the reference throughout to the parts of the model that are not visible in the image.

     During the modeling process, I was able to copy and paste many of the basic shapes that were repeated around the castle. I was able to resize the cone roofs, the rectangular buildings, the boards in the pier, as well as many of the gold trim accents. The railing would not have been made without duplicating the posts. For the window holes, I created a basic window shape out of a square and an ellipse. I copied and resized a piece for each hole, and then I used Boolean difference to make the indentation. I later used the same technique to hollow out the towers. The most difficult section was the stairway in front. I made a curve in the silhouette of steps and adjusted it from the top view to curve around the small tower. I copied the curve and increased the size for the larger edge. Then I used edge curves and carefully fixed the points to look more accurate. In order to make the door hinges, I applied my reference image to a rectangle and drew a curve on top. I then closed and extruded the curve and applied it to the door. In order to have the sand pillars on the left look more like the image and more realistic, I extruded a wavy curve and used the window shape to cut out the arches underneath. I finished up by adding flag poles to the top of each round tower and a tapestry on either side of the grand entrance.

     I chose these materials to try and match the reference. The white walls have some texture to them to look like stucco. The roof tiles were made with a cloth-type material. The wood material on the pier is rougher than that of the door to appear more weathered. Instead of choosing a different color for each flag, I colored them all the same blue as though they were all the kingdom’s official flag. I made the ornate trim and railing the same gold color to maintain continuity, but used a silver for the flag poles to make them stand out. Overall in design and material, I wanted to make my model be a close replica of the original.

Friday, September 9, 2016

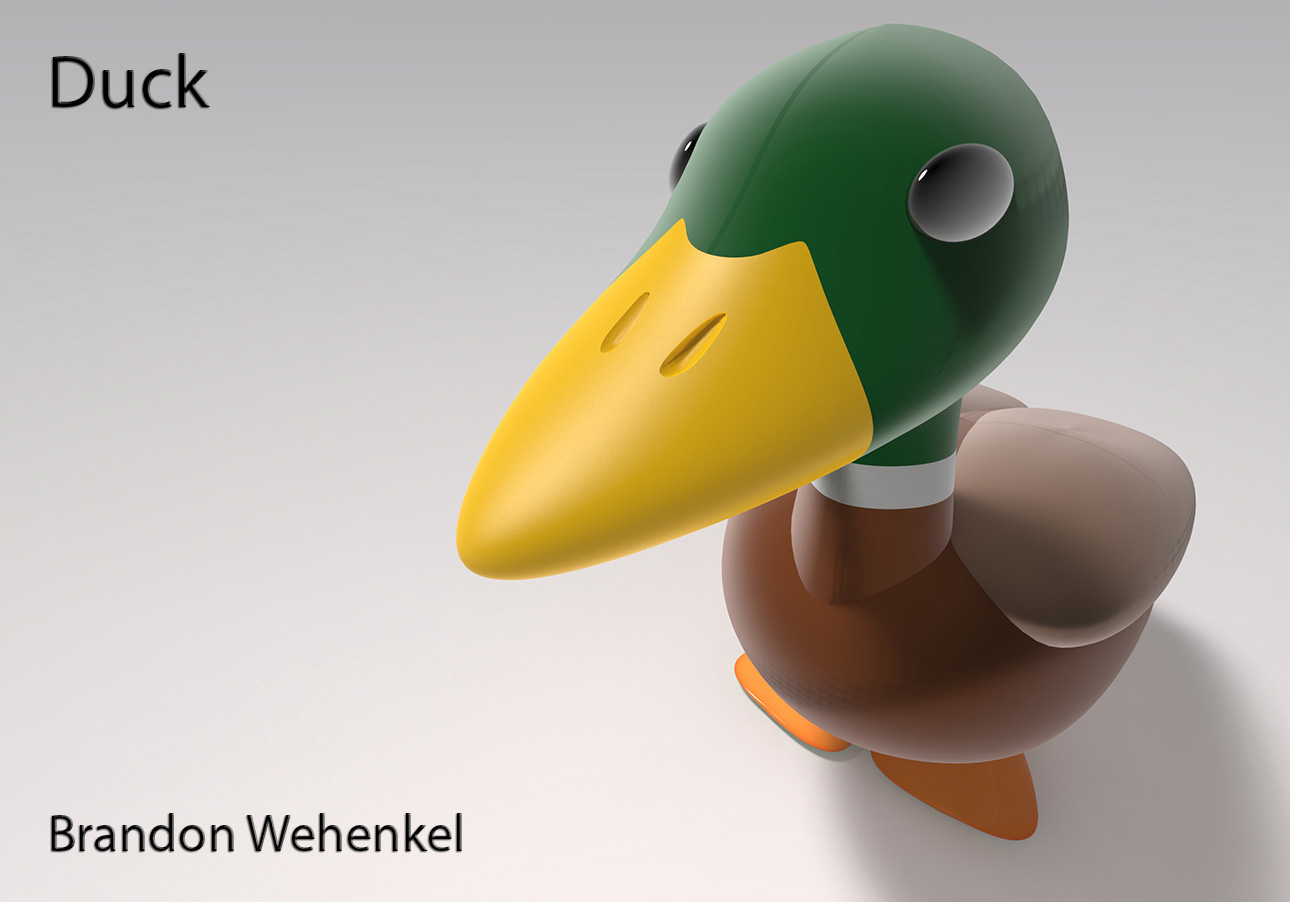
Brandon Wehenkel: Duck


 Black & White Ghosted

Colored Ghosted

Concept:
I googled "Duck" and saw a Mallard duck and thought it was the cutest variant of duck that I could find.  I liked their distinct green head.  I don't see ducks very often and I noticed a lot of the submissions were of rubber ducks, so I felt that making a more natural duck would be interesting.


Modeling Techniques:
I followed the tutorial to the teeth.  This was my first organic model EVER and it was quite up there on the difficulty scale for me. Just like the tutorial guided, use Edit --> Rebuild, to create more geometry in the sphere to work with.  Press F10 to get more vertex points to manipulate in to workable shapes. Use Transform --> Set XYZ Coordinates to manipulate points according to set coordinates.  Use Polyline tool to Project new curves onto surfaces.  Use Trim tool to cut out holes. Use Blend Surface to create the neck.  Repeat steps for new geometry.  I used Boolean Difference to create the wings and the nostrils, and Boolean Union for the flippers.
When designing the duck I had noticed that the body shape and the neck were different than what the tutorial had described so that's where I broke off.  I added the wings to add more detail, and the flippers to balance the body.  I also skewed one of the feet to hopefully aid in the stabilization.


Materials:
I liked what the Velvet material did to imitate the sheen of the feathers on the birds head.  So I added that material on everything except the flippers, the eyes, and the beak.  The beak and the flippers have a hard plastic material.  The eyes are a translucent metal with black as the diffuse.


Problems:
  1. I was not sure how to create closed polysurfaces once I used the polyline tool to dissect and trim the shapes. The best example was the beak to the head, the complex line that I drew to create the curve could not close to make a closed shape.  I was using Cap Planar Holes and Extract Surface but they weren't working.  In the initial photo when displaying that I had zero naked edges, I had combined the head and the beak as well as the few parts of the neck together so that I had closed poly surfaces.  Then once I took the photo I separated them to take into Keyshot, where I had a couple errors.  I fixed the errors by re-opening the program till there wasn't any texture bleeding, that way I could separately materialize each part the way I intended.
  2. I had more than one seam ending in the textures on multiple surfaces.  I was unsure how to fix them.

Jeremiah Baker: Week 2 Duck

ghosted painted black

ghosted with keyshot material assignments


Concept: I pretty much just followed the tutorial to the letter to get this one put together. I'm not very practiced at organic modeling, so it was difficult enough managing that.

Modeling Techniques: I used two circles for the body and the head. Control point editing helped a lot in making the modeling process easier, though I did struggle with selecting the right points. I used curves, projection, and split in order to cut off the beak and make the holes for the neck and head to join. I used surface blend to join the neck and head. For the eyes, I created a distorted sphere, used curve>project>split to separate the pupil, and then aligned it to the head. Then I used mirror to make another one on the other side.

Materials Used in Concept: I just tried out a lot of different materials for this one until I found one I liked. The Axalta materials stood out to me, so I used those and modified the colors a bit to go with the coloring I wanted for the body and head of the duck. I also used an environment with more interesting lighting because of the very reflective quality of the Axalta materials.