Showing posts with label spring 2015. Show all posts

Monday, April 20, 2015

Roman Hunt Week 12 Box

I used the box project as an opportunity to experiment with a number of different styles. Each of the six faces has its own design; some are abstract, others fairly literal. Most are defined by the material remaining on the face, though the sun/moon design is defined by what is subtracted. All of the designs were made by creating and editing curves in Rhino. Tools used most notably include the CurveBoolean and ArrayPolar commands. 

Rhino Curve Layout
Keyshot Render 1
Keyshot Render 2
Assembled Box View 1
Assembled Box View 2

Sunday, March 1, 2015

Renae Patoskie Week 7: Slots

Following my 3D Printing Free Model project I wanted to continue exploring the Fibonacci Sequence, but with a more organic shape. To minimize rough edges I therefore only allowed my modular form a single slot that would not be visible once attached to the whole. My modular forms were designed with the intention of building outwards from the center piece in order to maintain clean outer lines.

I created my forms by deforming a circle into a petal or leaf-like form, to enhance the Fibonacci visual. On the basic form there are two difference slot placements, to add variety in the constructed design's capabilities. With the intent of using both the Fibonacci numbers 5, 8 and 13, I printed each part in those multiples with a few spares. This is also why my central shape is a octagon.

Illustrator outline of modular forms, with inner and outer cuts designated.

As I assembled each configuration, I could never settle for just one; similarly each assembly grew farther and farther from any likeness to Fibonacci. As the complexity of the design grew they did however become unstable due to the lack of intersecting slots. However I much prefer the versatility this left me open to, and should a true favorite present itself, there is always glue.

Design 1: Perspective View

Design 1: Arial View


Renae Patoskie Week 4: Flashlight Sleeve

I wanted my flashlight sleeve to be about practicality and ownership. After experimenting with the different capabilities of Rhino, I decided not to have any extrusions on my final model. A flashlight of this size I would use a keychain, in which case it will be handled roughly and without consideration, therefore my design does not have any parts which could break off. I wanted to guarantee that the flashlight and sleeve could not be easily separated so I added an interior lip to contain the flashlight and added a screw feature so that the two halves would hold the flashlight inside. Finally to maintain the practicality of the flashlight, a hole was left in the base of the sleeve to grant access to the on/off button.

Ghosted view with no naked edges.

Layer organization.

In this model I used an outline and revolved the basic shape; created the screw feature, using spiral curves, the flow along curve function, boolean union and boolean difference; added the Light and Renae extrusions by projecting UV curves, adding text and then removing the volume of the text using boolean difference.


View 1 of Keyshot Rendered Model. 

View 2 of Keyshot Rendered Model.

Final printed model.

Renae Patoskie Week 5: FreeModel Inspiration

For the 3D printed Free Model I wanted to create something classic and complex. So I have decided to explore the Fibonacci Sequence. Originally I was inspired by the work of John Edmark. 
Fibonacci Zoetrope Sculpture designed and 3D printed by John Edmark.

Originally I pursued creating a conch shell:

Ghosted Rhino Visual.

Keyshot Rendering of Conch Shell.

 but upon further difficulty transferred my endeavor to look into the intersecting spirals found in pine cones, artichokes, sunflowers, succulents etc. that also follow the Fibonacci Sequence.
 Image result for pine cone fibonacci
Examples of Fibonnaci Sequence in Nature.
http://www.ecotree.net/fall_2011.shtml
https://lh4.ggpht.com/5YRvUhfiHxmw4WEzYYP2LeaDfnu6s_i1vmNLCgngFVNIVfo3FpQaYRTJow4GdVA1RMM23U0=s125
http://www.goldennumber.net/spirals/
http://www.zyq108.com/blog/6063

For my final model I used basic modeling techniques, free creation of a curve, UV curve projection, ribbon curve, extrude, array, and boolean union and boolean difference to create this model.

Ghosted model with zero naked edges.

Layer organization in Rhino.

When it came time to render my model, I was conflicted between simple two tones of wood, or something that would emphasize how the spirals contrast more than just the geometry of the design.
Below I used a dark walnut for the orb, glass for the counterclockwise spirals, and emissive light for the clockwise spirals. This could likewise be accomplished with the use of fiber optics.

 Rendered view 1.

Rendered view 2.

Final printed model.

Monday, February 16, 2015

Tanner Mortenson: Week 5 LED Sleeve


For the LED Sleeve in Week 5, the design was kept simple.
The design features a grip on the handle with several subtle accents.
Features include ridges, which were created using the 'chamfer' and 'fillet' commands, as well as 5 pyramid-shaped notches, arrayed around the center of the sleeve.  The notches were created using the 'booleanDifference' command. Although it is simple, the goal was see how the design would turn out 3D printed before going too elaborate. With any luck the next model will utilize more features with more comfort-ability in the 3D printing process.  I am curious to see the full potential of the 3D printing lab.

Rhino - screenshot #1
Essentially the design was split into three parts- the main body (or shaft), the grip, and the accented notches.

 Rhino - screenshot #2
Here the NURBS model created above has been exported to a STL file, which is submitted to the lab to be 3D printed.
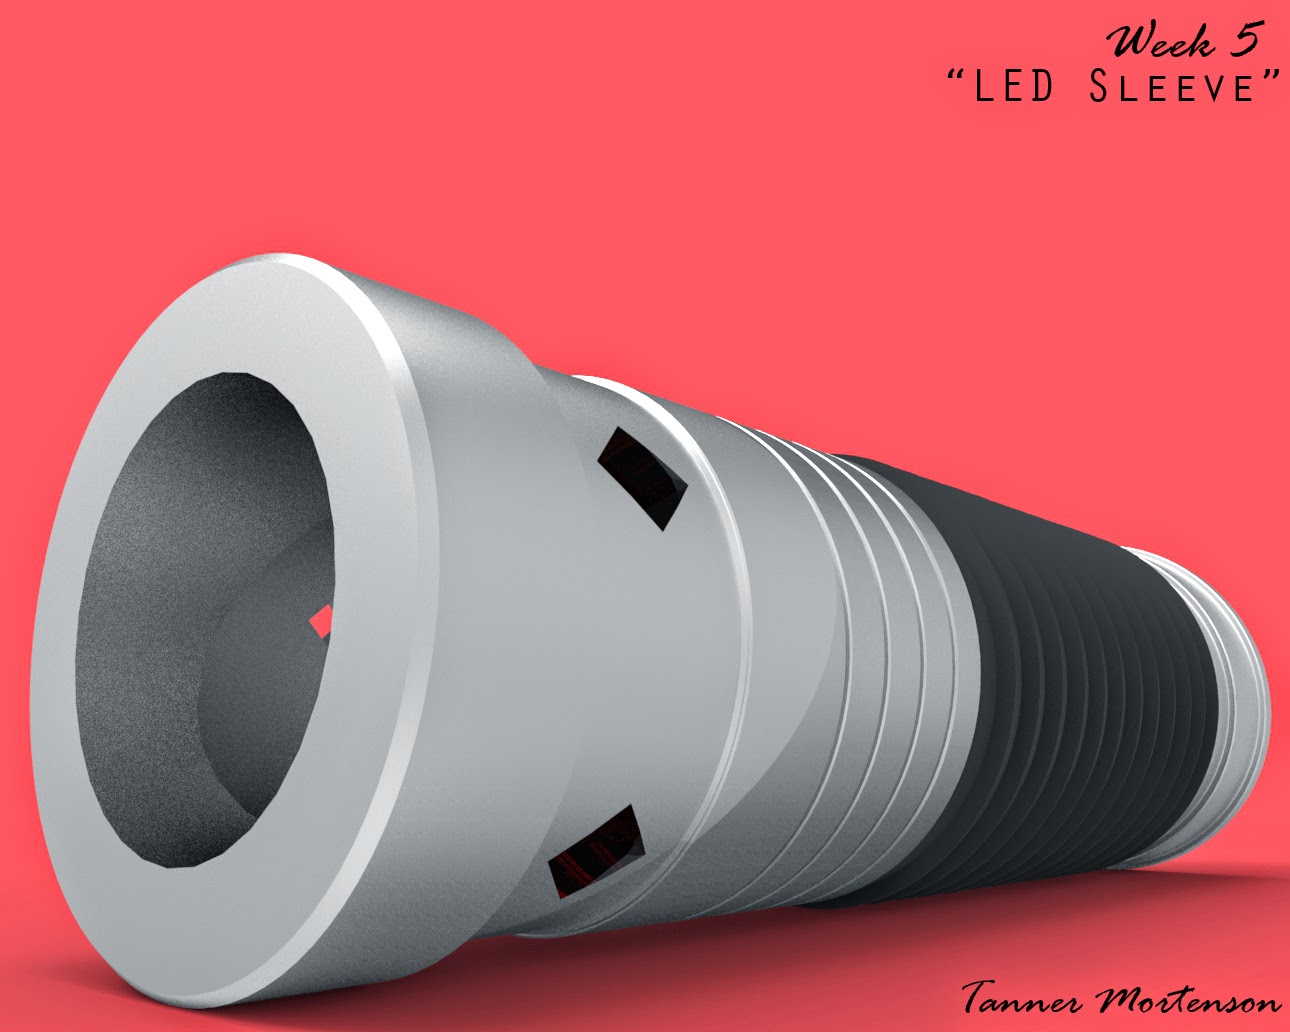
  

Keyshot #1
Here the sleeve is laying on its side, at an angle which the viewer can see the cut-away notches.

Keyshot #2
At a tilted view this time, the sleeve is standing upright, showcasing the rubber grip, metal shaft, and cut-away notches that are featured.