Showing posts with label box. Show all posts

Tuesday, December 6, 2016

Michael Hosler- Laser cut box

Concept- For the box I decided that I should make something I would use all of the time and that my trading cards needed to be organized. So I wanted to create a box that would safely house all of my Magic: The Gathering cards in an easy to access manner. However, I didn't just want to make a box and throw all of my cards into it, so I compartmentalized it into  6 drawers organized by the color of the cards and placed the 6 drawers inside of a larger housing.


Methods- I used Rhino for just about everything pertaining to this project after I got my pattern from the make a box site. after importing both the box pattern and the mana symbols from pdf format, I arranged the pieces on a 2' x 4' reference layer and used a simple engrave to outline the symbols on the face of each drawer and used inside cuts to add detail. After deciding that doing the same along he sides of the larger box may get monotonous, I decided I would simply cut out the mana symbols individually and glue them to the outside.


After cutting, I used Carpenter's glue on each joint to give the box and drawer structural integrity and assembled it.


After assembly, I sanded the outside of the large box and applied a few coats of a Pecan stain to make the engravings stand out more and then applied only 1 coat of a urethane to give a sort of rough sheen to the whole box.


Monday, December 5, 2016

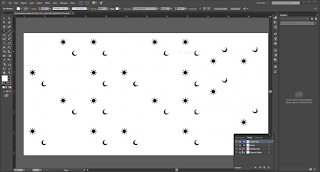
Draven Ashorn-Hejl: Box Project - Starlight


Concept: For the box project, after seeing people make boxes to use for things I decided I wanted to try that. One thing that's very common in the homes of my family are small light features, like candles and decorative lights. Also, the running theme in my family's homes tends to be rustic, western style decor. Thus, with this project I decided to make a box to serve as a light feature I could give to my family that would fit in with their decor, and to that end I went with an idea common in western stories: the celestial bodies, namely the Sun, Moon, and Stars.


Techniques: I used Box Maker to create the outer shape of the box panels, then imported that into Illustrator, where I added the Star shapes for inner cuts and added vector images of the Sun and Moon for raster engraving, and also cut a hole in the bottom to place an electric tea light to light the box.


Materials: I bought a sheet of plywood from Home Depot that was just barely smaller than the laser cutter window for the material for the box itself (out of which I got 5 boxes), and used the UTD Fab Lab's laser cutter to do the cutting and engraving of the panels. I then used superglue to ensure the boxes held together and added a small electric tea light for the illumination.

Saturday, December 3, 2016

Corrina Spurlin: Box Project


Concept:
I aimed to keep my theme of flower design going, as it is simple yet complicated, which I appreciate. I combined the flowery look with the symmetrical aesthetic of mandala (as can be seen by the design on the inside bottom of the box). All of the designs used on the box were originally created in Adobe Illustrator.

Techniques:
The main tools I used were in Illustrator. I utilized the shape and pens tools, while creating the symmetrical repeating patterns with the radial tool. I also used the halftone effect to give the raster engraved flowers on two of the sides a hatched look.

Materials:
I was originally going to use wood I purchased, but due to type of wood combined with sizing complications, I was unable to do so. As substitute I used cardboard. The cardboard is fairly sturdy and works well for the elements that were cut through, however, on the designs that are raster engraved it can be a little difficult to see.

Brandon Wehenkel: Box Laser Engraving


Rhino


Inspiration (Father's Box)


Concept:
My mother loves boxes so I decided to make a tiny chest for her to put her belongings.  My father has one on his nightstand that my mother had created, so I wanted to make one of similar size for her.  My idea was to make a box with a lid that opens with hinges.  She said she wanted to paint it.


Box Interior (Final)


Modeling Techniques:
I used box designer to make a box with measurements of 9x5x5 with a thickness of .1875".  I uploaded the pdf onto Rhino.  I used split to cut a line onto the box shapes to create my opening.  I changed that to blue.  Then I used rectangles and lines to make my design.  I used hatch, raster, high, medium, and low engraving colors as well.  My design is quite simplistic because I just wanted to add some texture to the box.
When I assembled the box pieces I got a paintbrush and brushed wood glue on the interior ridges and on the interior crack of the box.


Front/Back and Side Designs


Materials:
2'x4'x1/4" Birch Plywood although the actual thickness of the wood was 3/16"(0.1875), 2x hinges, 8x screws & washers, Wood Glue, Brush

Sunday, December 13, 2015

Caotan Pham: Laser Cut Box


I have a cat at home that sleeps in a small bed at the end of my desk. Sometimes, when she is careless, she will slide the bed in her sleep and it will tip over the side. She may not be as social as a dog, but she is a constant companion nonetheless, and I decided to make a box to prevent her sliding around.


I chose a 12x6x3 inch box from boxmaker.


Here is the finished design in Illustrator. I made a kitten, a cat, a ball of yarn, and a mouse to put onto the sides. I also cut out a large portion of the lid, because even though the notches look good, I thought that my cat may be annoyed by the feel of it, so I opted for the lid, while keeping the open top idea. The bottom has several strips cut out to allow for airflow to prevent moisture from possibly getting trapped under the bed, preventing mold and other growth.


Here are two walls getting glued together. I made this out of the same material as the smash plaque: 2.7mm hardwood plywood.


She let me keep the cutout parts.


Here is the finished product. The burnt edges give it a rustic look, and even the thin tails of the cats, mice, and yarn came out nicely. Assembly went mostly as planned, except that one side I could not fit the burned part facing out. All the other sides, including the top and bottom, could, but not that one side. This is why the long sides have the same shape if you look through them.

Unfortunately, I measured improperly, and the box is too small for her bed. Alternate uses for this box can be for new kittens. The box can be lined with blankets for the kitten to feel warm and secure, and will stay dry because of the slots on the bottom.

Monday, April 20, 2015

Roman Hunt Week 12 Box

I used the box project as an opportunity to experiment with a number of different styles. Each of the six faces has its own design; some are abstract, others fairly literal. Most are defined by the material remaining on the face, though the sun/moon design is defined by what is subtracted. All of the designs were made by creating and editing curves in Rhino. Tools used most notably include the CurveBoolean and ArrayPolar commands. 

Rhino Curve Layout
Keyshot Render 1
Keyshot Render 2
Assembled Box View 1
Assembled Box View 2

Jenna Bastian: Week 12 Fox Box

For this project, I used the BoxMaker generator to create a box template with dimensions 23 x 6 x 9 inches. The box is sized so I can store my manga in it. I made the height a bit taller for the ones that are sized differently (Dragon Ball and Star Wars manga). I decided to do an elegant, wind theme with a fox. 

I used the BoxMaker to create the sides of the box. I then went into Adobe Photoshop and used the pen tool to create the swirls and fox shapes, and exported those paths as an Adobe Illustrator file. Then I imported those into Rhino 3D. The blue parts will be cut out, and the red will be engraved onto the 1-ply cardboard. For the cover, I made a slot so I can fit and use a "key" made for the box to open it more easily. 

Assembling the fox box was quite simple. I applied super glue to the slots and fit it quickly to the other edges. I left the top lid unglued and fit the "handle" inside the middle. This will probably hold objects of low weight so the bottom won't fall off. I'm probably going to glue the cut out fox on the back of the box. 

Fox Box Template in Rhino3D

Fox Box complete #1

Fox Box complete #2

Fox Box complete #3


Jake Lenzen - Week 12: Box

I've been working on a box project for the past few months, which I've just recently completed. The idea was to create a deck box system designed for portability. The boxes are attached to the carrying piece with magnets, and can be rearranged, attached and detached with ease.


Saturday, April 18, 2015

Chloe Ferris: Week 12 Box

For this project I used BoxMaker to create a 6x6x6 box. It is a decorative box, meant to be used to store personal items in. Each side face of the box features a decorative cutout, based on a stained glass leaf design. The removable lid has a circular flower cutout, to make it easier to lift the lid off of the box. The box was printed on 1-ply cardboard, and was very easy to assemble.

Cut Sheet
To create the designs, I used a series of curves that I trimmed to each other to make one continuous piece, so it would not fall through the hole. This was then rotated and copied to the different faces of the box, to mix up the design a bit. On the lid, I created a teardrop petal shape with curves, and then used ArrayPolar to cast 7 of them around a central circle.

Assembled show, showing removable lid