Showing posts with label boxmaker. Show all posts

Friday, May 1, 2020

Jacob Sears - Laser Cut/ Engraved Boxes

Laser Cut Boxes

Concept:

For my boxes I wanted something that would be useful to me on a regular basis rather than something decorative that I'd end up putting in a closet. I like to paint a lot and i typically use oil paints and because of that i need various different mediums and solvents to get certain paint qualities, so i wanted to make a tray that could hold all of my solvent jars and brushes in one place without me having to worry about getting paint a chemicals all over stuff. As for my other box i wanted something that would be good for storing something. unfortunately i have a bit of a nasty coffee addiction to the point that i roast my own coffee beans and after roasting they need to sit out a few days to degas before they can be used to make coffee. Because of this i thought it would be nice to have a box that would be breathable but still sealed to put all my freshly roasted beans in while they wait to be stored in more airtight containers.

Process:

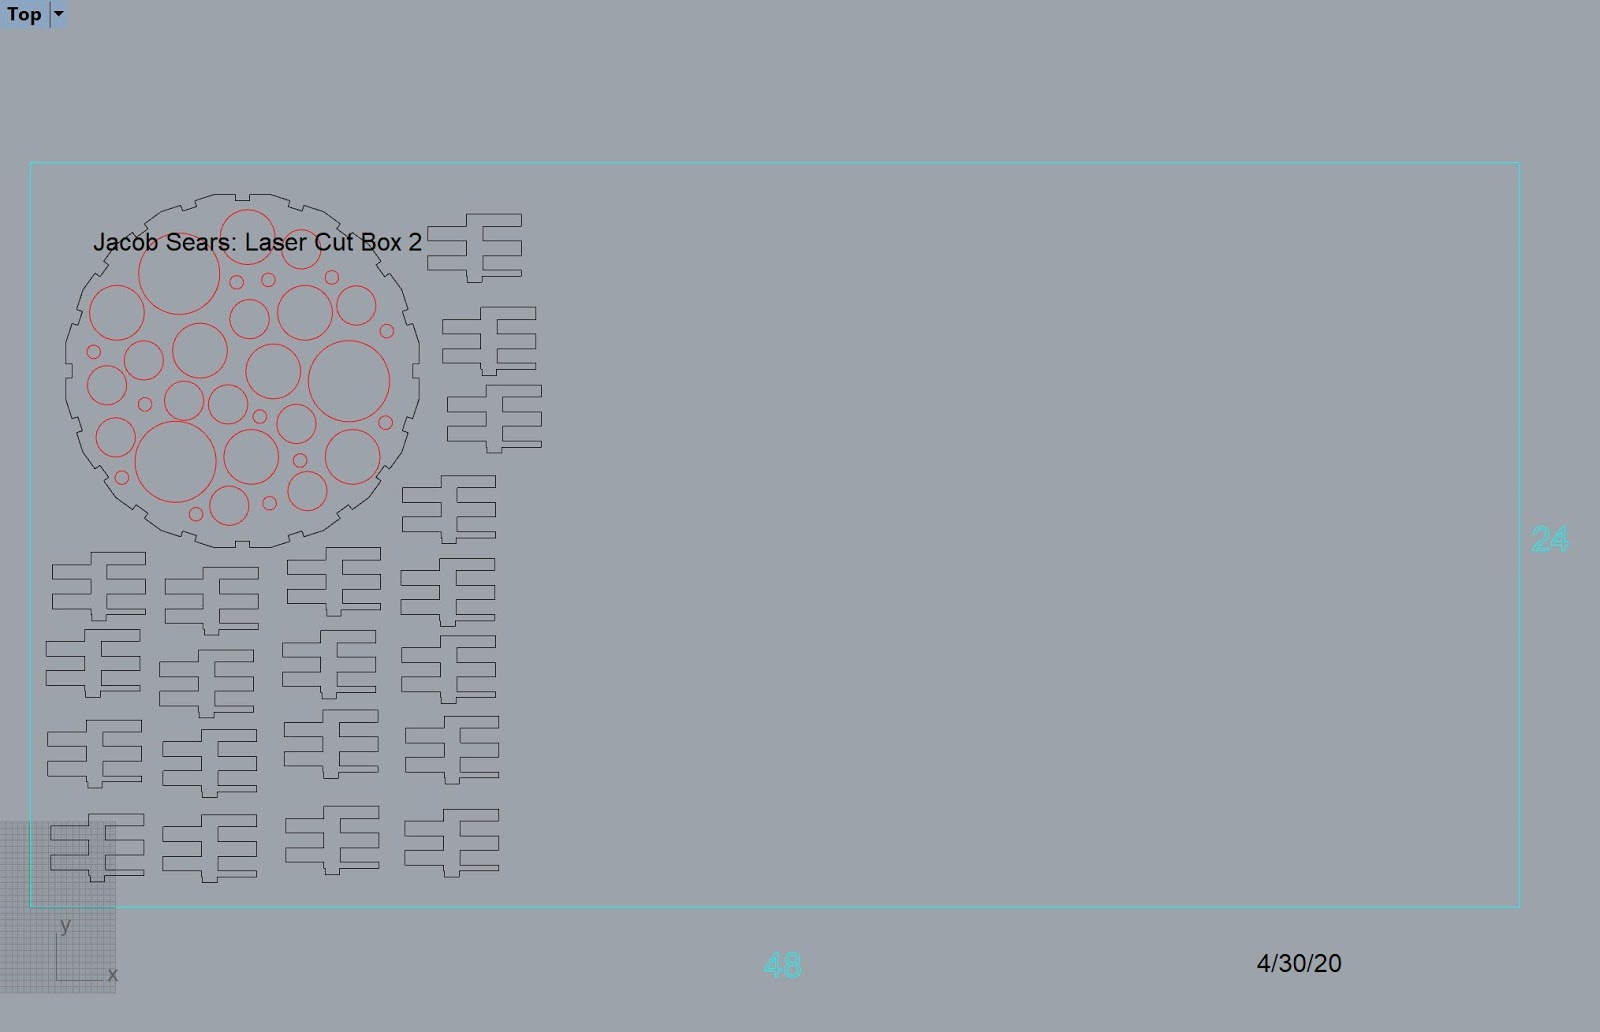
For my tray i decided to use maker case so i could see what id be making a bit better as i wasn't technically making a box. To make it i chose the polygon box and cranked up the side number to 20 and then from there just made the "box" wider and much shorter. After importing it into rhino i added some decorative circle engravings to give it a sort of natural looking pattern. For my coffee box i used festiboxes and went with the rounded box with flex partly because it looked really cool and also because of the way the flex was done it would allow it to be a little more breathe-able. And after i put it in rhino i took a couple of vectors i made in figma, converted them to dxf files and used them to decorate the box with coffee themed patterns and iconography.


Materials:

As for materials, for my tray i would like to use either mdf or some sort of nice wood thats then sealed/ treated to resist being stained by oil paints. And for my coffee bean container i would choose to use an opaque acrylic because it'd be easy to clean, might handle the flex aspect a little better than just plain wood and because coffee beans need to be kept more or less in the dark to prevent degradation.

Saturday, December 3, 2016

Corrina Spurlin: Box Project


Concept:
I aimed to keep my theme of flower design going, as it is simple yet complicated, which I appreciate. I combined the flowery look with the symmetrical aesthetic of mandala (as can be seen by the design on the inside bottom of the box). All of the designs used on the box were originally created in Adobe Illustrator.

Techniques:
The main tools I used were in Illustrator. I utilized the shape and pens tools, while creating the symmetrical repeating patterns with the radial tool. I also used the halftone effect to give the raster engraved flowers on two of the sides a hatched look.

Materials:
I was originally going to use wood I purchased, but due to type of wood combined with sizing complications, I was unable to do so. As substitute I used cardboard. The cardboard is fairly sturdy and works well for the elements that were cut through, however, on the designs that are raster engraved it can be a little difficult to see.

Brandon Wehenkel: Box Laser Engraving


Rhino


Inspiration (Father's Box)


Concept:
My mother loves boxes so I decided to make a tiny chest for her to put her belongings.  My father has one on his nightstand that my mother had created, so I wanted to make one of similar size for her.  My idea was to make a box with a lid that opens with hinges.  She said she wanted to paint it.


Box Interior (Final)


Modeling Techniques:
I used box designer to make a box with measurements of 9x5x5 with a thickness of .1875".  I uploaded the pdf onto Rhino.  I used split to cut a line onto the box shapes to create my opening.  I changed that to blue.  Then I used rectangles and lines to make my design.  I used hatch, raster, high, medium, and low engraving colors as well.  My design is quite simplistic because I just wanted to add some texture to the box.
When I assembled the box pieces I got a paintbrush and brushed wood glue on the interior ridges and on the interior crack of the box.


Front/Back and Side Designs


Materials:
2'x4'x1/4" Birch Plywood although the actual thickness of the wood was 3/16"(0.1875), 2x hinges, 8x screws & washers, Wood Glue, Brush

Sunday, May 10, 2015

Renae Patoskie Week 12: Box

For the geometric unfolding I chose to make a candle holder. With the intention of giving it to a Disney enthusiast I chose to incorporate symbols from her favorite films.

The Sun Motif from Tangled, Tiger to resemble Raja from Aladdin


A Rose to signify Beauty and the Beast and a Conch shell for the Little Mermaid

Each side was dedicated to a single movie so that it could be rotated at the viewers discretion. I imported the images into Illustrator, obtained curves from the images and then imported them into Rhino where I cleaned them up to create appropriate outlines. 


Box and lamp combined cut sheet.

During cutting it became apparent that many of the lines in both the Tiger and Rose images were too near one another, and the intensity of the laser burned the outlines to a crisp. These panels were therefore engraved instead of using inside cuts lines.

Assembled Box: Shell and Rose / Tiger and Suns

Monday, April 20, 2015

Jenna Bastian: Week 12 Fox Box

For this project, I used the BoxMaker generator to create a box template with dimensions 23 x 6 x 9 inches. The box is sized so I can store my manga in it. I made the height a bit taller for the ones that are sized differently (Dragon Ball and Star Wars manga). I decided to do an elegant, wind theme with a fox. 

I used the BoxMaker to create the sides of the box. I then went into Adobe Photoshop and used the pen tool to create the swirls and fox shapes, and exported those paths as an Adobe Illustrator file. Then I imported those into Rhino 3D. The blue parts will be cut out, and the red will be engraved onto the 1-ply cardboard. For the cover, I made a slot so I can fit and use a "key" made for the box to open it more easily. 

Assembling the fox box was quite simple. I applied super glue to the slots and fit it quickly to the other edges. I left the top lid unglued and fit the "handle" inside the middle. This will probably hold objects of low weight so the bottom won't fall off. I'm probably going to glue the cut out fox on the back of the box. 

Fox Box Template in Rhino3D

Fox Box complete #1

Fox Box complete #2

Fox Box complete #3