Concept:
I originally wanted to do a raster engraving of the black/white image featured above, but due to some unforeseen issues with formatting, I decided to make it a crosshatched engraving instead, as I knew it could be done without issue. The car featured is a 2016 Mustang GT350 R.
Technique:
I took a wallpaper of mine and modified it in Photoshop to be black and white, and so that the shadows were extremely contrasting, and any excess color or lighter shadows were gone. I then took that image into Illustrator and drew curves around all of the different "tiers" of shadows, which made 4. I then took those curves into Rhino, and split planes with them, organizing each plane by shadow tier. Then I used the contour command to crosshatch each plane according to its shadow tier. I added an additional hatch for each tier of shadow, with the 4th tier having 4 hatches, and being darkest.
Materials:
I used a piece of regular plywood from Lowe's, and some glue to secure the feet of the stand.
Showing posts with label engraving. Show all posts
Sunday, April 30, 2017
Saturday, April 29, 2017
Brandon Wehenkel: Waffle Lamp
Ghosted Black
Ghosted Colored
Ghosted Black and Colored
Concept:
My initial idea was to create a lamp with a lid that also doubled as a frame for my engraved object. However, with the numerous times, I restarted and changed my idea I had to ditch the idea of a frame for the lamp. So I made a separate object which I talk further about in my engraving blog post.
I was inspired by Quinn Baldacci's rocket lamp with the lid. I thought that was an ingenious idea to create a cavity for the light bulb while also keeping a design seamless and uninterrupted by large holes. I created two designs that integrated the lid aesthetic. First was recreating the idea from Quinn Balacci's rocket and second was the bell shape inspired from Taiwanese Buddhist Temples known as a Pagoda. I used an actual A-Frame design for the body of the lamp.
I saw the pyramid shape in Tamara Brennan's pyramid lamp and DISENO Y MANUFACTURA DIGITAL CAD/CAM's clear (acrylic) hanging lamp. Their waffle style was what I wanted to replicate: using the corners as the rib for the horizontal cuts, plus the hanging lamp was gorgeous. I would have enjoyed incorporating chains into the project, but I made a decision to make the lamps static on a flat surface instead. I didn't have to worry about gravity and all the annoying small holes for the chain links.
I also was planning on using two materials for this project, so I also needed to figure out which ribs and which cuts were going to be what material. Unfortunately, acrylic sheets are not cut to a traditional thickness measurement that matched wood sheets, so I had to be precise about where my inset slots were going to be.
Laser Cut Sheets
Modeling Technique:
I used polyline a majority of the time to create unique shapes. I used curves to create an A-frame which I then polar arrayed 10x to get the style I wanted with a the flat triangle/ asymmetrical rectangle, I Boolean Unioned, Boolean Differenced, Boolean 2 objects multiple times. I used project to slice the lids and the base. I alt tapped to duplicate shapes. I used spiral, twist, and pipe to create the light bulb inside as well as Interpolate Curve. I used revolve to create the lid.
I had a hard time deciding which style I wanted. I was going to make a frame for my engraved tile that was built into the lamp, but it just looked ugly. I spent a lot of time deleting and revising my ideas. The three styles were mostly from manipulating array polar and boolean 2objects. I really wanted to incorporate an A-frame style into the design with a pyramid. I ditched the pyramid idea because it covered up a lot of the triangles that were created from the polar array also I used contour multiple times with many failures with that pyramid shape. Contour was used after I figured out which design to work with. I have two materials, so I alternated the lid and the base as wood for a size difference of .1875 inches apart. And the middle part which I call the torso is .220 inches apart. I hope that small difference in thickness won't matter. I felt like I might have messed up somewhere in deciding where to cut due to the size difference.
I used surface --> planar curves as well as extrudeCrv several times in the contour and section process. I messed up a lot and needed very precise measurements when creating the complex waffle structure. I followed the tutorial, as well as the class discussions. I used Orient for the piped ribs. I used split to cut them. Again I might have messed up somewhere, so I'm hoping the print works. This design is very abstract to me, and It has become an ordeal for me when I can't quite figure out how the slices will fit.
I also hope the hole I created for the cord works as well. I didn't like that the cord could just freely sit anywhere through the design, so I had to create a base for the lightbulb to sit in.
Keyshot 1 w/ Reference
Keyshot 2
Materials:
In Keyshot:
I used glass for the vertical pieces and the glass on the lightbulb, I used hard plastic for the lightbulb base and soft plastic for the cord and textured wood for everything else. I changed the colors of everything except the glass.
I liked the bump on the wood, so I made it slightly more pronounced. I think originally it's at 0.5, I just bumped it up to 0.6.
WIP
In real life:
2 - 24" x 48" x .220" sheet of acrylic, $56 each
5 - 24" x 48" x .1875" sheet of MDF. $7.42 each (didn't end up being .1875 for all of them)
Home depot advertises, Medium Density Fiberboard (Common: 1/4 in. x 2 ft. x 4 ft.; Actual: 0.216 in. x 23.75 in. x 47.75 in.) and even that is still wrong.
Westinghouse Snap-in Candelabra base socket, 6'.
1 LED Lightbulb.
1 bottle of Gorilla Glue
3 bottles of Locktight Super Glue
Tears
Keyshot 3 w/ Cut Sheets
This lamp design was definitely not for beginners. I had experiences I will never want to reproduce again. MDF is not worth the effort. It's too fragile, and Home Depot does not cut every 1/4 slab the same. I had 3 different sizes when I bought 5 boards. Needless to say, none of my slots worked with MDF. It just broke or became very brittle. I think one vertical piece survived intact.
Lamp 1
Lamp 2
Lamp 3
Brandon Wehenkel: Granite Tile Engraving
I loved the idea of engraving stone. My sculptor's instinct of mine went crazy hearing that it was possible for this project, so I used one of my old drawings from my beginner's art classes and imported it into curves. Like many of my other projects in the past, I like to incorporate the human and animal aesthetic, so I designed Bubbah, my gorilla-human character from my scanned object post.
My initial plan was to recreate an old 80s family portrait idea. Where there is one person, and their face is superimposed and faded behind, off to the back somewhere in the photo. But it became too muddled. Too many lines and it didn't quite look how I wanted it.
Ghosted Frame
I wanted to create a waffle frame for this project as well, so the engraved stone wasn't laying flat. I used an A-Frame design to create the frame.
Detail
The border is designed with this style.
Modeling Technique:
Adobe Illustrator, raster and image trace
Rhino
Photoshop
This cost me a lot. I have 13,678 curves and 5548 hatches.
I used TWEENCURVES, and that's about it. I got help from Professor Scott for making curves very quickly, and I used that about 80% of the process. The other was hatch, copy, paste, move, interpolate curve. I used picture frame and measured a rough size for my 12x12 tile and just started drawing over the reference plane. I went into Adobe Illustrator several times to try to import curves, but it looked like garbage. Just think about how children draw before they know how to, it was just scribbles. Apart from the nose and eyes nothing else was recognizable. So I had to create the entire design from scratch. I stayed up till about 4 am for about 5 nights in a row starting my work about 5 pm. There were a lot of tedious, repetitive moves.
Frame Laser Cut Sheet with Lamp
I used the same technique as my lamp design for my frame. I even used some of the same curves. Such as the "A-Frame" curve. I wanted to incorporate an A-Frame design, which I provided a link earlier of what one looks like. So I used a triangle with a sliced top to make the initial shape. I sliced the curve a tiny bit more, so the angle the tile sat was similar to a picture frame, where it isn't completely 90degrees. The frame should slide into the cuts I created; unfortunately, it did not. Even though I measured 13/32", I should have made the cuts a tiny bit bigger. I used the pipe and orient commands to create the cuts in the planar surfaces. I used section to create the verticle planes and contour to create the horizontal planes.
Materials:
12" x 12" x 13/32" black granite tile.
2 - 24" x 48" x .1875" sheet of MDF (didn't end up being .1875 for all of them)
Home depot advertises, Medium Density Fiberboard (Common: 1/4 in. x 2 ft. x 4 ft.; Actual: 0.216 in. x 23.75 in. x 47.75 in.) and even that is still wrong.
Gorilla Glue
Locktight Super Glue
Masking Tape
Black Spraypaint
Building Process
The frame is in the back, and it didn't work out, the materials I bought were too varied in thickness. I had bought a sheet of MDF 1/4 in size measured it to be .1875 instead. I went back the next week and got the same material from the same stack on the shelf, and it was a different thickness. I didn't know this till I was putting the pieces together. It was also too fibrous and broke with the littlest of pressure. I couldn't get it to fit the tile right either. I'll need to recreate the design again, and it was my own project within a project, so it wasn't worth the fuss. My father helped me redesign a new frame from the broken pieces that survived the accident I had. Its not the prettiest fix but it is very nice in terms of funcionality. I only wanted something to hold my tile for better viewing pleasure so the image below is to show the alternative for my frame.
Uncolored Frame
Colored Frame
Based off the cut sheet image, I can see where I went wrong. I put the horizontal cuts on a different sheet than the verticle cuts. Because the place I bought the sheets from did not cut all of their sheets exactly the same, I ran into a project destroying issue. My horizontal sheets could not fit the verticle sheets, and I ended up breaking a bunch of my MDF cuts. I had to create an entirely new design from my broken pieces.
Engraving
The small details that I shared above did not fully render. I chose too small of curves together and should have made my curves further apart. A lot of my detail was wasted to the grain of the stone. I learned my lesson and will know for my process next time.
Engraving with Frame
Monday, April 3, 2017
Rebecca Genung: Week 11 Laser Engraving
For this project I wanted to do a heart. Heart abnormalities run rampant in my lineage: so much so that I, my mother, and my great-grandmother all have a extra, fully formed, and functioning valve. I also have a heart rate averaging 4 times higher than the healthy amount for someone of my build. I'm not unhealthy, it's just genetic. With that in mind: I will die of a heart attack one day relatively soon. To me, hearts don't represent emotion but rather the duality of life and death. My heart powers my body, but it will ultimately be the thing that kills it.
For my image, I drew a heart in vector in PhotoShop with the pen tool (shape mode). Then I imported the .PSD file to Illustrator and converted it to a .AI file. I wanted to imply the animation of a beating heart.
While I think cut metal would be the nicest looking, I went with cardboard for financial reasons. While the lines were smooth, the cut has several puncture areas that stand out. I still like how it turned out though.
For my image, I drew a heart in vector in PhotoShop with the pen tool (shape mode). Then I imported the .PSD file to Illustrator and converted it to a .AI file. I wanted to imply the animation of a beating heart.
Tuesday, December 6, 2016
Michael Hosler- Laser Engraving Board
Concept- In keeping with my love for geometrical patterns, I decided to engrave one onto a Longboard. but slapping a geometric pattern in a circle is totally lame, so I started to chop it up and move pieces of it around and play with different sizes to see what I found most appealing. these were a few of my ideas, along with the original design:
Methods- In making the original design, I generated a few simple shapes and then used polar arrays to rotate and copy the shapes until I had a really interesting pattern. then I sliced it in half and played with sliding the halves further apart and mirroring them over the center of my reference layer. After cutting my first board, it grew legs and walked away so I was forced to start again. After I cut the second board, I applied just a single layer of blue stain to give it a slight blue tint, then used paint to fill in the pattern itself with a bright green hue. While wiping away the paint, I noticed that leaving just a little bit on the surface of the board blended really nicely with the stain, so I started wiping less paint off and trying to get the colors to really mesh. After the coloring was done and everything was dry, I applied grip tape to the top of the board to finish.
Monday, December 5, 2016
Draven Ashorn-Hejl: Box Project - Starlight
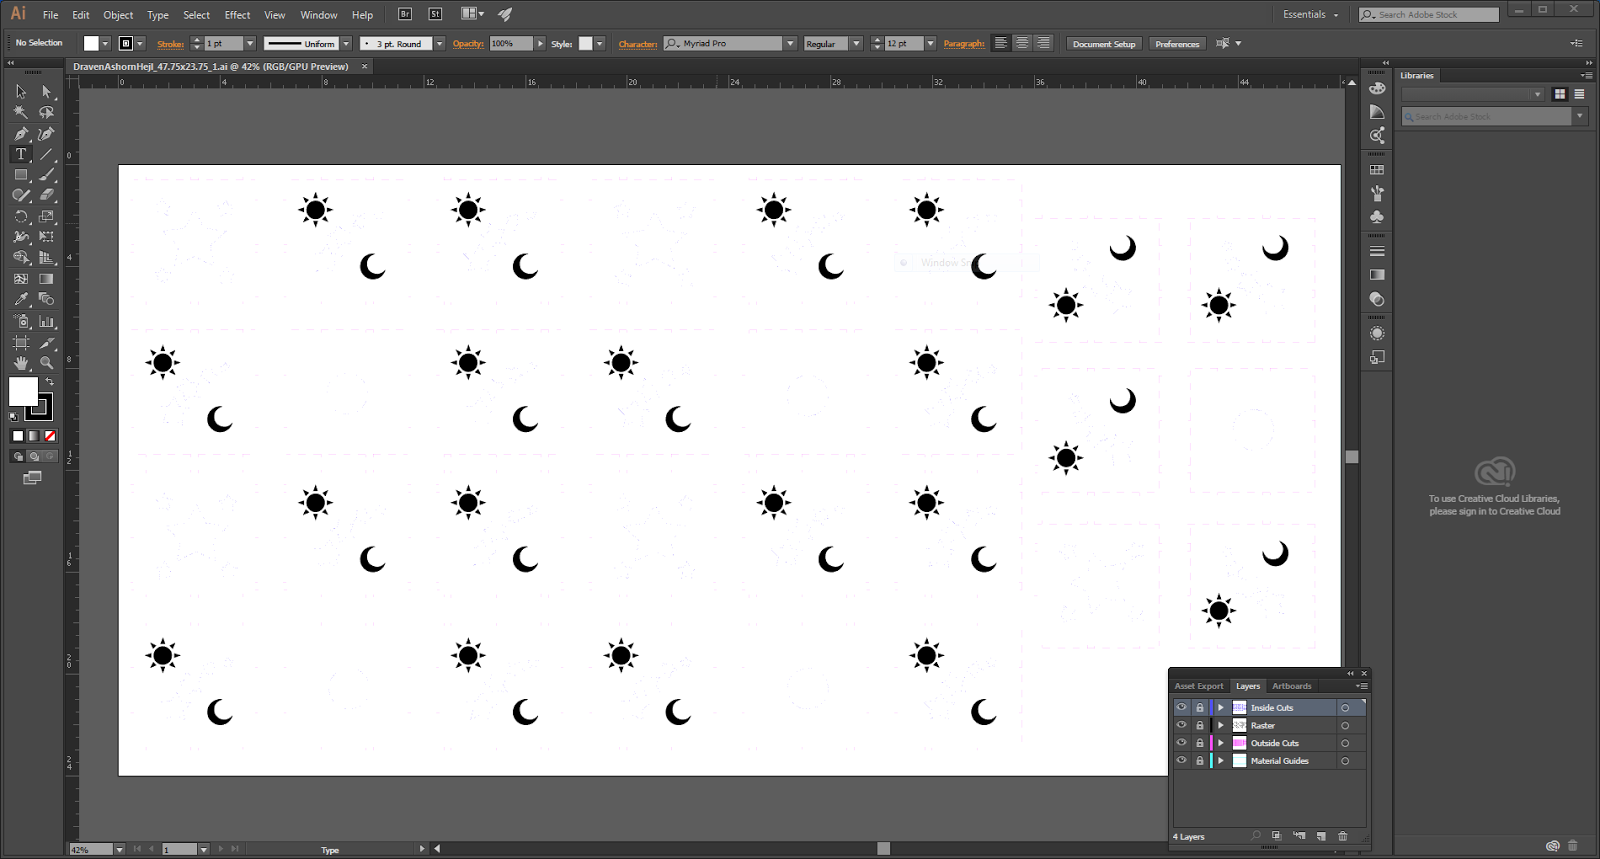
Techniques: I used Box Maker to create the outer shape of the box panels, then imported that into Illustrator, where I added the Star shapes for inner cuts and added vector images of the Sun and Moon for raster engraving, and also cut a hole in the bottom to place an electric tea light to light the box.
Materials: I bought a sheet of plywood from Home Depot that was just barely smaller than the laser cutter window for the material for the box itself (out of which I got 5 boxes), and used the UTD Fab Lab's laser cutter to do the cutting and engraving of the panels. I then used superglue to ensure the boxes held together and added a small electric tea light for the illumination.
Labels:
ashorn,
ATEC,
atecfabutd,
box,
draven,
dravenashornhejl,
engrave,
engraving,
Fall2016,
hejl,
laser
Draven Ashorn-Hejl: Laser Engraving Project - Skateboard
Materials: I bought one of the skateboards Professor Scott recommended because I trust his judgement, and used the laser cutter at the UTD Fab Lab to handle the engraving.
Labels:
ashorn,
ATEC,
atecfabutd,
draven,
dravenashornhejl,
engrave,
engraving,
Fall2016,
hejl,
laser,
skateboard
Subscribe to:
Posts (Atom)