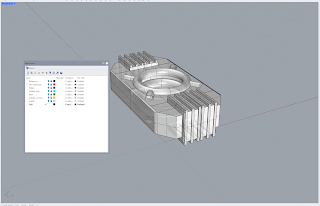
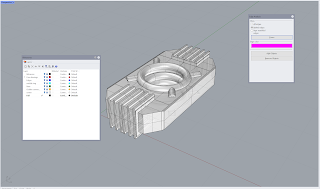
The part I have chosen to create is a AI computer chip from a video game called Halo. This is was the first video game I have ever played and I really wanted to create my own model on a AI Chip. This is my Idea for my Halloween costume accessory, which I would like to get a full suit in the future. The way I wanted to create the model would be using a Image/drawings of the chip to get an idea to create my own. Which would help in the long run to save me time and as well know the demission's I want to use in order to achieve what I wanted to create. Since this AI never leaves the guys site let alone hand. I wanted to represent it in a similar way, I resulted into having a chain in the chip to show how it will never leave his site. creating the chip would not be easy as symmetry would be a really good priority in this model. The idea is to create a well rounded chip to be able to insert in the helmet from either sider in theory. This would be a really fun and difficult modeling process I have done
 |
| Refrence |
 |
| Drawings |
Process:
The Process of making this model was quite difficult, I wanted to take the advice from my professor on how it would be better and faster to create half of the model and then mirror it. You would save time let alone not struggle with create symmetry as much. The Polyline command is one of the most useful command that I use. It allows me to get a base of how I would want the design and give me an idea how it will turn out. Which is where the reference points come in and help. The ExtractIsocurves command helps a lot as well when needing to create that extra geometry when you want to add or change a shape looks. which can help with the Sweep rail command as well. Using that help me create the rings around the outer edges of the center without having the trouble of creating even more lines of geometry. The array tool helped more then I would have thought considering I did not think I would have a lot of the same part on two sides. One of the more last and well used commands would be the Cap command as well. When sweeping circles onto curves they tend to not have ends close which would need to have done in order to not have any naked edges.
Command List:
Polyline: will be used to draw some of the parts that are difficult to make.
Torus : making a donut shape to create the circle in the middle
Boolean Difference and union: to put together shapes as one or pull them apart.
Array: creating multiple of the same shape on the end of the chip and the corners
Mirror: making half of the model and then mirroring it to work smarter.
Join: Join the lines I will be making on the model to join them together.
Materials:
The process with the materials is very interesting. In the beginning of creating the materials for the chip, I was very undeceive on what type of materials I would choose. I wanted to go for a decent game looking chip. So I took elements of what would be a good conductor for electricity. as well what a futuristic AI chip would look like. I wanted it to have a deeper though process than what it would look like. I had trouble creating the emissive lighting to those certain parts since that lighting is either to dark or to bright. The 3D Print came out a lot better then what I had thought it would be. I was very hesitant on thinking it would come out decently well. it was very difficult to create the rendered version since sanding it was very hard. I use acrylic paint and some spray paint on the ends to paint the model.


.jpeg)


No comments:
Post a Comment