For a long time I was uninspired in what to do for this project. Then I came across some images of retro-futuristic ray guns. I believe this type of style is called "Gothic raygun." It is a bit of a 1940s-1950s prediction of what the technology of the future would look like.
Showing posts with label waffle structure. Show all posts
Sunday, May 1, 2016
Thomas Perugini: Waffle Structure
Sunday, April 24, 2016
Christopher Rickett: Waffle Structure
Technique: To create this, I created curves and lofted them. I then projected curves onto the surface and trimmed out holes. lastly I used the blend surfaces command to reconnect the edges of the holes. this also allowed me to customize the curvature of the surface around the holes. As for creating the waffling itself, I played with different combinations of contouring along the X, Y, and Z axis' to find the one I thought would, one: look the best, and two: be the easiest to create slots in and reconstruct after being printed.
Materials: The waffle structure was printed on .25" cardboard but for Keyshot, I used a metal texture. This way, it really captures the structural skeleton that I was envisioning as I was designing this piece.
Thursday, April 14, 2016
Jung Choi: Waffle Structure Wave
Concept: The concept I had for the waffle structure project was a wave in the ocean. I got the idea from the Japanese painting, The Great Wave Off Kanagawa, when I saw it somewhere the day I started on the project and thought it would look interesting as a waffle structure with it's curvy and wavy lines.
For modeling techniques, I used the interpolate on curve tool to create the wave-like shape I wanted then extruded it in order to create a sold object. Then I created a cylinder and used the boolean difference tool with the solid to create the concave part at the bottom. Then I used the contour tool to create the curves which I used planar surface tool on to get the surfaces. Then I used the cutribs script and the unroll script to get the slots and lay them out for laser cut. I wanted to create diagonal lines with the contour tool to create a more interesting effect, however, this made the cutmyribs script buggy as it gave an error and not cut the slots when there is a two pronged surface that were connected at one part that branched out to 2 different wings. It would cut slots on the bottom wing but not the top wing, so I had to get contour curves using 90 degree angles.
Material: For the actual structure, I used quarter inch cardboard as it was cheaper. For this project, I wanted the structure to have a slight bulkiness to it as waves are nothing to scoff and dangerous if given proper size which made me choose the thicker cardboard. In my opinion, it turned out fine and still kept the shape of a wave and just made it look like a wave of brown water. If I were to make this without price restraints and had more time to procure materials, I would use a bluish glass with a white/grey glass to create a more ocean water-like color that is see through as I did in keyshot.
Sunday, May 10, 2015
Renae Patoskie Week 10: Waffle Structure
For the Waffle Structure project I again wanted to create a visual texture. To accomplish this I started by creating a curved form using the Loft command. I then created the interior shelf using the extrusion of a cylinder and Boolean Difference.
Once I had contoured the object in 1in. sections I selected a gradient traveling in the vertical and a pulse gradient in the horizontal for the final waffle. This design choice creates interest while also providing support to the sections of the shelf likely to experience more weight. I then altered the contour of the interior shelf to mirror that top surface edge giving the shelf a more completed look, while also increasing the functionality of that lower shelf.
Rhino Ghosted Image of Shelf
Rendering of Shelf in two tones of Wood.
Assembled Shelf.
Monday, April 13, 2015
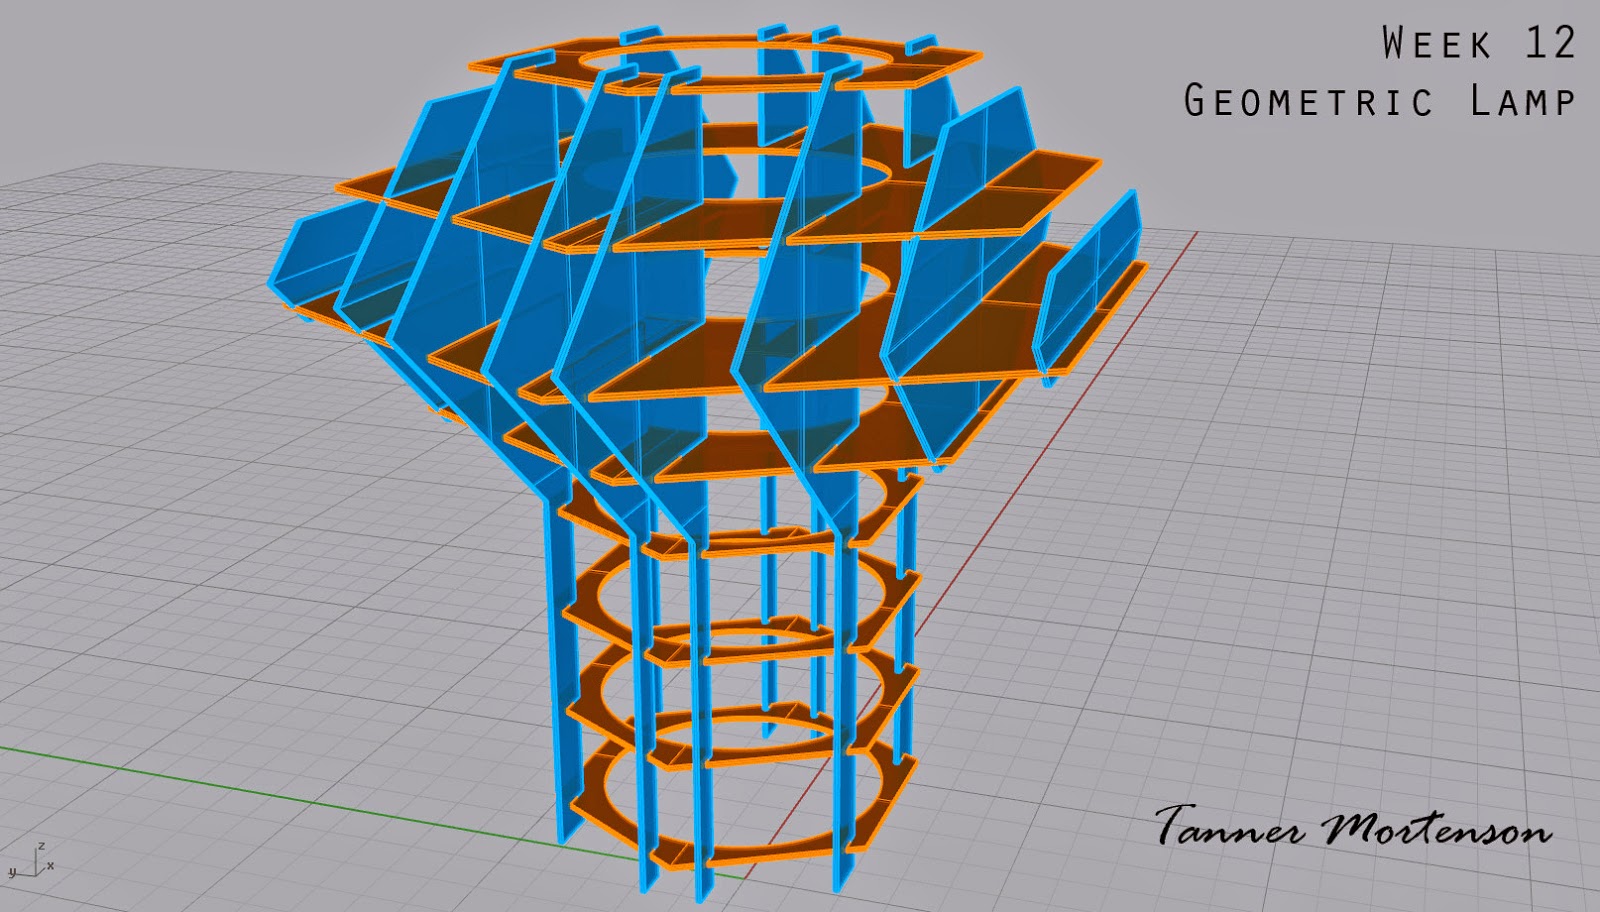
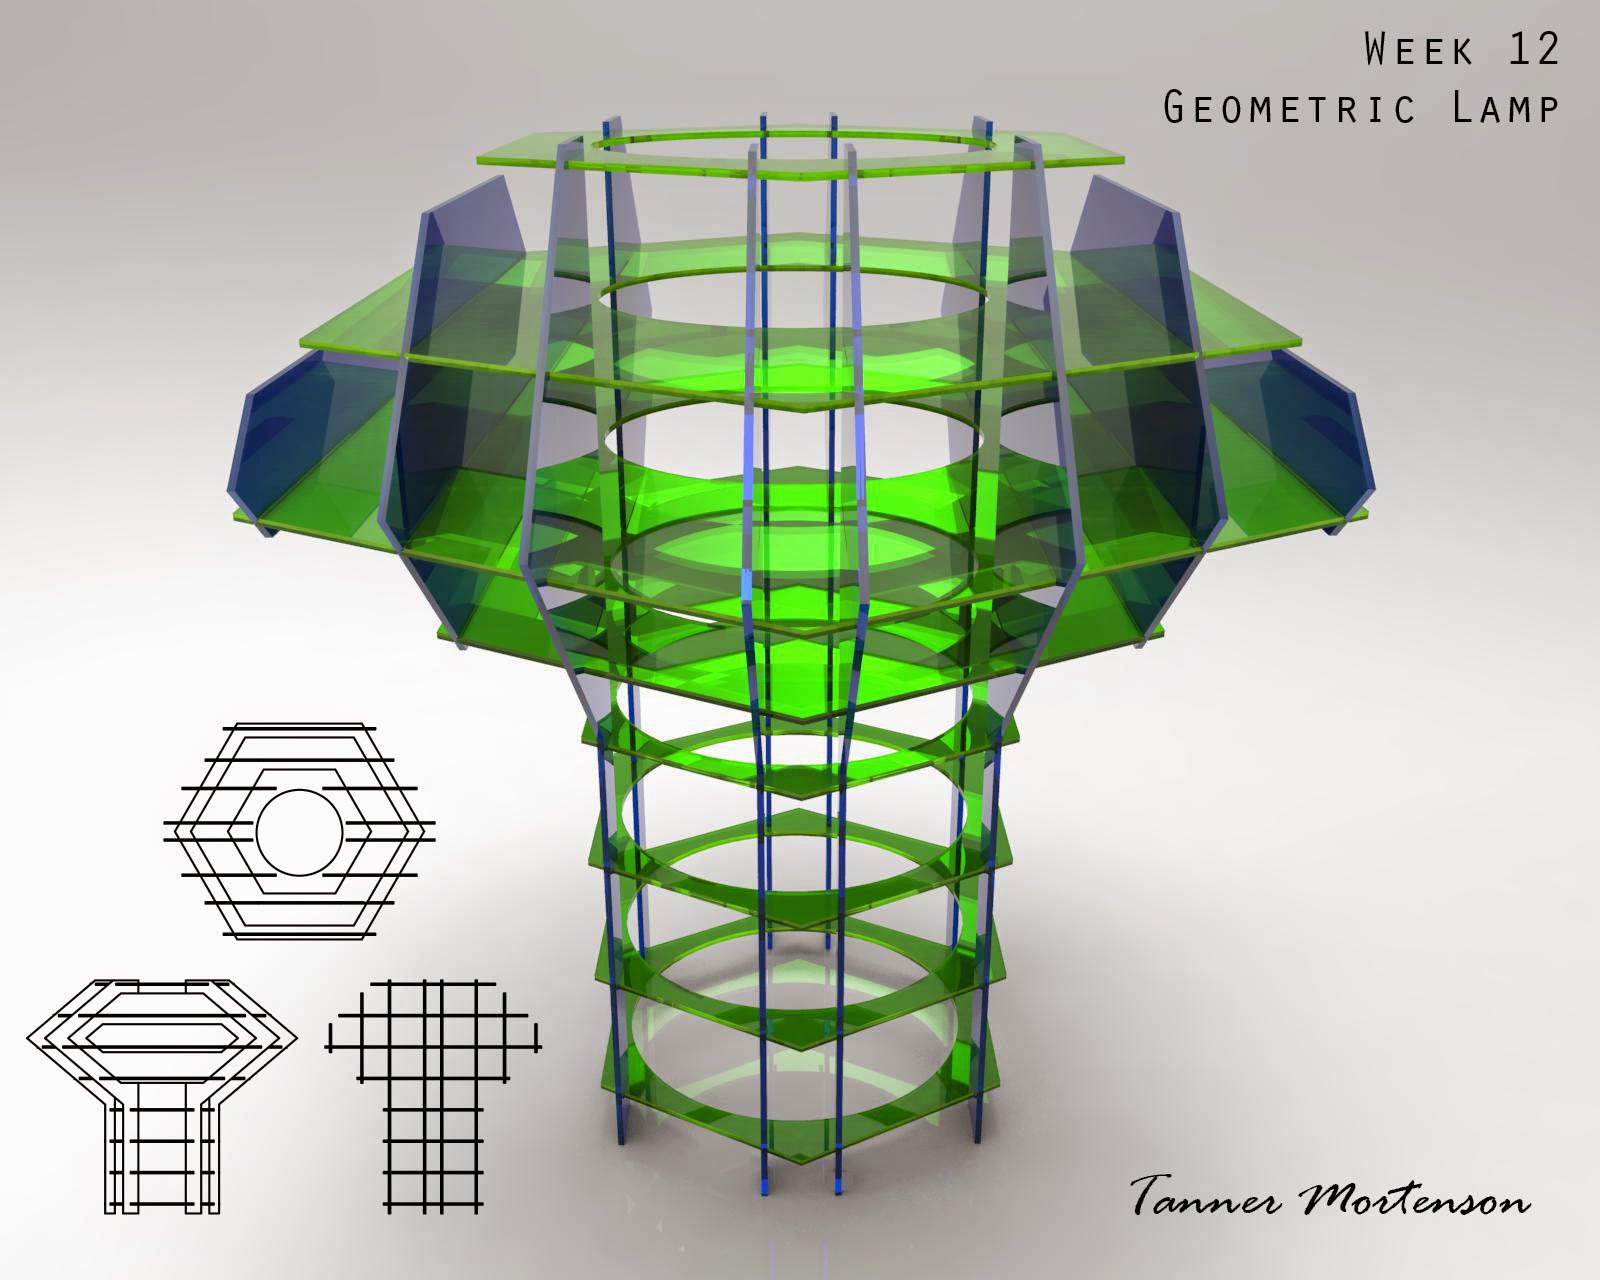
Tanner Mortenson Week 12: Geometric Lamp
For week 12, I continued to build on the idea for my geometric lamp.
After last week, I had finalized my idea and began to get the design ready for Laser Cutting.
Once the design was finalized, I used two helpful scripts within Rhino- "Cut My Ribs" and "Massive Unroll". Cut My Ribs allowed me to select the different oriented pieces, and then allow the program to automatically cut slots into each piece upon their intersection. Next, Massive Unroll allowed each of those individual cut pieces to be laid out cleanly so I could then arrange them on my cutting sheet.
I chose to use a 30x36 sheet of plexiglass to make my lamp out of, purchased from Home Depot.
In addition, I had to get another small piece of plexiglass to account for the excess pieces that were unable to fit on just one sheet.
I decided to choose the thinner plexiglass sheets to reduce the overall weight of the lamp. Looking back, I would have loved to know silicone was not the best adhesive for this project, as it turned greasy and was not clear as I had hoped it would be. It was also very flexible still when dry, so the structure of the lamp was very shifty.
The light was placed in the middle of the upper portion of the lamp, allowing light to not only be projected left to right and out of the top, but also downward in an ambient fashion.
This unique direction of light is one of the reasons I chose this design.
Rhino model screenshots:
Laser Cut sheet design and layout:
Keyshot Renderings:
Final Product:
Light on:
At rest on a stool.
Labels:
2k15,
3d,
3d printing,
3dprint,
Art and Technology,
ATEC,
ATEC FAB,
form,
geometric,
KeyShot,
Lamp,
laser-cutting,
Lasercut,
LEDs,
tanner mortenson,
Technology,
Waffle,
waffle lamp,
waffle structure,
Waffles
Sunday, November 16, 2014
Chris Venable - Waffle Lamp
While fleshing out the design of my lamp I began browsing through the project history provided on Blackboard. I found that I really liked the more elongated look of some of the designs and thought that I would incorporate this same aesthetic into mine.
My lamp began life in 3Ds Max, I am quite familiar with Max and wanted to take advantage of the spline editing features available in the program. After creating a silhouette I used the Lathe modifier to rotate the object around an axis, this created the polygonal geometry displayed below.
While designing the lamp I really wanted to play with the idea of sharp vs subtle curves while incorporating heavy tapering. The ends of the lamp feature a soft, gradual curvature while the center is dominated by a sharp peak.
My lamp is created used .24in MDF, I really like the character that the laser adds to this material.
My lamp began life in 3Ds Max, I am quite familiar with Max and wanted to take advantage of the spline editing features available in the program. After creating a silhouette I used the Lathe modifier to rotate the object around an axis, this created the polygonal geometry displayed below.
While designing the lamp I really wanted to play with the idea of sharp vs subtle curves while incorporating heavy tapering. The ends of the lamp feature a soft, gradual curvature while the center is dominated by a sharp peak.
My lamp is created used .24in MDF, I really like the character that the laser adds to this material.
Sunday, November 2, 2014
Chris Venable: Week 10 Waffles
For this project I really wanted use the waffle structure to create a simple representational piece. Since it is finally getting cooler here in Dallas and the clocks have change, I decided to create a simple Oak leaf.
I am really attracted to this shape because it is both simple and recognizable. I began my process by finding reference online. I specifically chose a White Oak leaf because I felt that the roundness of the edges would contrast nicely with the vacancy that waffle structures create along the structure's exterior.
Here is an image of the original model created in 3Ds Max. The silhouette of the model was created using spline object, which were then converted into polygons for optimization and further control. After finalizing a flat version of the model, deformations were used to further shape the structure.
Again, if anyone ran into similar issues, or thinks they may have a solution I would greatly appreciate your assistance. Thanks!
---EDIT---
While in class I re-ran the CutMyRibs script with fewer curves and had success, as a result my structure has changed. New renders and content below.
Rhino
Architectural Context
Edit - 12/14
Pictures.
I am really attracted to this shape because it is both simple and recognizable. I began my process by finding reference online. I specifically chose a White Oak leaf because I felt that the roundness of the edges would contrast nicely with the vacancy that waffle structures create along the structure's exterior.
Here is an image of the original model created in 3Ds Max. The silhouette of the model was created using spline object, which were then converted into polygons for optimization and further control. After finalizing a flat version of the model, deformations were used to further shape the structure.
I then brought the model into Rhino with the intention of creating contours, ribs, and layouts. However, I ran into some problems in this area. When running the Cutmyribs script I kept getting errors that halted the running of the script. I took a screenshot posted below.
I went back over the tutorial videos many times to try and find the problem, but kept running into the same issue. I even tried flipping the X and Y selections, and while that seemed to let the script run longer it would always eventually halt.
I did do ahead and get some rendering of my structure, but I was not able to complete the layout at this time. If anyone can help, I would really appreciate it. I'm really not sure what could be causing the issues.
Here are my renders
Again, if anyone ran into similar issues, or thinks they may have a solution I would greatly appreciate your assistance. Thanks!
---EDIT---
While in class I re-ran the CutMyRibs script with fewer curves and had success, as a result my structure has changed. New renders and content below.
Rhino
![]() |
| Original Photo by Tim Griffith |
Pictures.
Subscribe to:
Posts (Atom)


.jpeg)